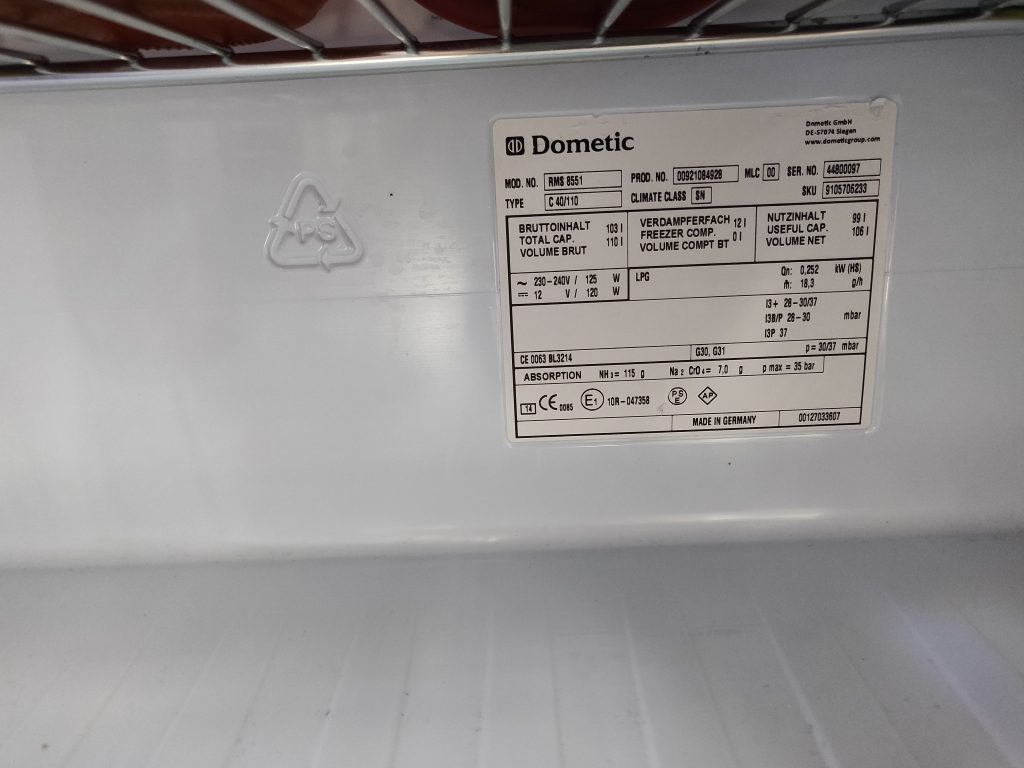
There seem to be a number of problems with the Dometic RMS 8551 door latching shut and not opening without manually lifting the door at the same time.
Dometic Fridge Model number
Ours had stuck closed in this manner and it looked like the bottom hinge had bent downwards ever so slightly – probably as a result of constant vibrations on the road with provisions lodged in the door.
It seemed like it could either be bent back or a number of packing washers placed between the door and the lower hinge pin. In the end we bent the hinge very slightly and added a single washer.
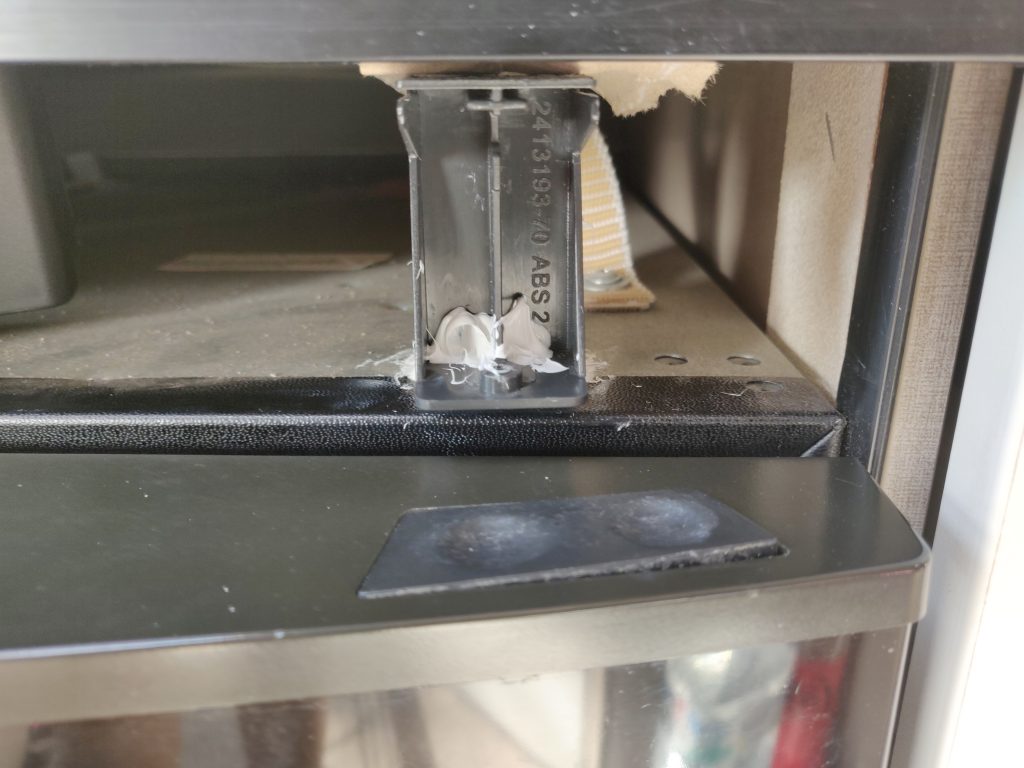
That was the easy bit. The hard bit was removing the door so that we could pack out the hinge pin. The control panel electronics themselves sit in the centre of a plastic cover which runs across the entire width of the fridge. There are two small screws which need to be removed from underneath the panel. In theory, this allows the panel to pull forward. The lower part of the panel was free but major resistance from the top of the panel.
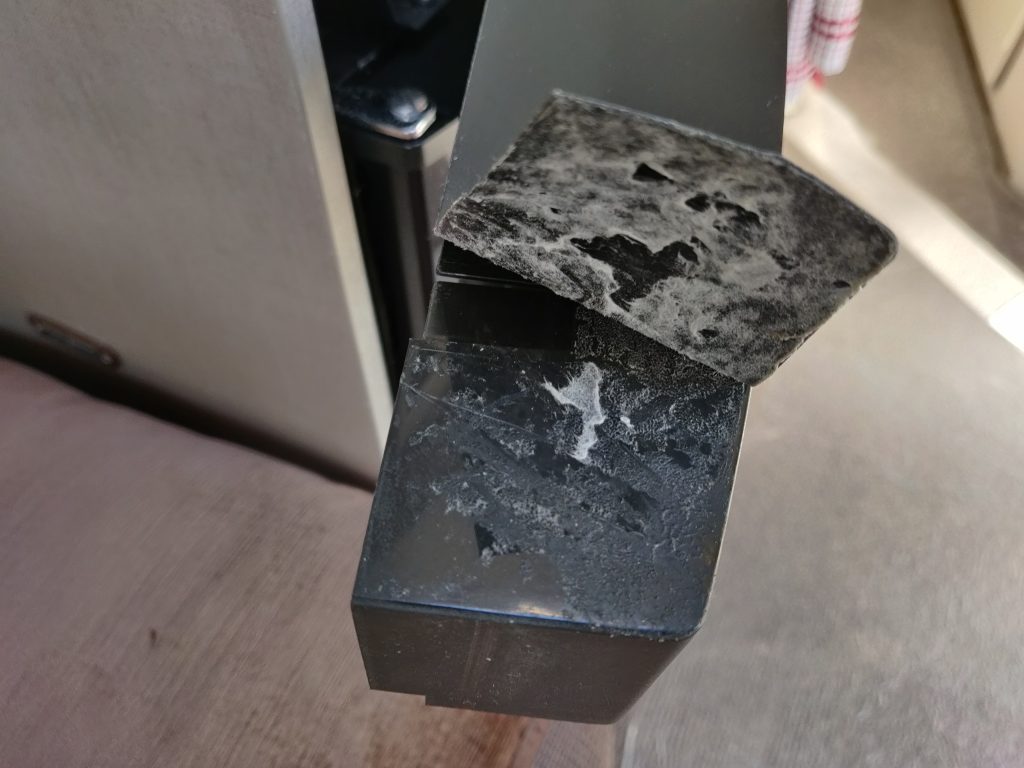
Eventually there was the sound of plastic breaking and the right hand retaining click had broken, revealing the issue. Dometic had glued some kind of plastic finishing strip all along the top of the panel – including the section where the panel clips on the retaining clip. This strip was stopping the panel sliding forwards.
The sticky plastic cover
I was able to slide a screwdriver under the foamy plastic on the left hand side and this freed up the panel from the clip. Access is tight but I *think* a wallpaper scraper would have done the job a bit tidier than my screwdriver.
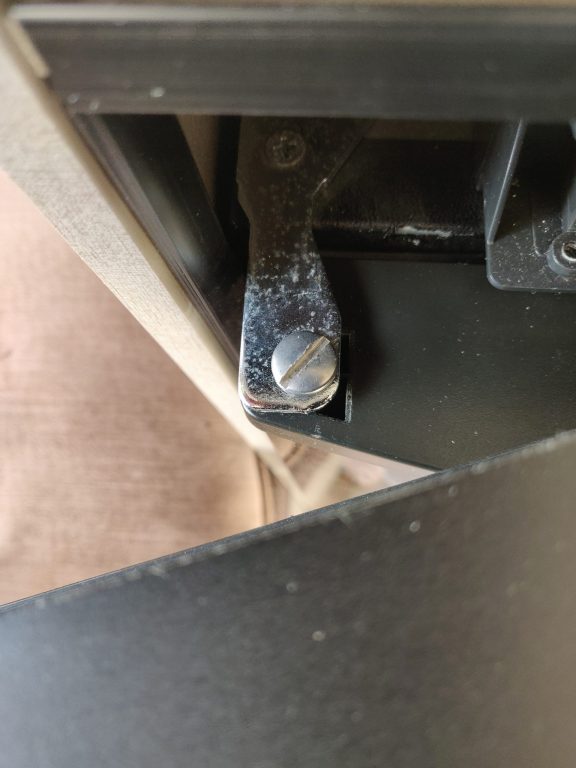
Once the panel is out of the way you can see the screw-in upper hinge pin. Remove this and the door lifts off allowing the hinge to be bent back into shape or packed-out.
Upper hinge pin, with slotted screw
If I was doing this job again, I would try to undo the hinge pin with the panel in situ; maybe with a knife blade or some pliers. Don’t know if that would work or not but worth a try.
I stuck the broken retaining clip back together with Sikaflex and it will hold until a new clip arrives.
For re-assembly, I also removed a section of the stick plastic where the clip fits. This means it won’t get stuck again!
Bodged retaining clip – new one on order from eBay!
Previously on day 3, we had travelled some 350 miles from Santander to Caceres and it had taken 7.25 hours, which included one stop for fuel and a second combined stop for lunch and more diesel. Today we had a shorter journey of 250 miles.
After yesterday’s drive and a few beers watching the World Cup final (devoid of any stresses associated with following England), sleep came easy and by 09:00 today (Monday) we were ready to drive the final leg south to Conil de la Frontera.
A similar story to the prior day – one mid-morning break for fuel and an early afternoon lunch break just south of Seville. A mostly un-eventful day (apart from a near collision with a maniacal coach driver), we arrived at Camping La Rosaleda around 14:30.
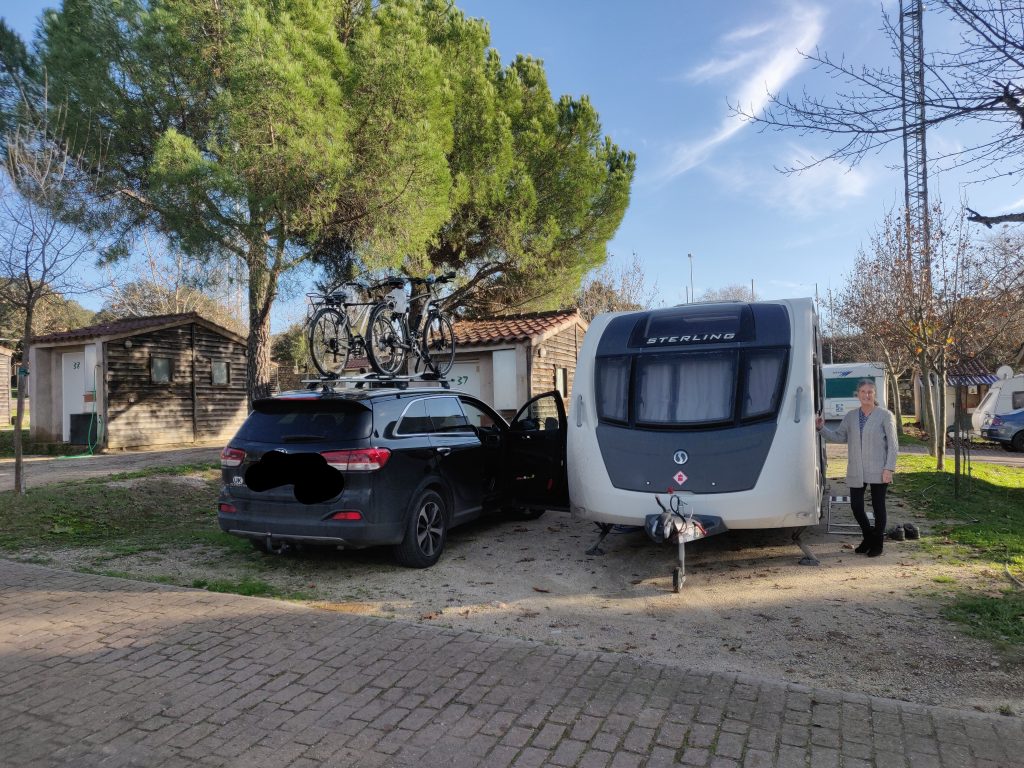
We received a warm welcome at reception and booked onto out usual pitch where we will stay for around 6 to 8 weeks of our 90 day stay.
The site is surprisingly busy and the weather just superb with the daytime high today of between 21 and 23 Celsius. However, our pitch was sodden and muddy – a result of torrential rain and storms which have beset this region for at least the last 3 weeks. Always worth noting that lovely weather in Spain is not guaranteed over the winter months.
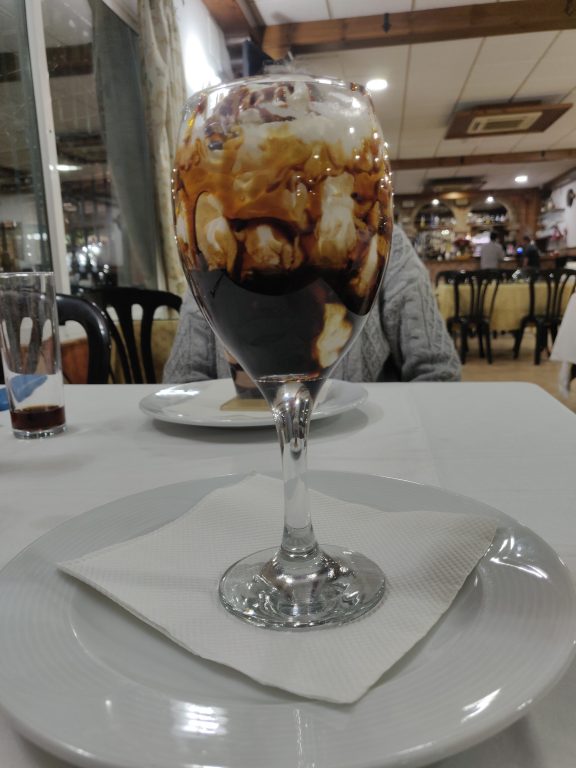
After a quick wash of the caravan, which had turned a mucky grey / black colour, we headed to the bar for a couple of drinks and dinner. Desert was a “something” Pedro Ximenez.
… “Pedro Ximenez” desert
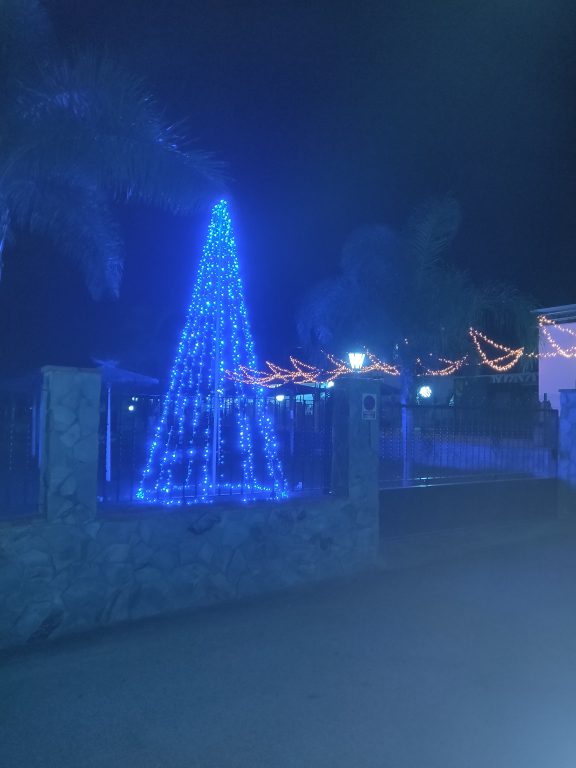
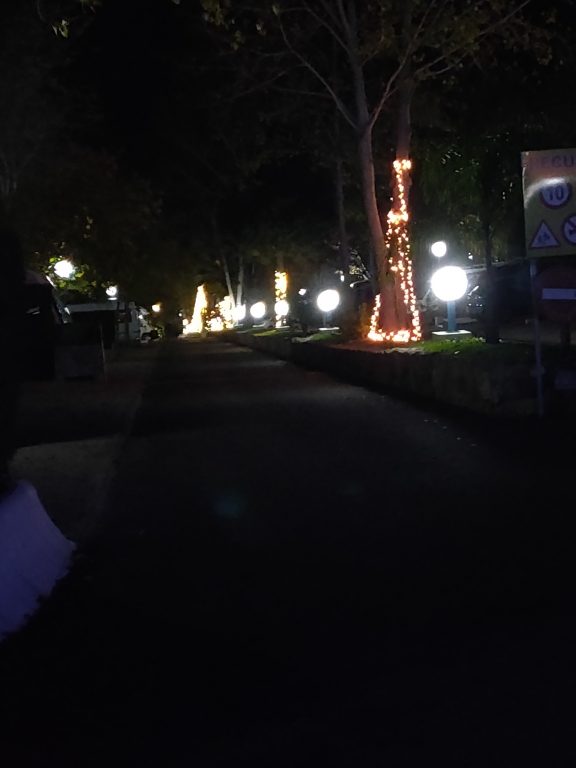
A couple of night-time photos from Camping La Rosaleda.
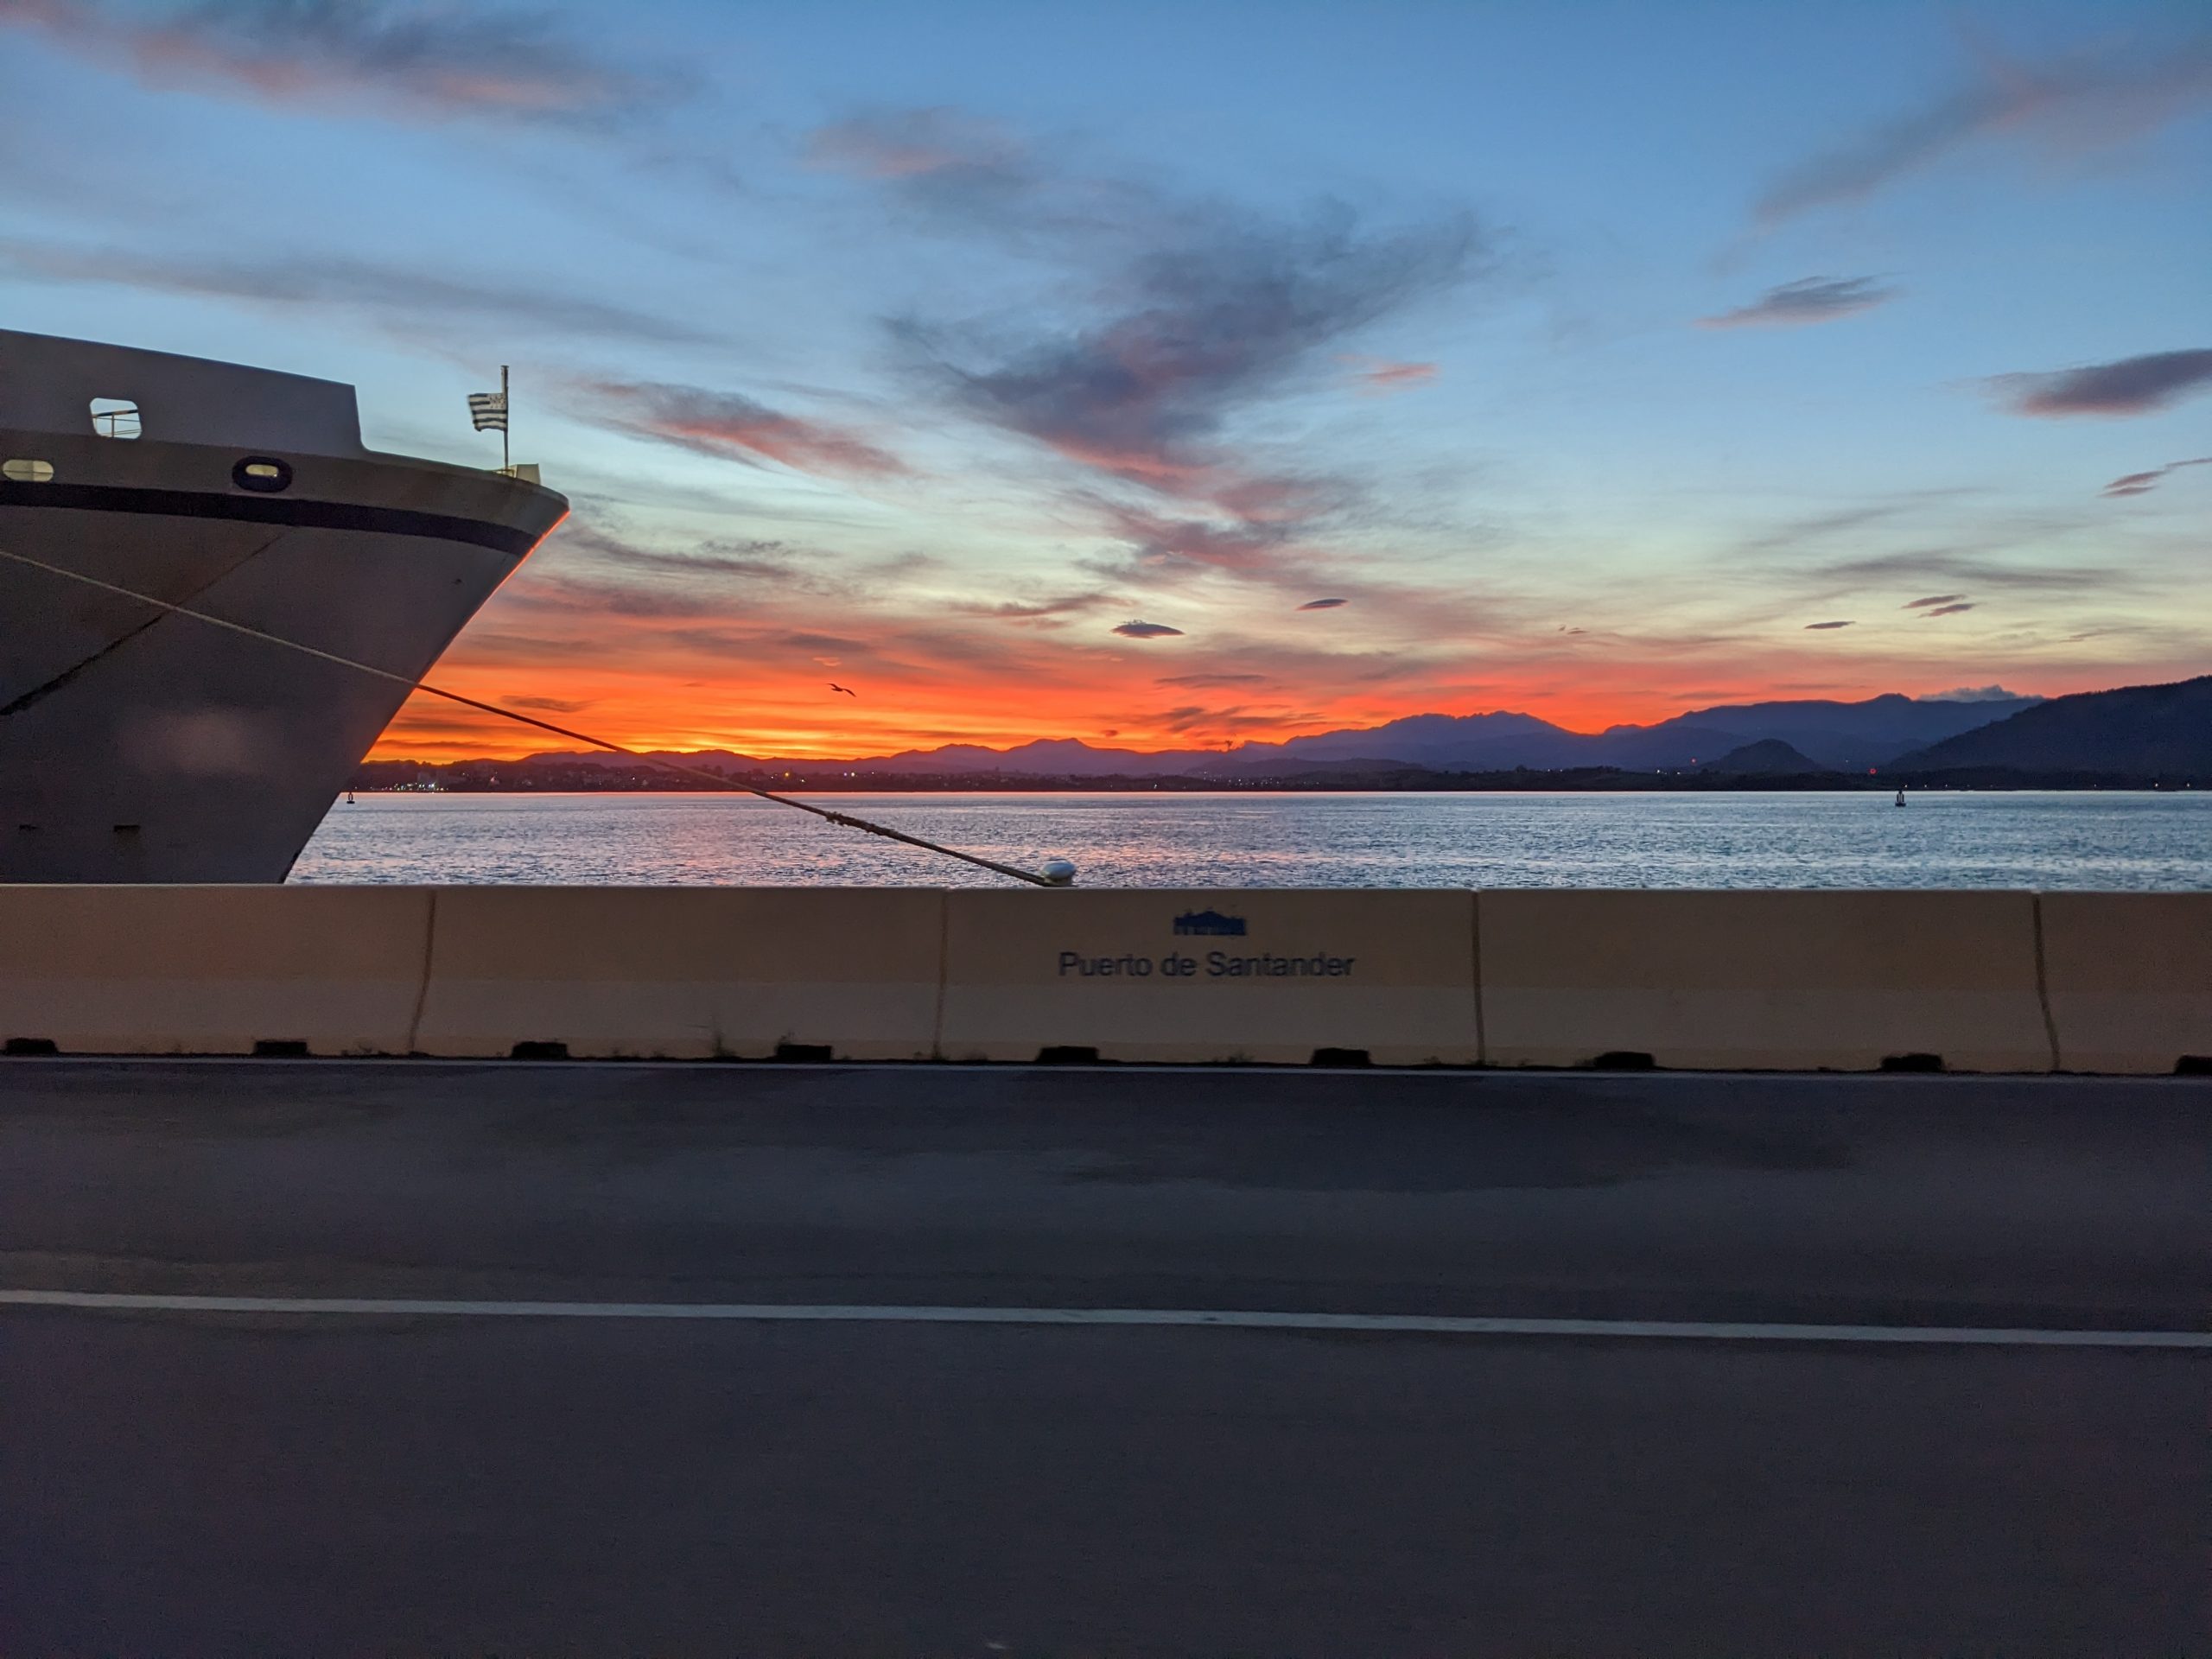
After a very calm, almost 36 hour crossing, we docked at Santander one hour before the official arrival time. This didn’t of course make any difference to our dis-embarkation which commenced promptly at 08:00 Spanish time.
After the extreme cold weather in England we were pleased to be greeted by a lovely sunrise and temperatures hovering around 10 degrees.
Arrival at Santander, Dec 2022
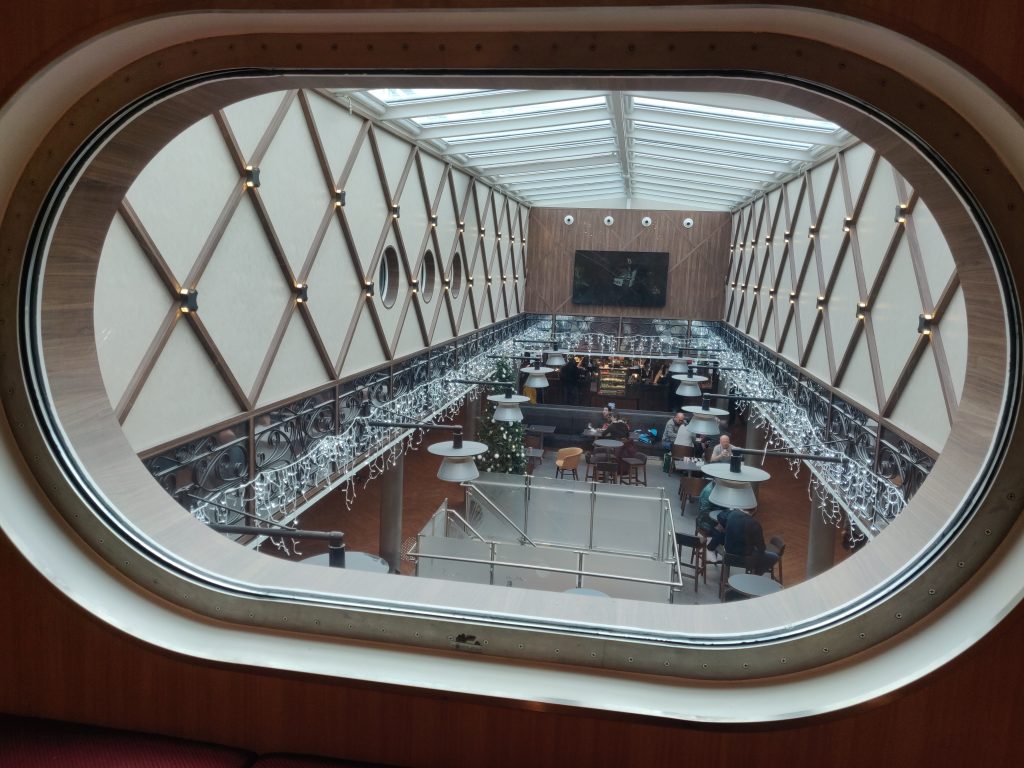
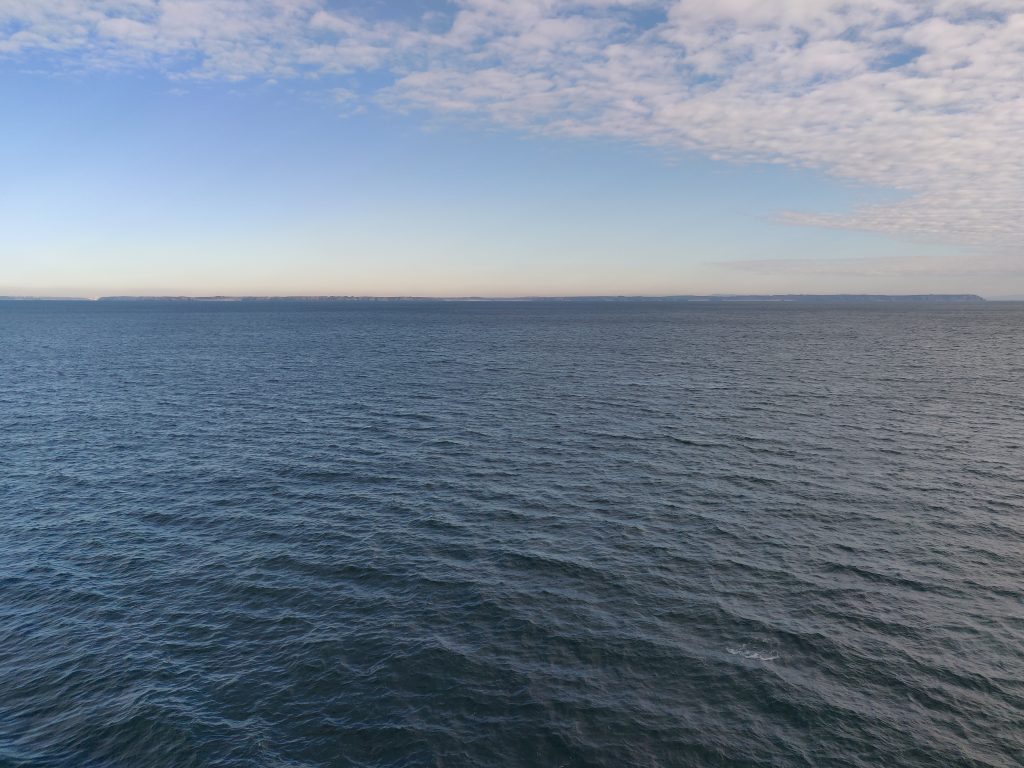
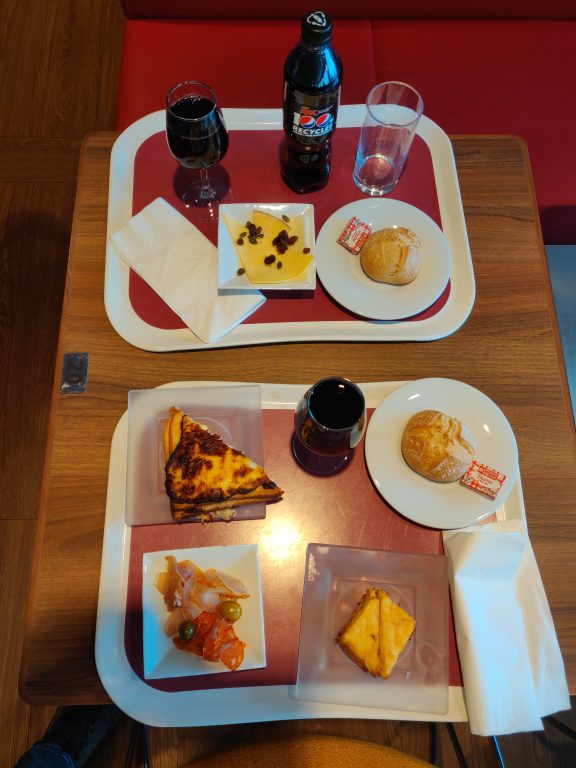
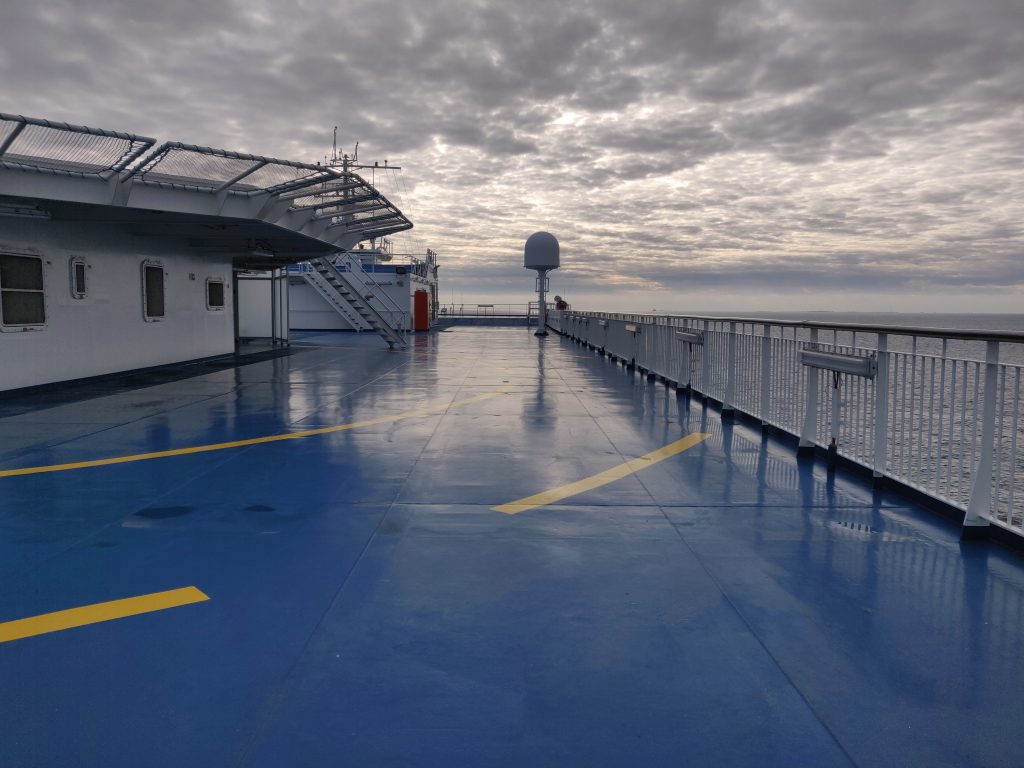
Here are a few pictures from our time onboard “Galicia”.
Galicia, view from the Upper deck
Galicia off the French coastline near Brest
Galicia, lunch in the Tapas bar
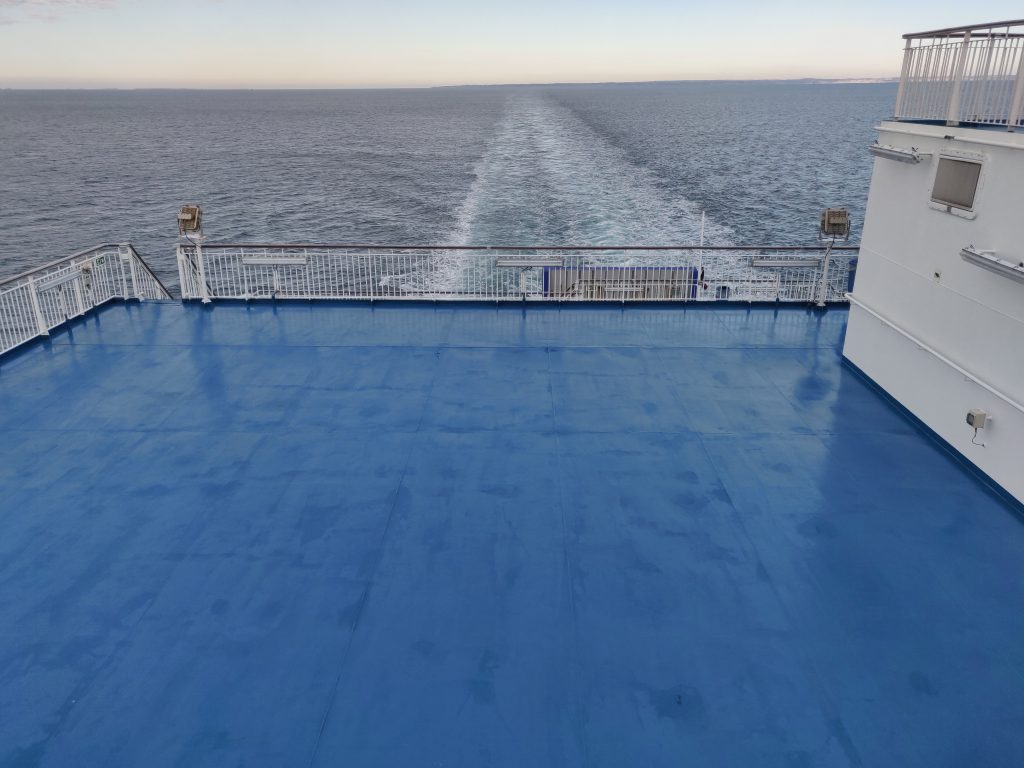
Galicia, view from the stern
Galicia, bow view
We exited the port at precisely 08:30 after being waved through the various check points and customs areas without issue. Our location on the lorry deck was a big advantage for a prompt departure ahead of the 350 mile drive to Caceres.
We headed south on the Autovia network. The first hour of travel through the mountains was a little scary with very strong, blustery winds and accordingly we made fairly slow progress. As we moved away from Santander, the weather improved with the wind dropping and temperatures around 10 – 12 degrees Celsius.
We stopped for fuel after a couple of hours driving and a further fuel / lunch break just after 1:00pm – Diesel prices at Euros 1.71 are not dis-similar to the UK. The final leg of the journey took us into the campsite at Caceres just before 4pm and at the start of the 2022 football World Cup final.
By the time we had setup the caravan, Joe headed to the bar to watch the second half; extra time; and penalties. At the last world cup final we had been staying in Chalons-en-Champagne after visiting the Ardeche – France won and the streets and roads were chaos. No such repeat tonight, Argentina winning after penalties following a 3-3 score line aet.
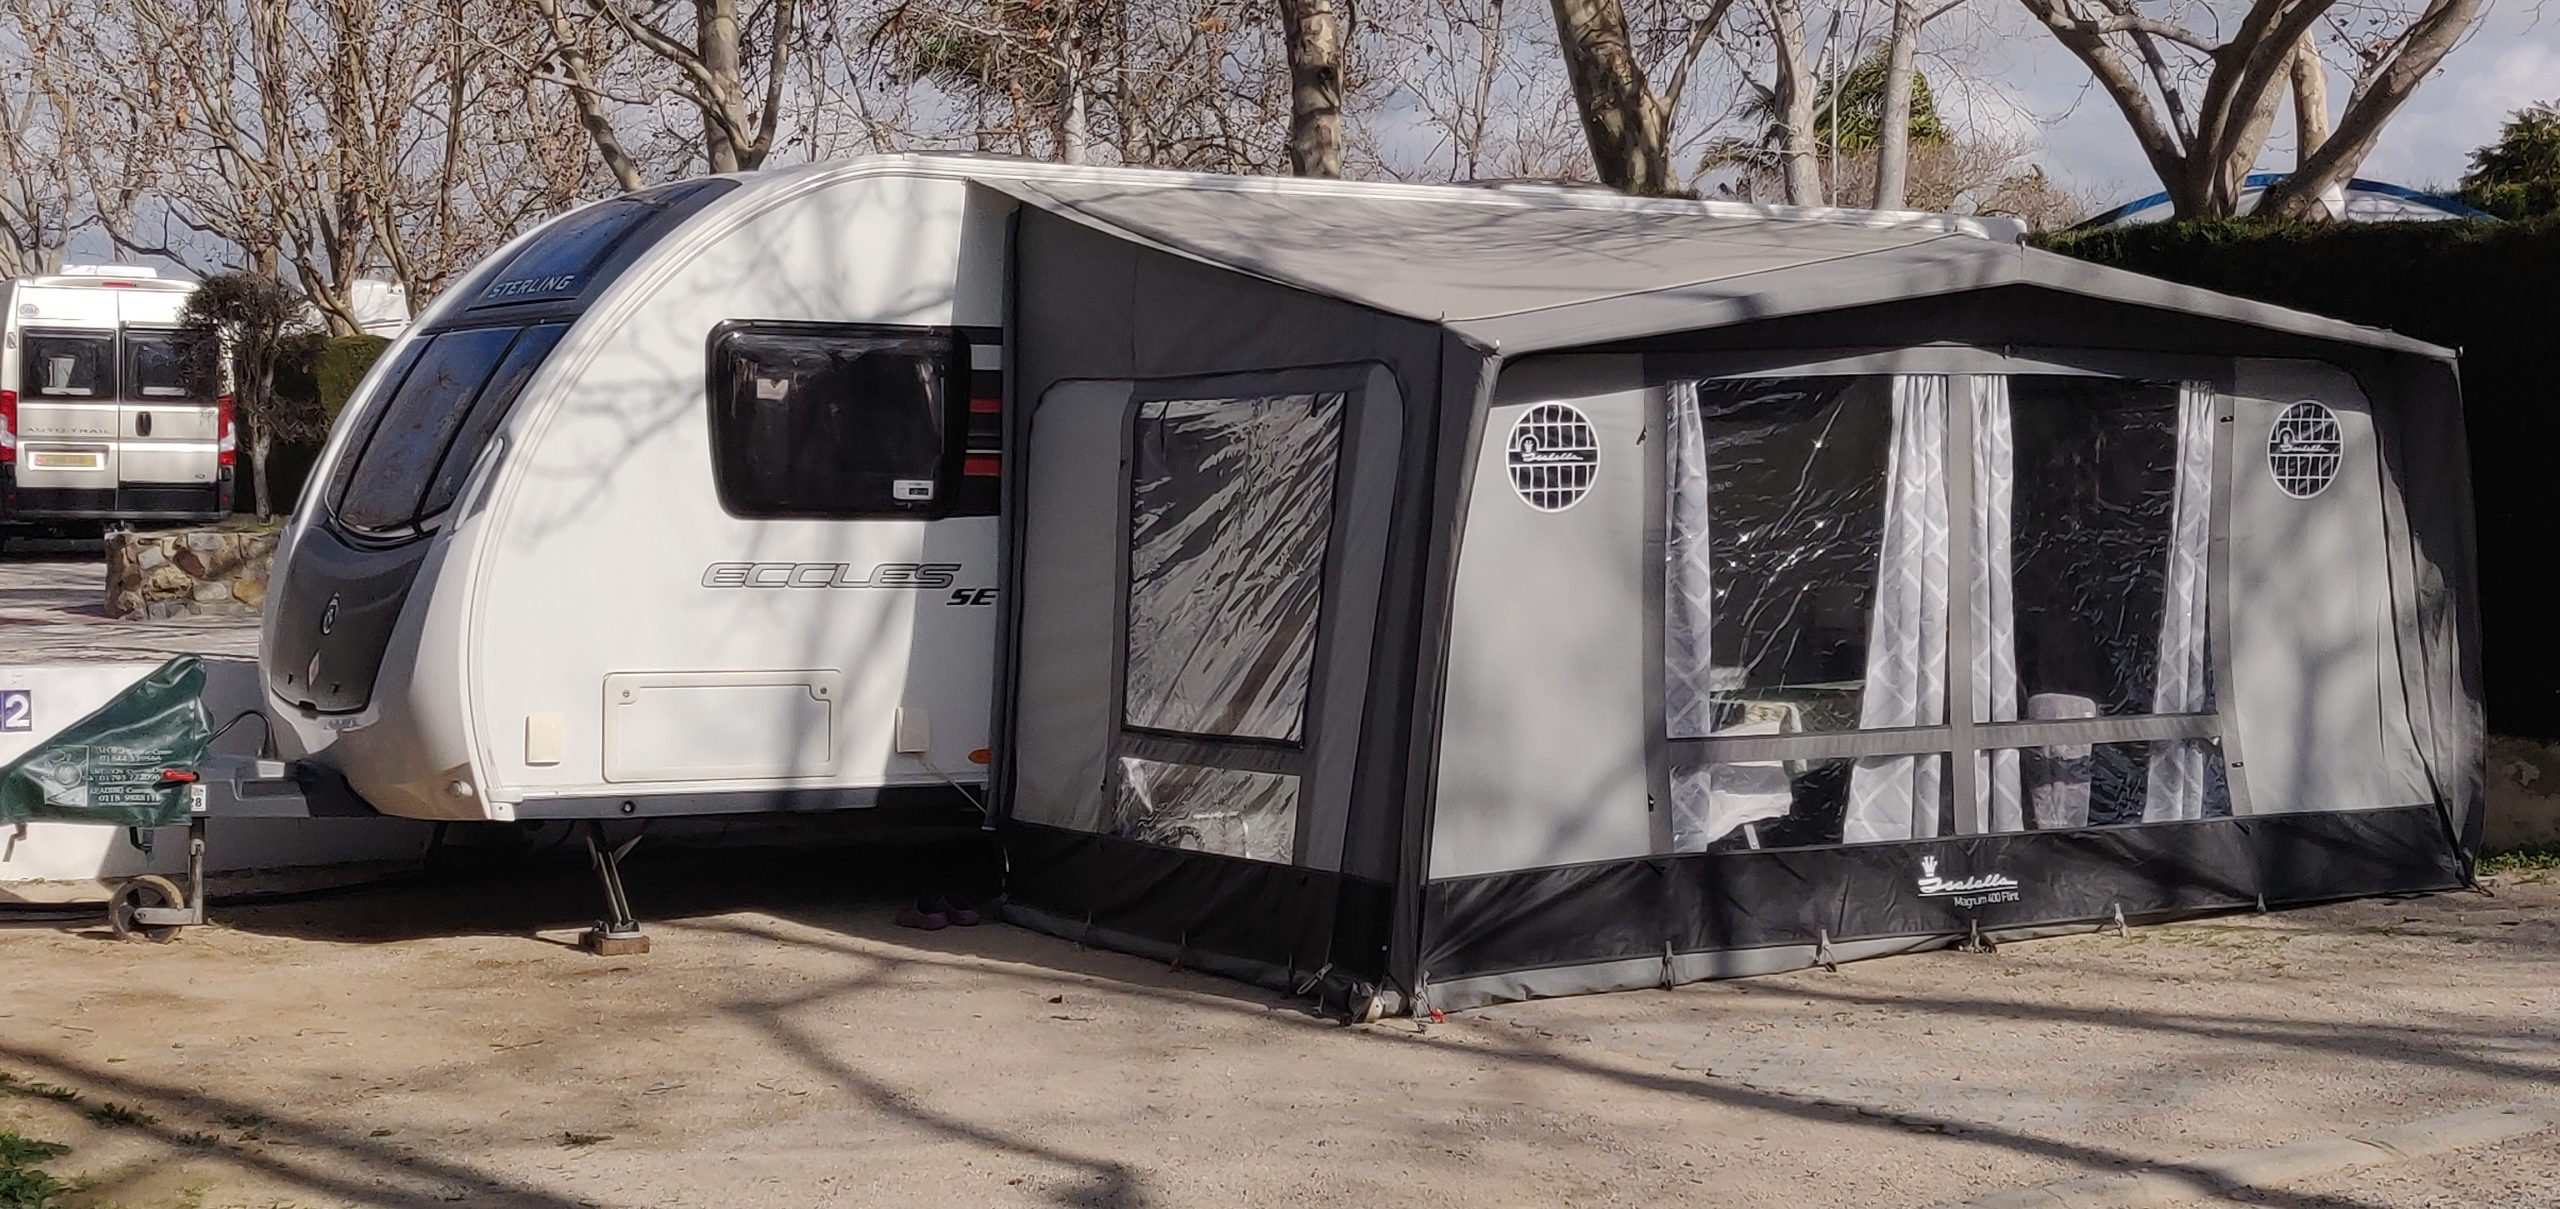
Here at the campsite, this year we are on Pitch 37.
We are just heading around the Northern corner of France near to Brest. About to cross the Bay of Biscay. The journey so far overnight has been very quiet and calm – long may that continue.
Our drive of some 120 miles from East Devon to Portsmouth was uneventful and took some 3.5 hours. We have just had around two weeks of very cold temperatures (feels like lows of minus 10) and are hoping for some decent winter sun.
Portsmouth traffic was gridlocked and our usual petrol station, the Shell garage on the dual carriageway some 200m from the port entrance has closed down and is part demolished. Re-fuelling will delay what we hope is a swift exit from Santander on Sunday morning.
We are on-board one of Brittany Ferry’s new vessels, Galicia and it’s very comfortable. We are also parked on the lower lorry deck so hoping that will elicit a quick exit.
it’s a beautiful sunny day as we enter the Bay of Biscay…
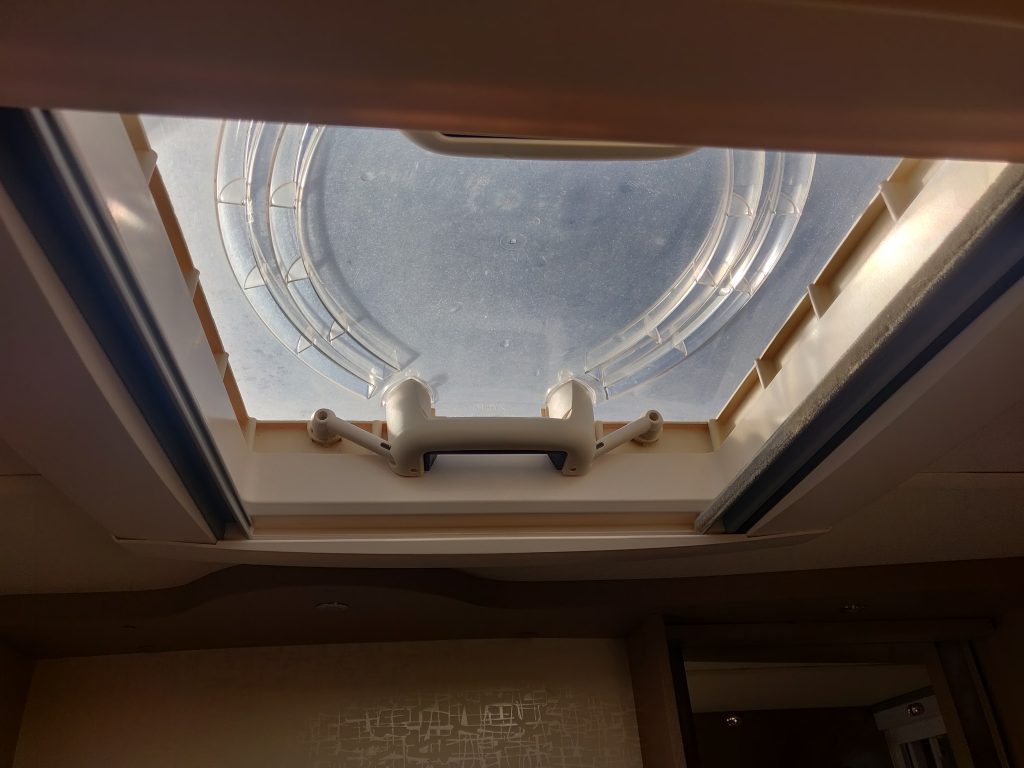
Our Heiki Roof Light hasn’t been cleaned since we took delivery of our Swift Caravan back in 2015. It’s absolutely filthy and there is very little light penetrating into the bathroom.
With the right tools, it’s a very simple job to remove / deep clean and the results are outstanding.
You can see plenty of videos on Youtube but some of them are painfully slow!
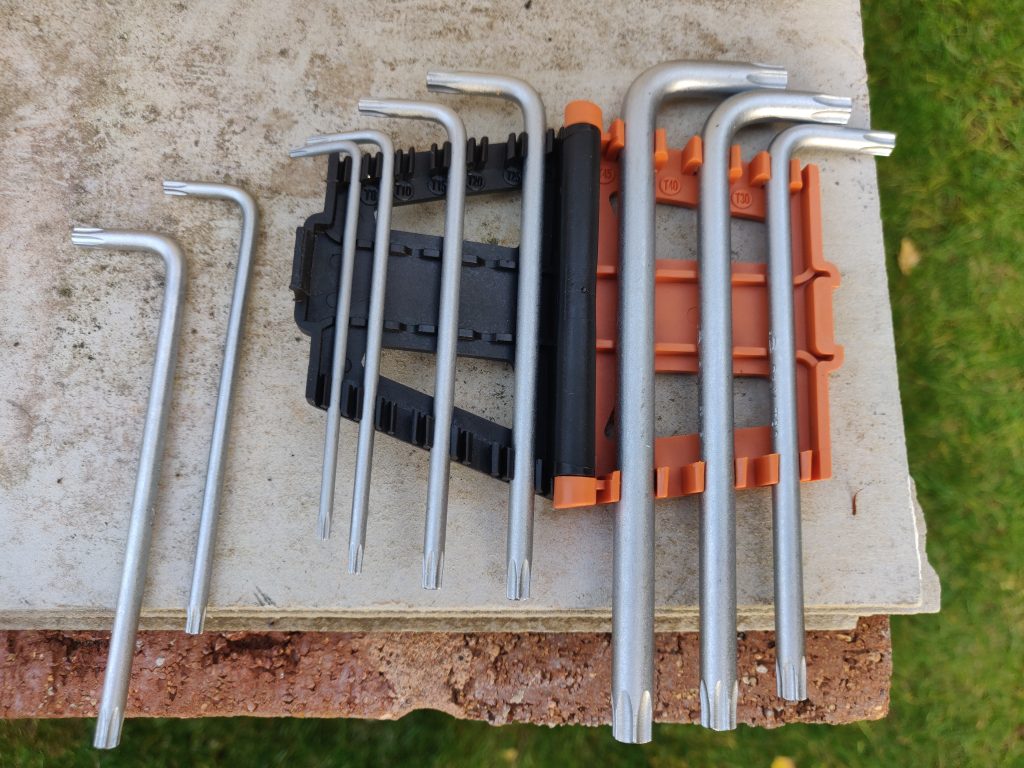
First, make sure you have a set of long reach Torx keys / wrenches. This set cost me nine quid from Screwfix.
Long reach Torx keys
How to remove the roof light:
Raise the roof light into the up / open position.
Using the Torx 15, unscrew the 4 screws in the handles of the roof light.
The handle stems then pull off their spindles (pull them gently inwards).
Once all stems are free, place the roof light to one side on the roof and retrieve it with a ladder
The light can now be separated unto it’s two components – the outer cover and the inner vent. For this you need the Torx 25 key. Once all 4 screws have been removed, the plastic can be thoroughly cleaned with washing-up liquid and a splash of bleach.
Assembly is the above in reverse. The result is outstanding; shame I forgot to take a before picture!!
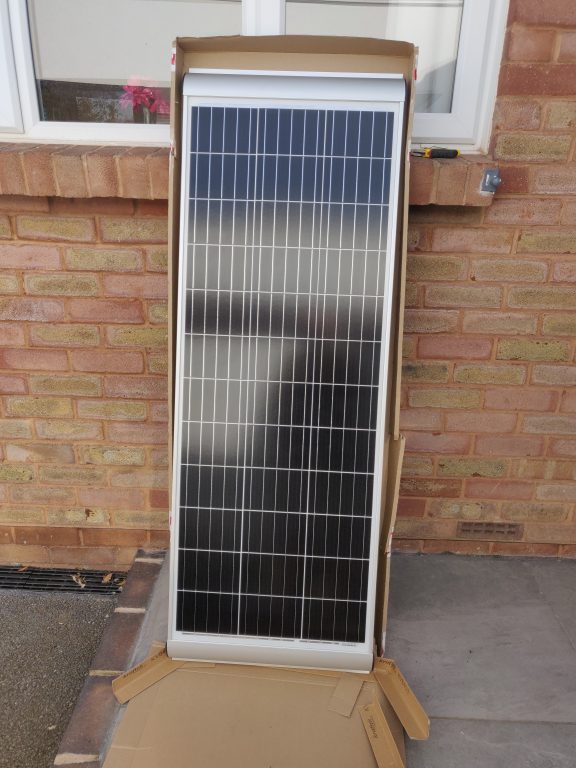
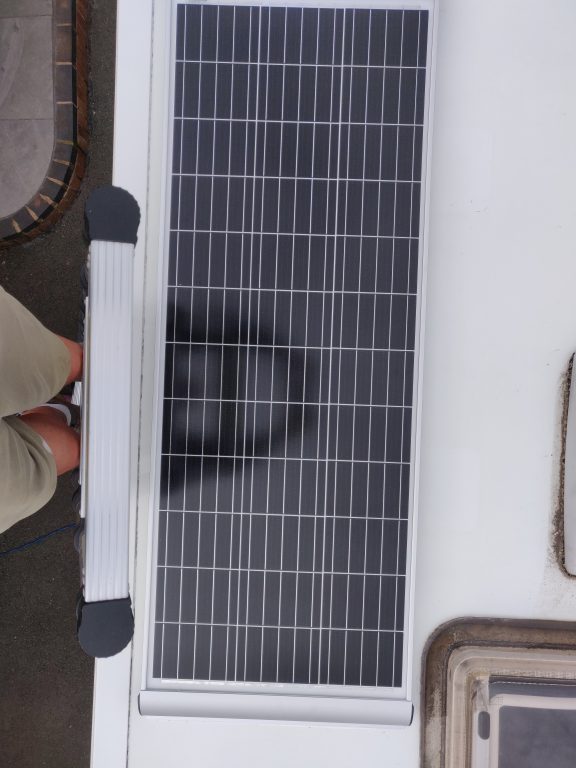
Our Swift caravan comes with a factory fitted Sargent 40w solar panel. This isn’t really enough for some off-grid vanning so we decided to add some additional solar to the roof. The idea was to add an additional 130w panel but it adds another 11kg to the already paltry payload so I decided we would swap-out the exiting panel and replace it with the 130w version.
The panel cost around £200 from Sunshine Solar Ltd and delivery was prompt.
Un-boxing the new 130w Solar Panel
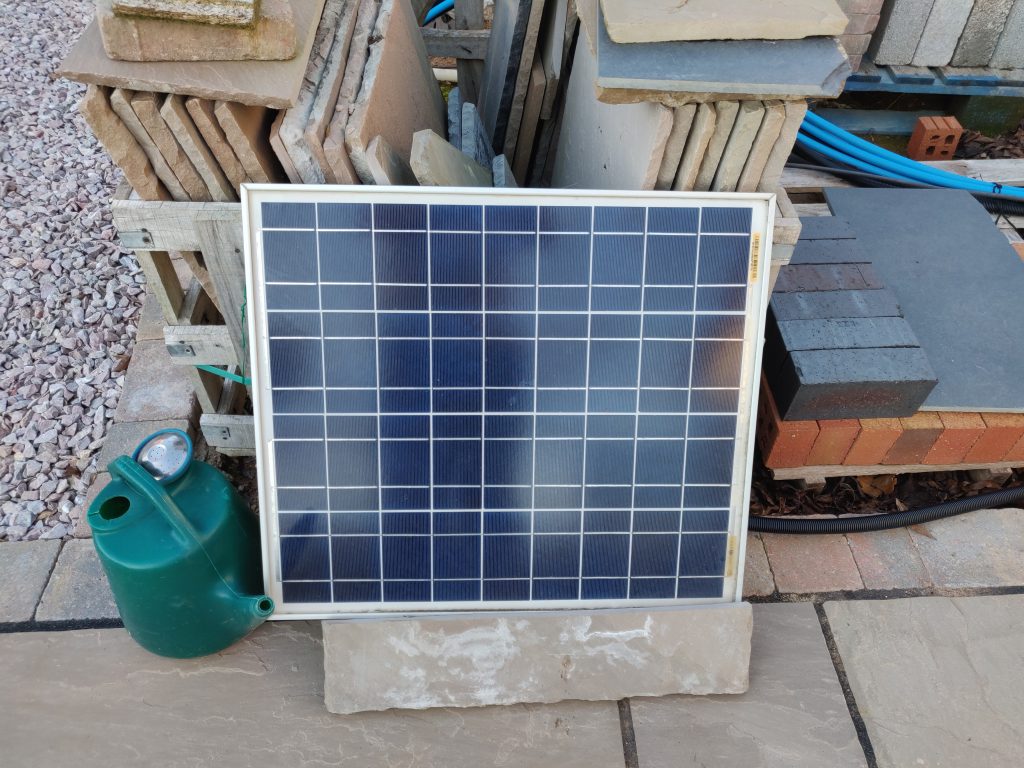
Removing the old panel
The panel was screwed into two plastic mounts so it was straightforward removing the panel itself. The mounts had been stuck down with a silicone adhesive and removing these was more of a challenge. I used a Stanley knife to partially cut into the silicone and then tried the wire “cheese cutter” method. In the end, I was able to pry up one corner and as it was a hot day, was able to tease open the entire seal with minimal damage to the roof. The old panel is now charging the redundant leisure battery in our outside cabin at home…
Original 40w Sargent solar panel
Installing the new panel
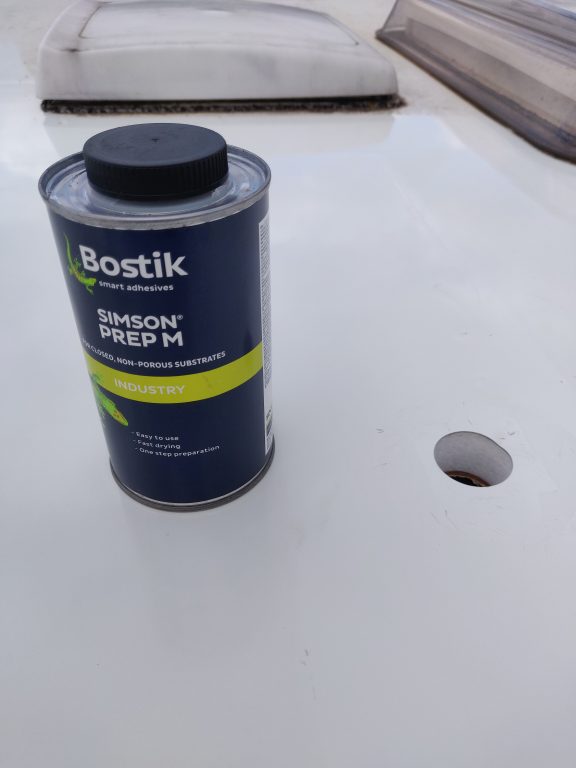
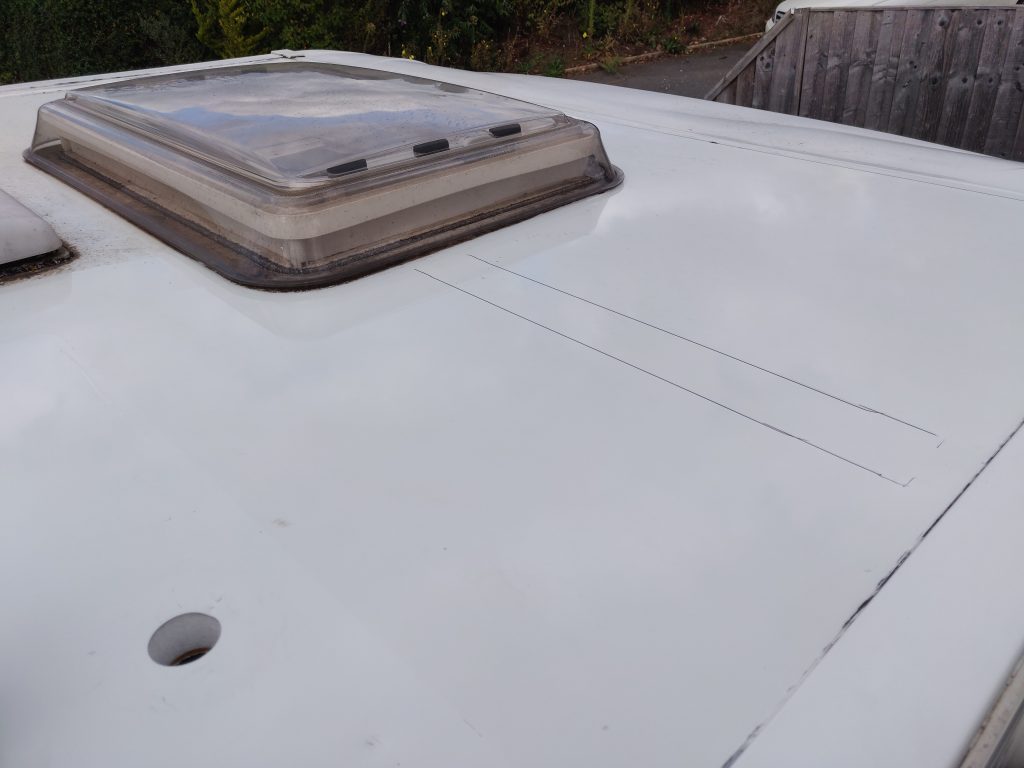
There’s a nice pre-drilled hole in the roof of the caravan and with the purchase of a Solar Roof Entry gland I routed the cables through into the caravan. I also added an extra cable – a USB cable – through the gland as a neat way of mounting the caravan WiFi Extender aerial. Below you can see the roof cable entry hole and I cleaned the roof surface with Bostik Simson Prep M (just the sections where I would bond the new panel).
Prep ‘M’ cleaner
The gland was secured with some 3M VHB tape on the inner edge and then Sikaflex 522 adhesive silicone around the edge.
Cable Entry gland
Marking out where to bond the panel
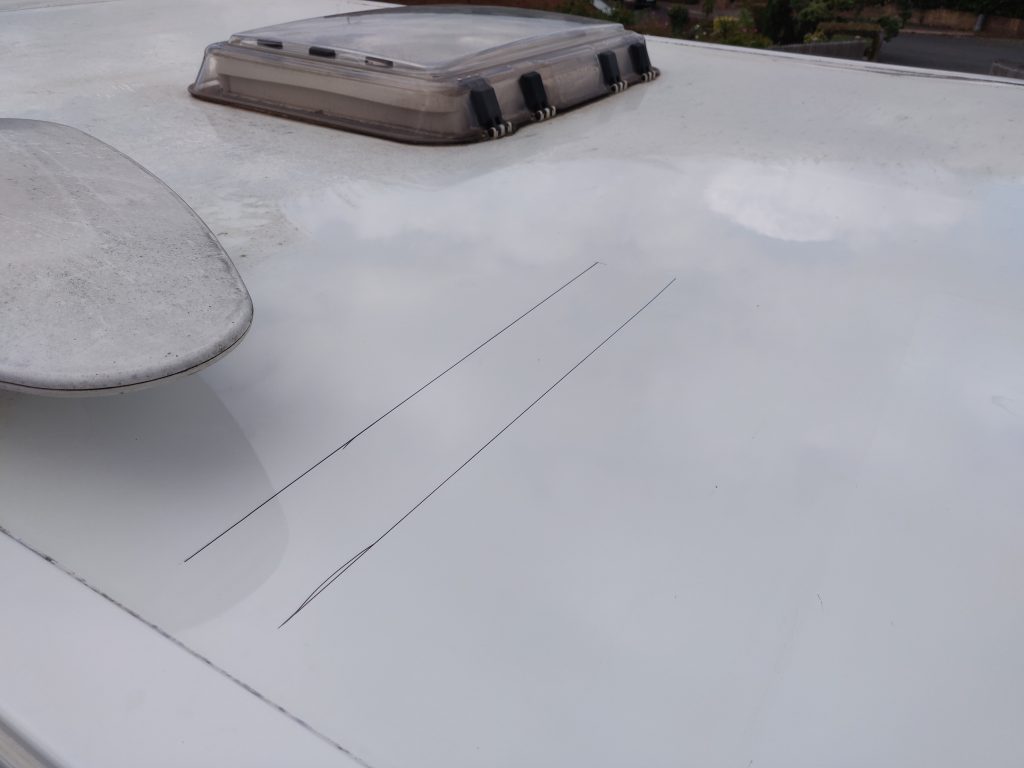
And on the rear side
I used the same technique to bond the panel. A central strip of VHB and plenty of Sikaflex 522 around the edges.
Here’s the panel bonded in place.
Solar panel bonded into place
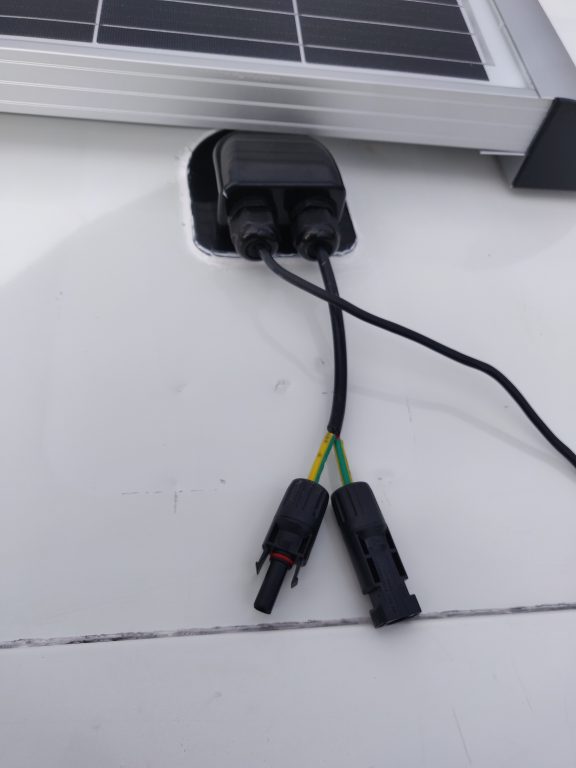
I then attached a terminal box and 4-way plug / socket to the edge of the panel. This will allow me to deploy the WiFi extender onto the roof without trailing a cable into the van through a window.
Terminal box and socket attached to edge of Solar panel
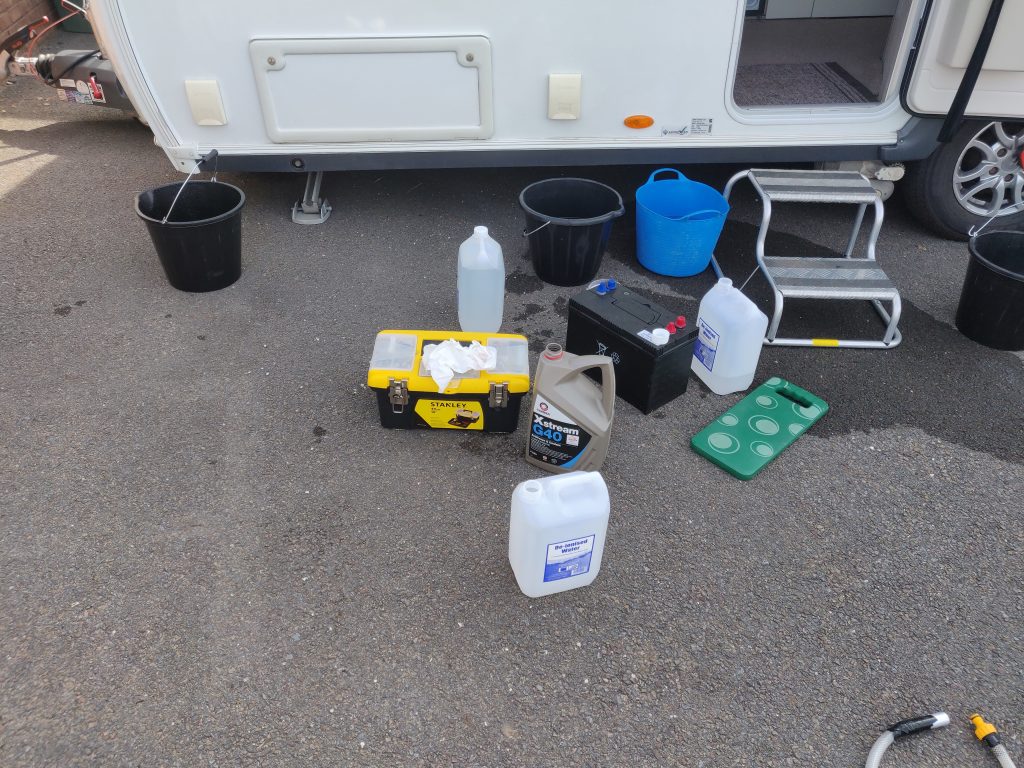
It’s around five years ago that I changed the Alde central heating fluid in our caravan and it’s ready for its next change. I learnt a lot last time round and decided to adopt a slightly different approach.
Key points for the planning were:
Buy a cheap 12v pump from Amazon or eBay. Note I think the one I bought will also substitute as a spare for our Thetford toilet
Don’t faff around trying to drain the system – which on our van isn’t even possible. Just use the pump to flush and fill.
We know the system holds 12 to 15 litres of fluid so the flush and fill was in multiple stages.
Flush with 30 litres of tap water
Then flush through 5 litres of de-ionised water
Then mix 7 litres of Comma Xstream with 5 litres of de-ionised water
Pump this into the system
Continue pumping de-ionised water until the output is pink
Top up the header tank with neat fluid
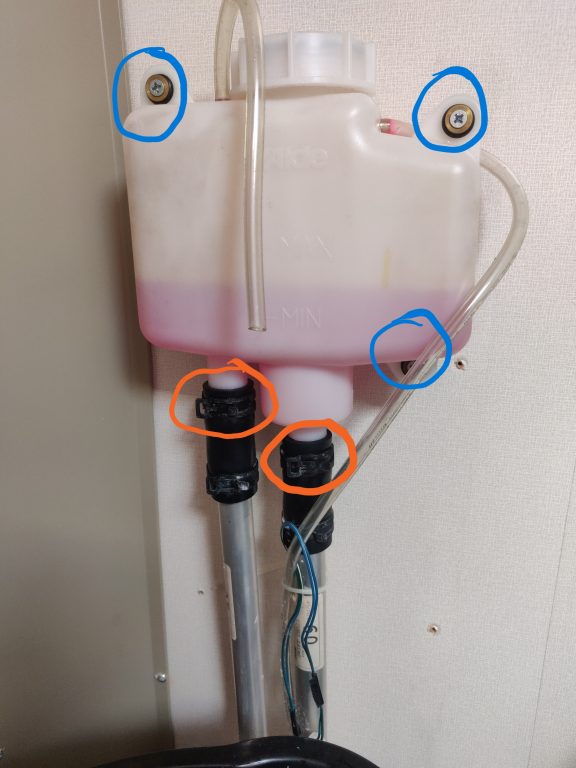
Let’s kick off the fluid change. Remove the covers from around the header tank. This is what you will see.
Header tank removal
I wanted to double check the flow of liquid around the system as I believe there is a one-way valve somewhere. To do this I just operated the heating for a few minutes and noted the warmest pipe into the header tank. I’d already figured this out as I know which radiators get the warmest first but this just confirmed it.
You then need to remove excess liquid from the header tank and a good old suction technique sorted this for me. Fill a 1m length of thin clear plastic tube with water. Place your finger tightly over one end and insert the other end into the header tank and down into the pipe below the tank. Take you finger off the tube and let the liquid drain into a bucket. Repeat for the second pipe.
There are three or four screws circled blue in the picture which will release the tank from the side panel.
Two spring clips, circled orange can then be loosened to allow the extraction of the header tank from the rubber pipe couplers.
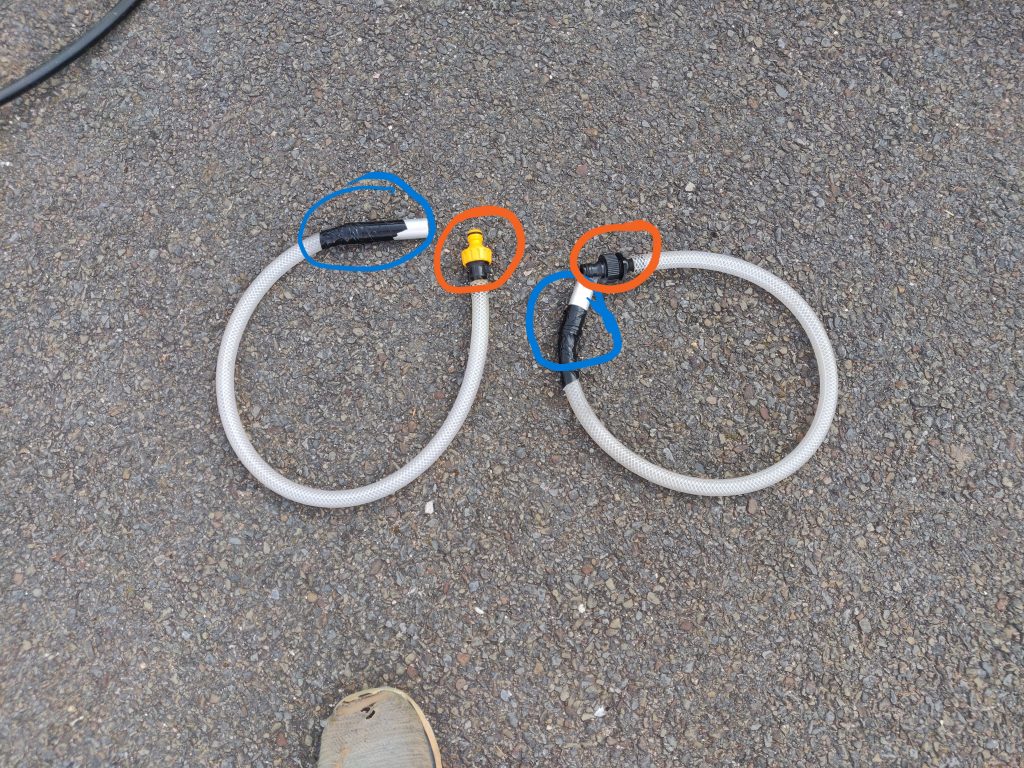
I cobbled together 4 pieces of pipework which interconnected using Hozelock fittings. You can use whatever works for you with regards to this.
The two short lengths connect to the rubber boots of the caravan pipework. I happened to have some Alde metal tube, circled blue, of the correct diameter with which to do this.
Heating coupler tubes
The two longer sections are cheap 14mm irrigation pipe. Terminated with the appropriate Hozelock connectors at one end and the pump at one of the others.
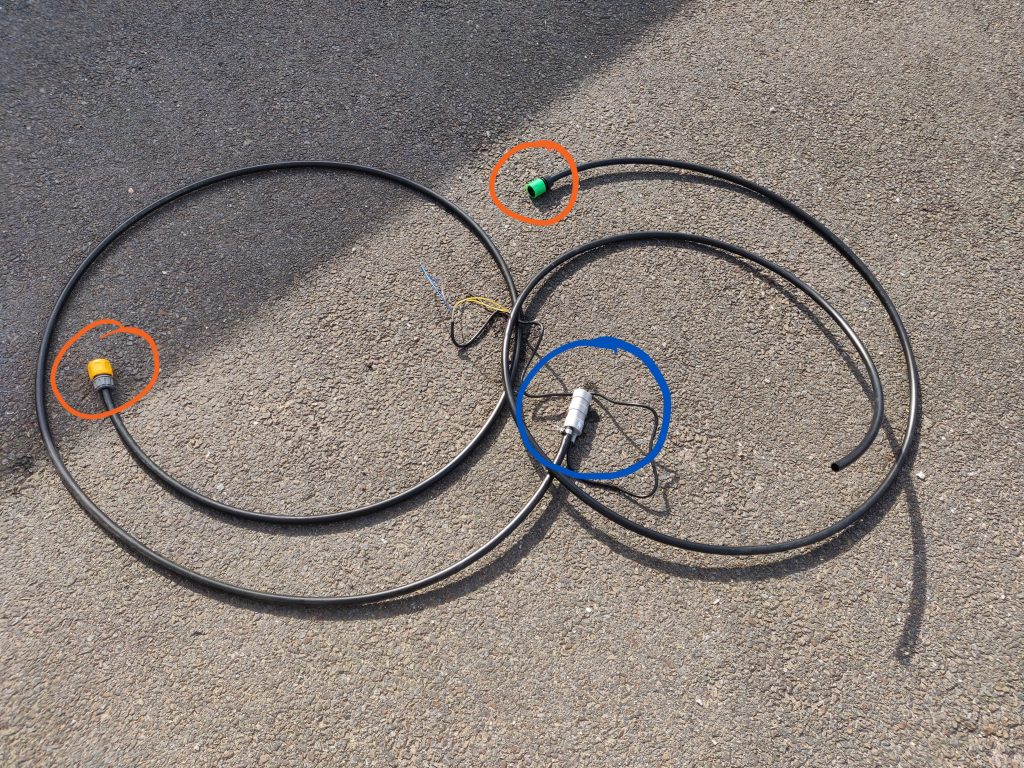
It was then just a case of dropping the pump into the bucket of liquid (see order of liquids above) and activating it by hooking up to an old 12v battery.
Pump and Drain hose with Hozelock connectors.
Once the fluid was replaced, the procedure to reconnect the header tank was the reverse of the above.
Here’s an image of other equipment used for the swap-out.
“Stuff” for Alde fluid change
Finally, the heating was operated for 10 minutes with the pump at full power.
In the evening we ate at the “Royal China” restaurant in Sandown. The place was very busy and there was an enthusiastic core of repeat visitors. The food and service was in fact excellent.
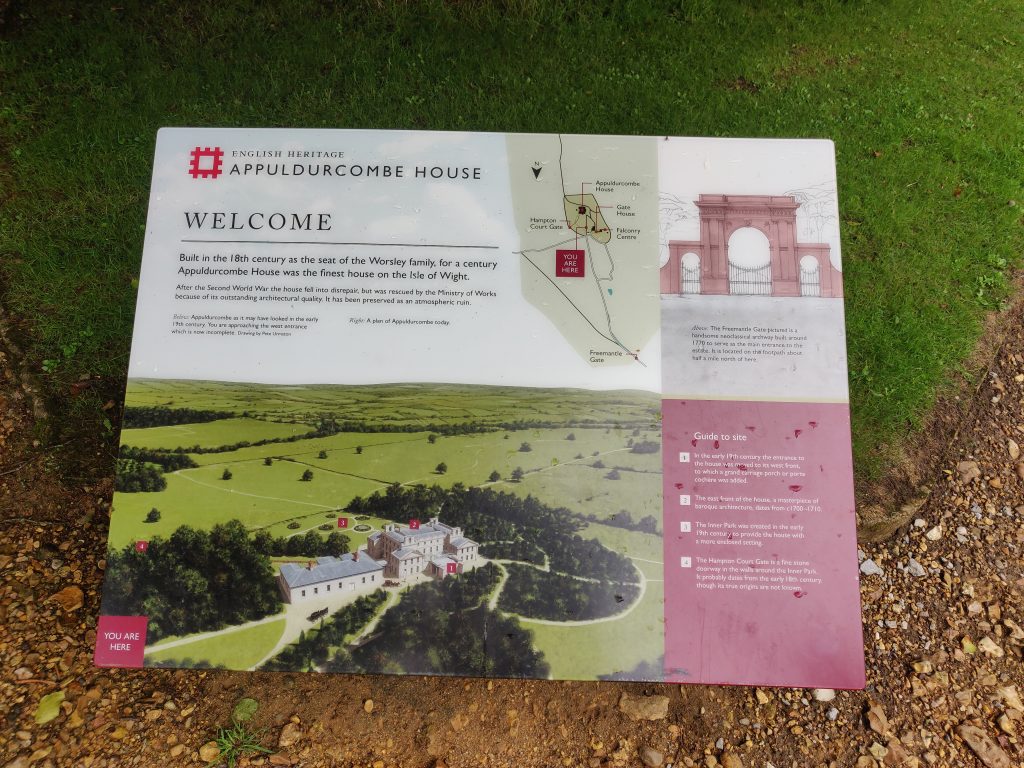
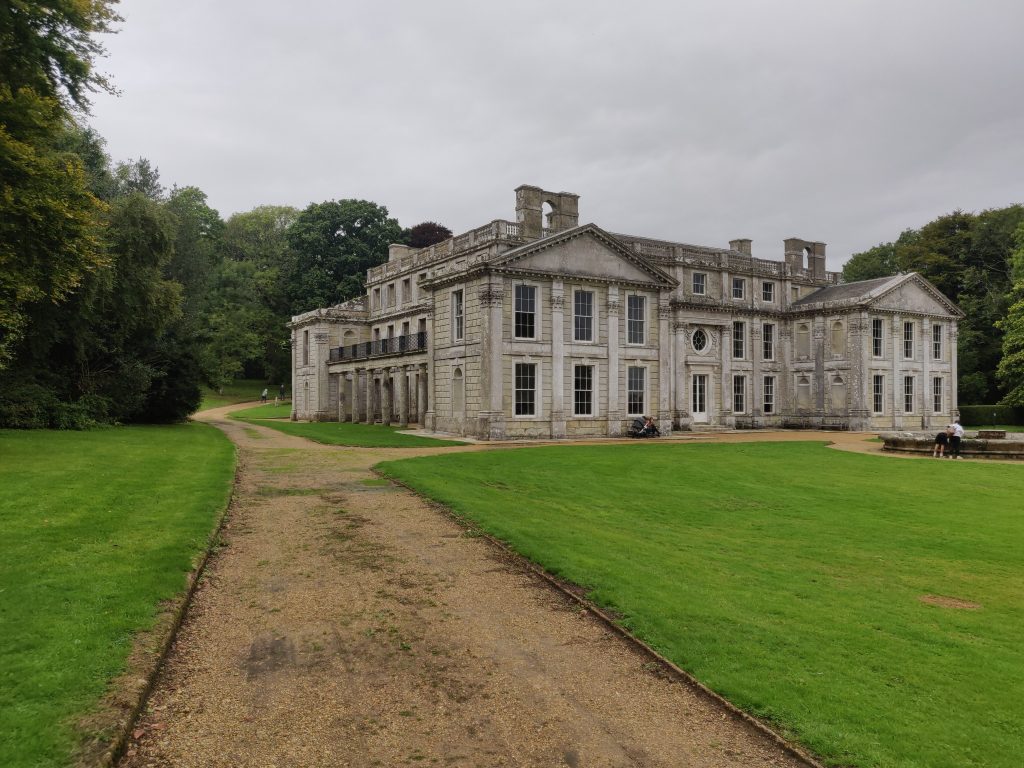
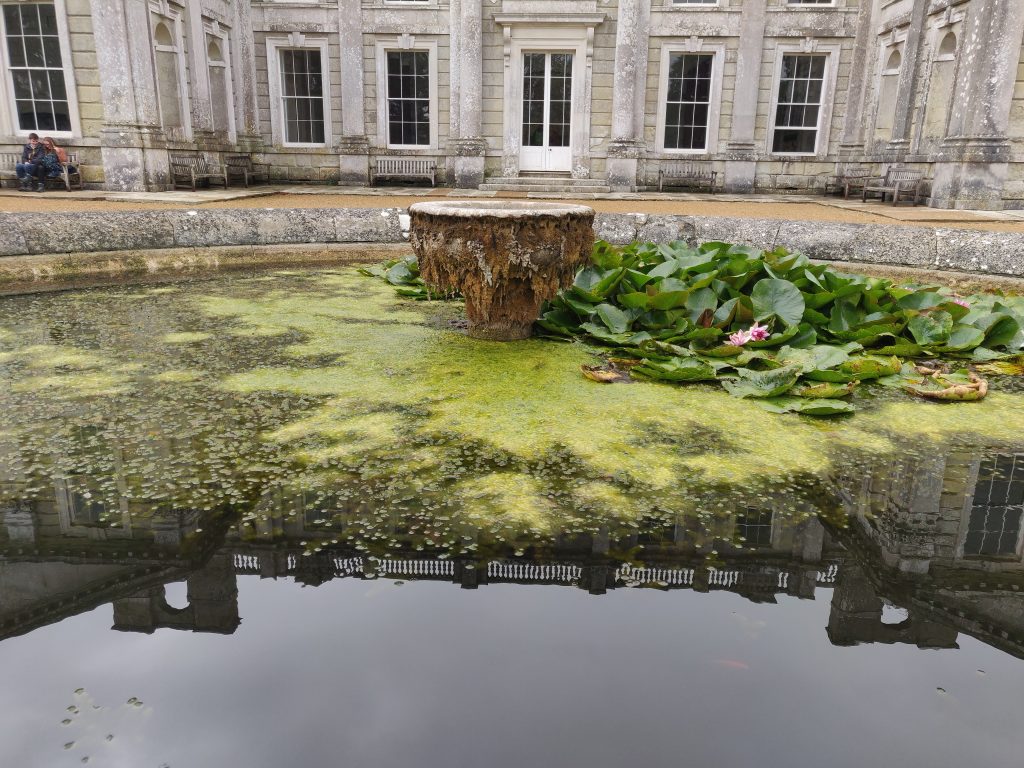
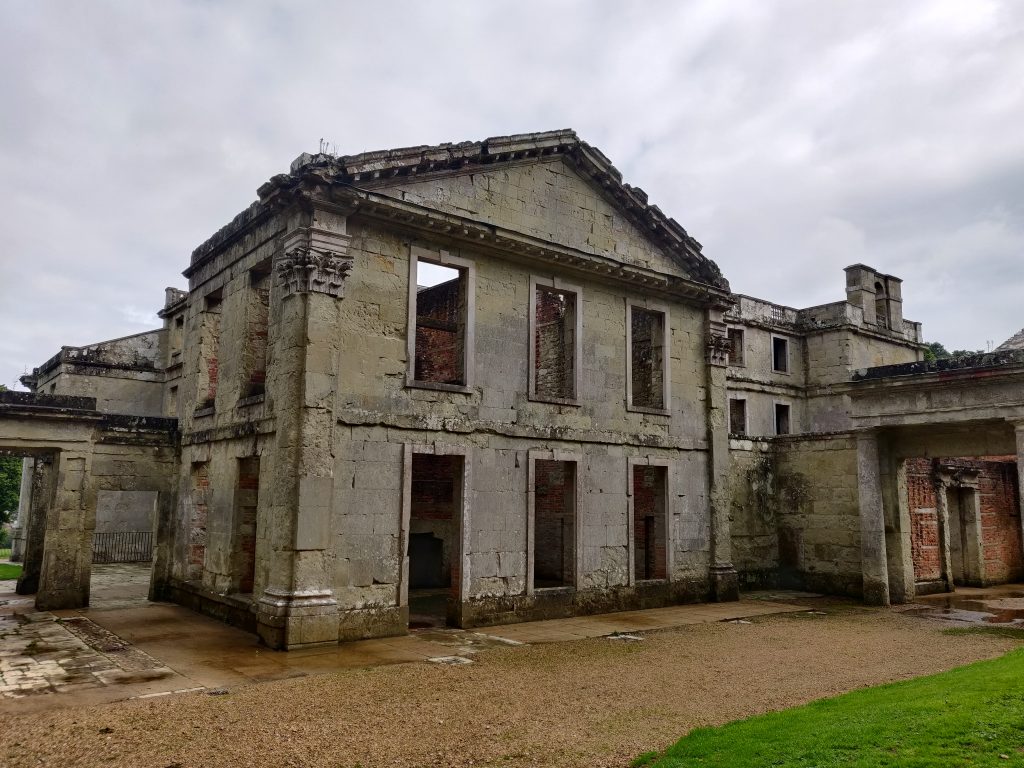
Wednesday we drove to Appuldurcombe House, which is an English Heritage property but is in a state of disrepair and free to visit.
Appuldurcombe House, IOW, Sep 2022
This English Baroque country house was the home of the Worsley family and actually started life as a priory in AD 1100 before becoming a convent.
The large Tudor mansion was bequeathed in 1690 to Sir Robert Worsley, 3rd Baronet who began planning a replacement. The house building was started in 1702 and the architect was John James. Alas, Sir Robert died in 1747 and he never saw the house fully completed.
The house was greatly extended by his great-nephew Sir Richard Worsley, the 7th Baronet of Appuldurcombe and Capability Brown was commissioned in 1779 to design the ornamental grounds at the same time as the extensions.
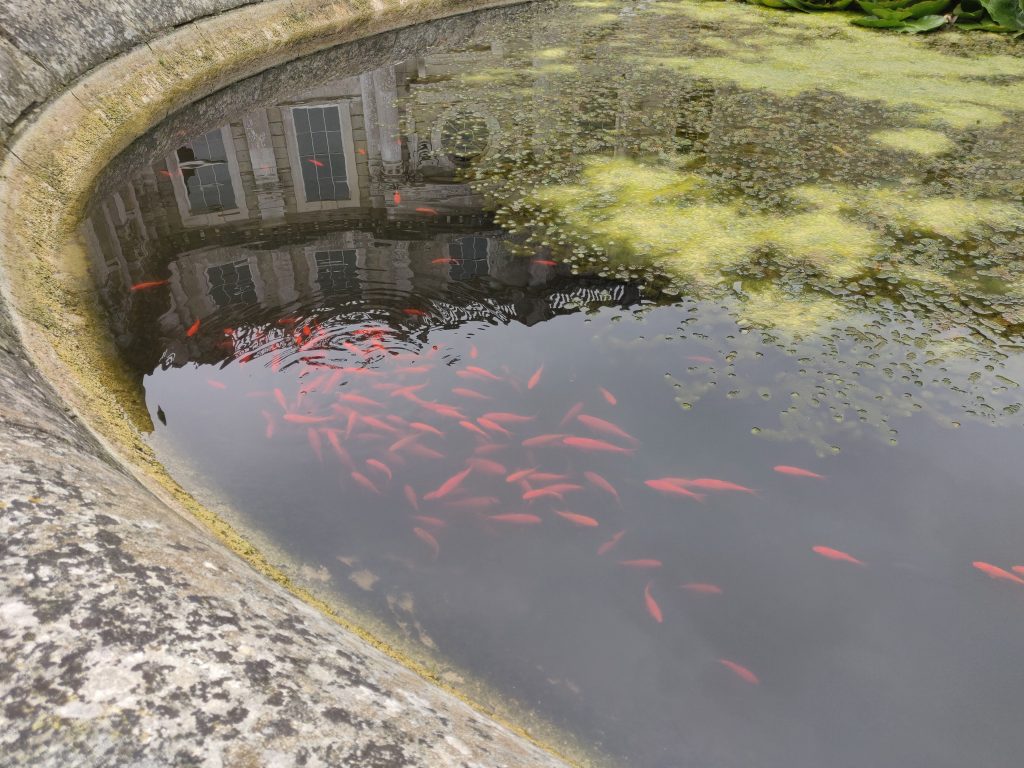
Someone is tending to the Goldfish!, Appuldurcombe House, IOW, Sep 2022
Presently, the house is now mainly a shell although the front section has been re-roofed and glazed and a small part of the interior recreated. The house has become well-known as one of the supposedly most haunted places on the Island.
Appuldurcombe House, IOW, Sep 2022a
Appuldurcombe House, IOW, Sep 2022a
Appuldurcombe House, IOW, Sep 2022a
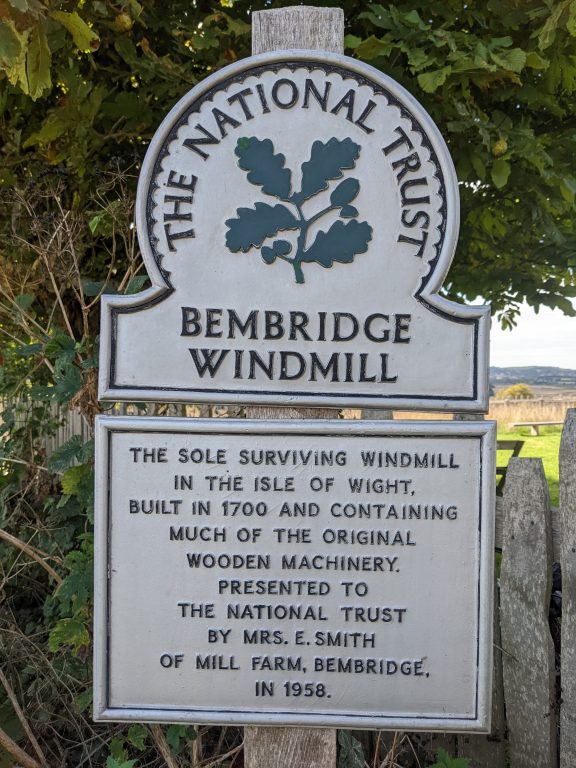
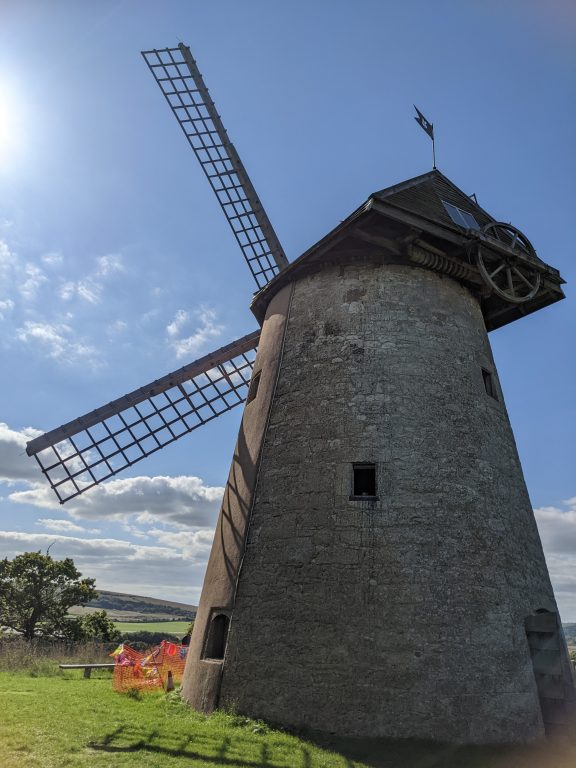
Bembridge Winmdmill is only open to the public on Tuesdays, Thursdays and Sundays. We headed over to Bembridge on Thursday lunchtime, via the Island bus service!
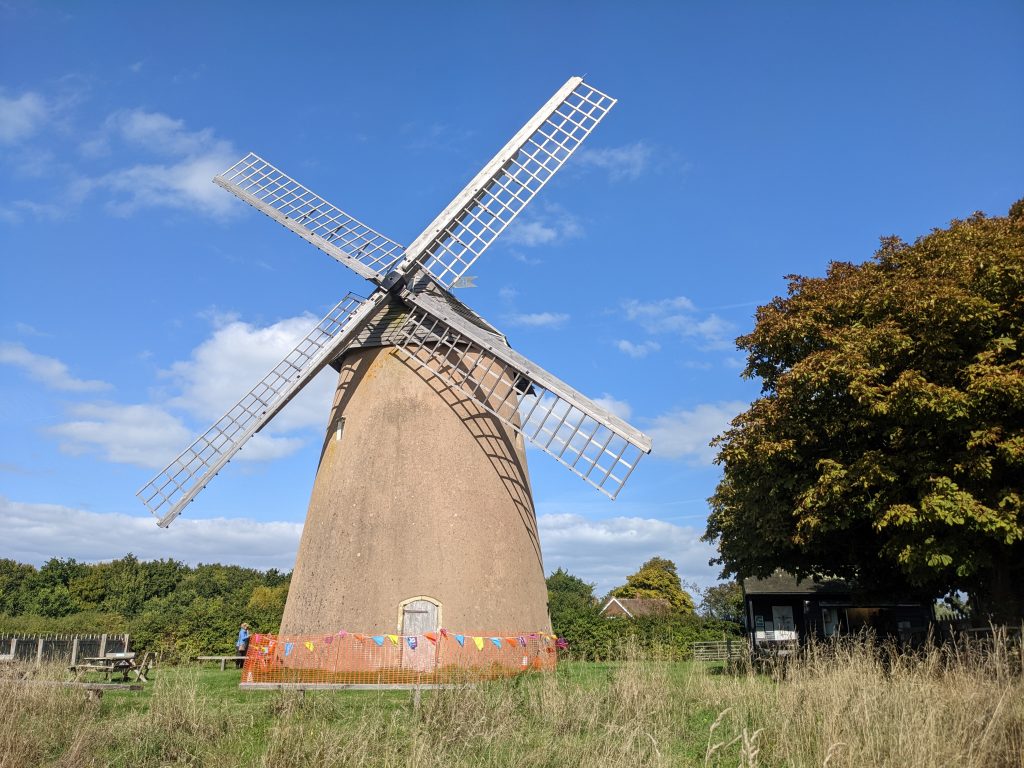
Bembridge Windmill, IOW, Sep 2022
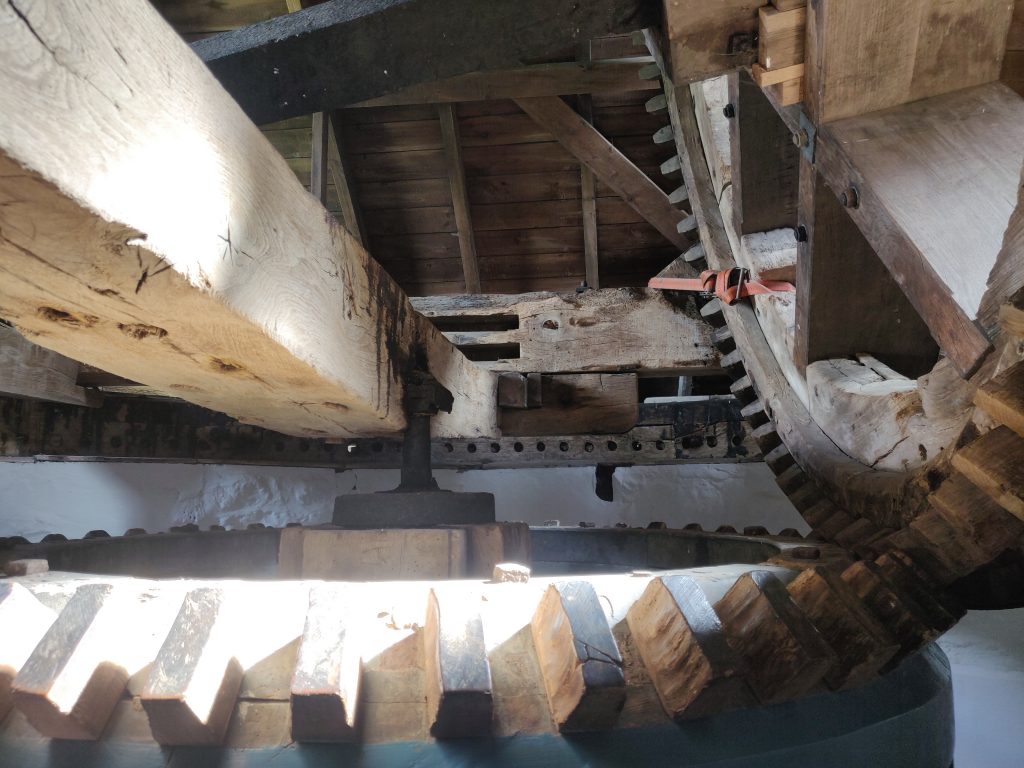
The windmill is the last one remaining on the Island and whilst it is “run-up” every year or so, it isn’t working in so far as processing flour from grain. All four floors of the windmill are open to the public via some fairly tight staircases. Bembridge Windmill was built in the early 1700s when Bembridge was almost an island in its own right, cut off from the rest of the Isle of Wight.
Bembridge Windmill, IOW, Sep 2022
Bembridge Windmill, IOW, Sep 2022
Much of the machinery remaining in the mill is typical of the early 1700s.
Bembridge Windmill, IOW, Sep 2022
The earliest positive date was found during restoration work when the steps between the first and second floor were replaced. Those steps had previously been reversed so that the runner against the wall had once been the outer runner, along which the inscription “E BEKER 1746 A C” had been carved. Other inscriptions have been found, one which could be 1701, but is not clear enough to give positive dating.
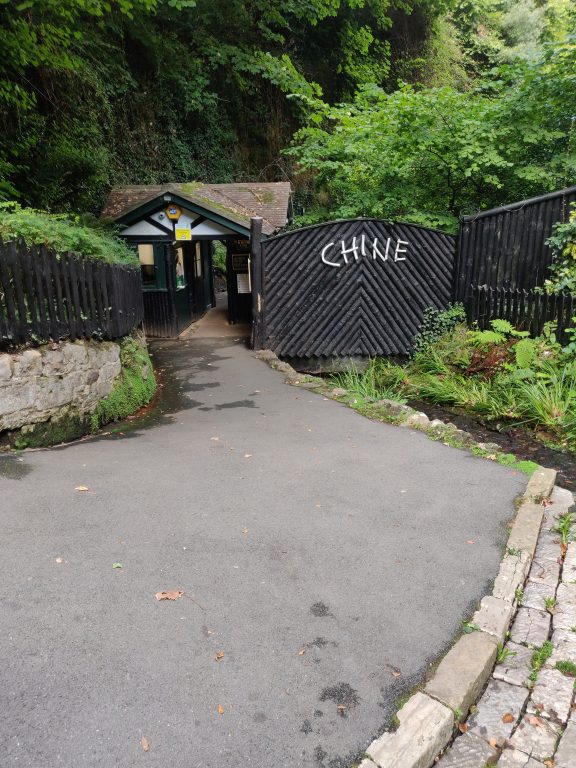
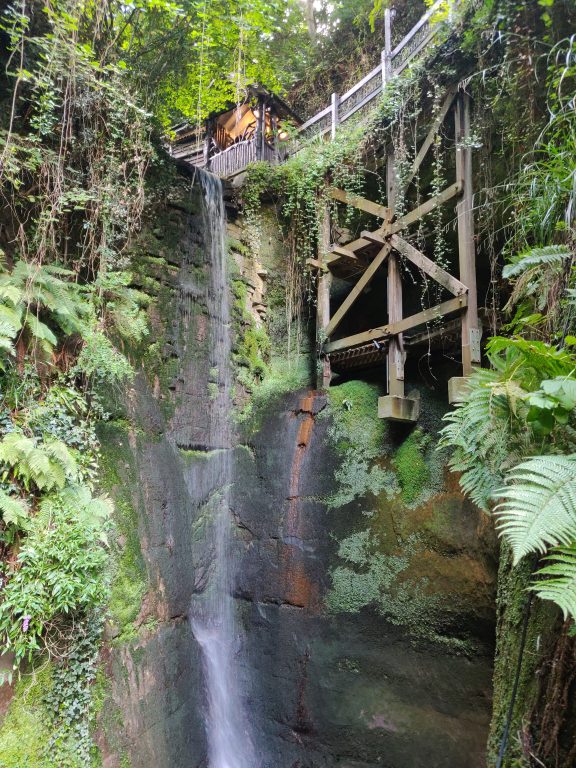
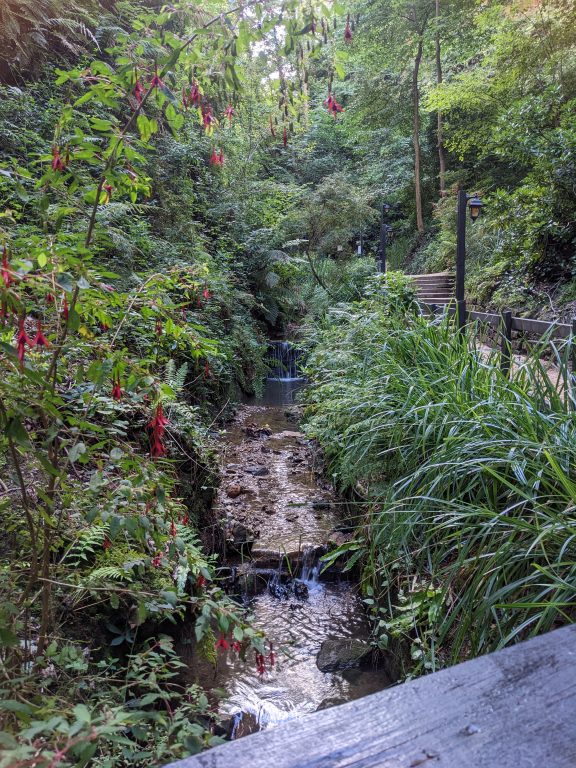
After a coffee in the village of Bembridge we headed to Shanklin and the Chine. It’s fairly pricey to enter the gorge but the ticket lasts a whole 7 days so we visited again later in the week after dark where there is a nice light show. After our first visit we had a reservation at the pub located at the bottom of the Chine – The Fisherman’s cottage. It’s a lovely setting but the place was lacking a warm and cosy atmosphere. We found better places to eat in the Old Village (more later!).
Shanklin Chine, IOW, 2022
Shanklin Chine, IOW, 2022
Shanklin Chine, IOW, 2022
The weather has improved significantly over the last few days. The deluge of rain has stopped and the ground is starting to dry out. Days are sunny but there is now the chill of Autumn in the evenings and overnight.
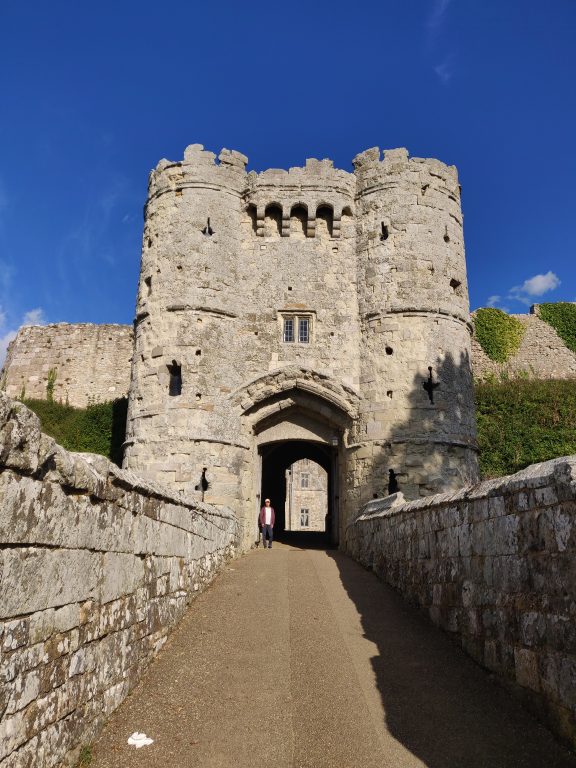
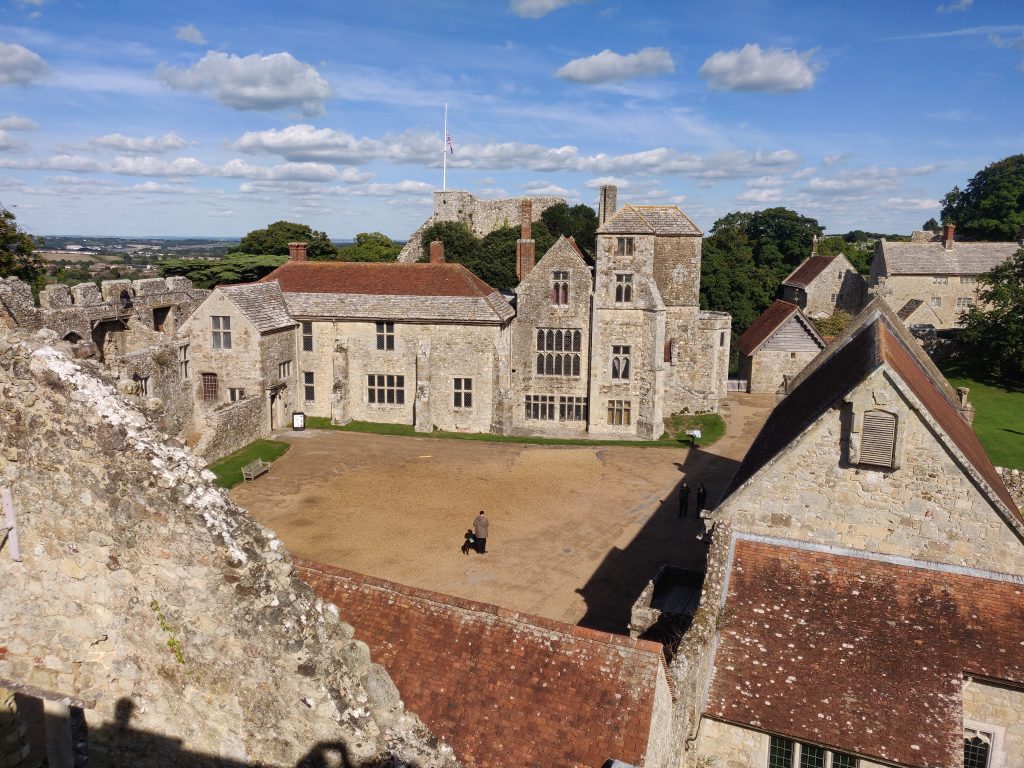
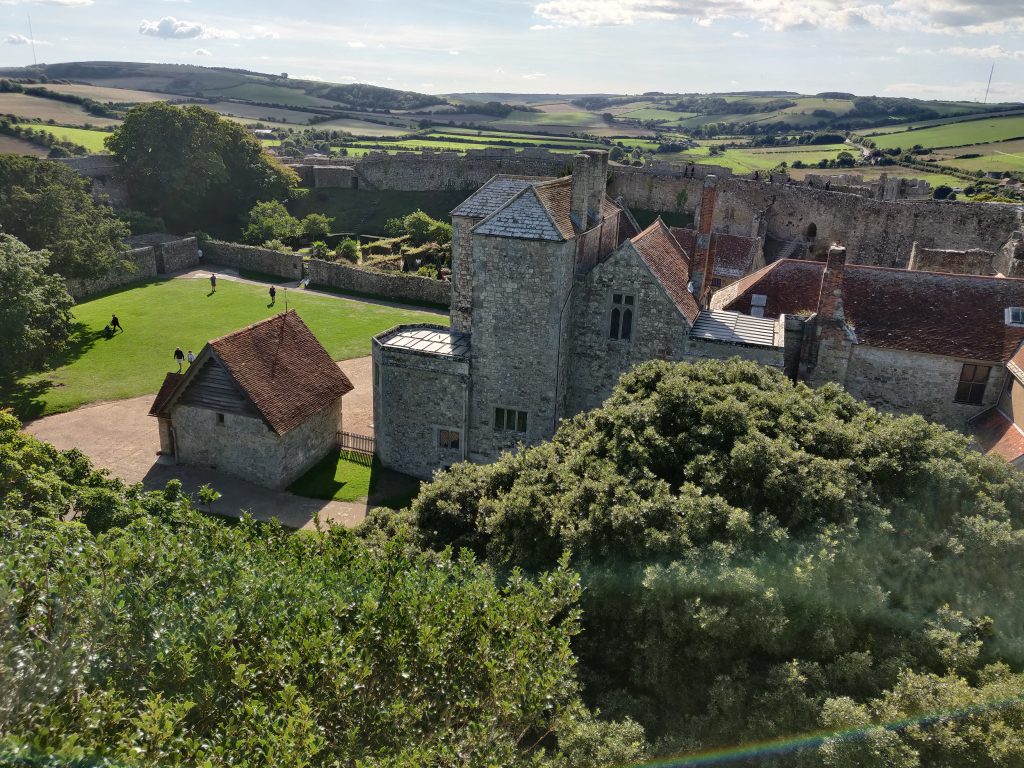
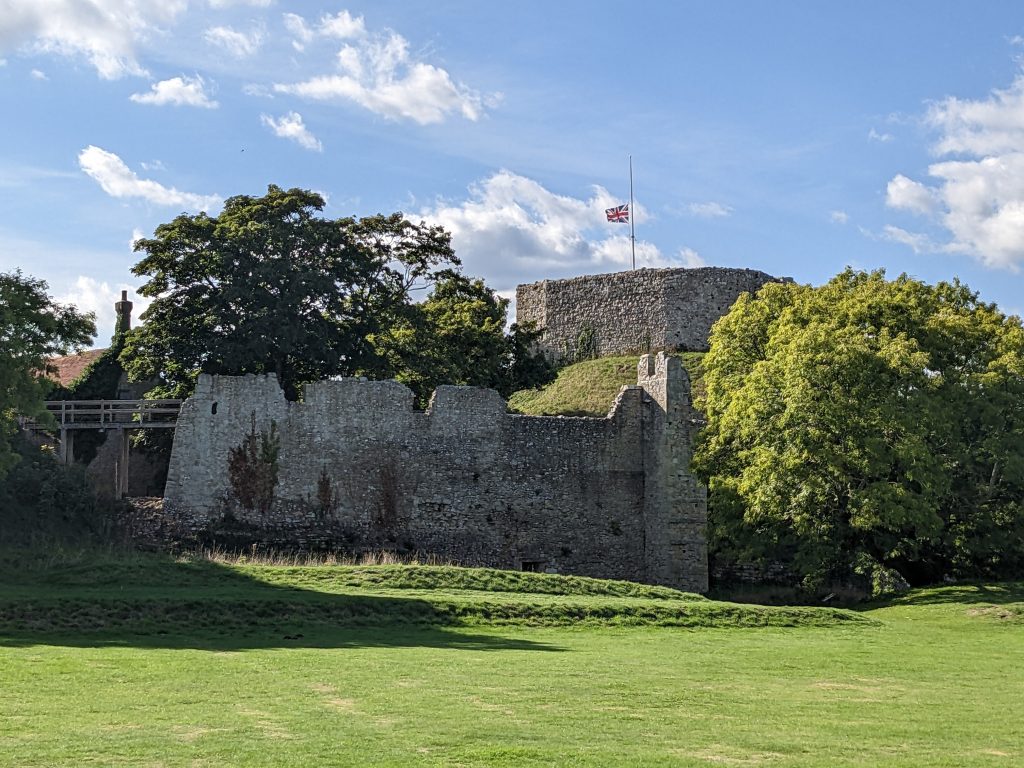
Saturday we headed over to Carisbrooke Castle – another English Heritage monument. We’d already spent £40 to visit Osborne house and the castle was another £20. We were able to get an annual membership for £103 and I was refunded for the Osborne House visit. Just need to remember to cancel the Direct Debit! Plus we avoided the £3 parking charge.
The site of Carisbrooke castle may have been occupied in pre-Roman times as a ruined wall suggests that there was a building there in late Roman times. From 1100 the castle remained in the possession of Richard de Redvers family and over the next two centuries his descendants improved the castle with stone walls, towers and a keep. In 1293 the castle was sold to Edward I and from then on its governance was entrusted to wardens as representatives of the crown.
Charles I was imprisoned here for fourteen months before his execution in 1649 and afterwards his two youngest children were confined to the castle. From 1896 to 1944 it was the home of Princess Beatrice, daughter of Queen Victoria, as Governor of the Isle of Wight before becoming under the control of English Heritage.
Caarisbrooke Castle Gatehouse, IOW, 2022
Caarisbrooke Castle, IOW, 2022
Caarisbrooke Castle, IOW, 2022
Caarisbrooke Castle Keep, IOW, 2022
Chapel of St Nicholas, Carisbrooke Castle, IOW, 2022
In the evening we headed back to Shanklin for dinner at the Village Inn. This had been recommended by a lady we were chatting to on the IOW Steam Railway. This was everything the Fisherman’s Cottage wasn’t. A warm cosy bustling atmosphere; great beer and good food and a lovely table by the window. Only minor criticism was that the Chilli-con-carne was listed as being seriously fiery. It wasn’t. Other than that we had a great evening before heading through Shanklin Chine one last time – on this occasion after dark.
Moe enjoyed her desert (Eton Mess) at the Village Inn, Shanklin
It’s now Sunday morning and we have Sunday lunch booked at the Pointer Inn in Newchurch. Then the final remnants of packing-up before we head off back to the mainland. The Queens funeral has meant we will spend Monday night at Charmouth as we don’t fancy moving the caravan around the tight streets of our East Devon coastal town on a Bank Holiday Monday
We’ve had a few wet days over here on the Isle of Wight and I’ve been busy planning a few jobs and upgrades on the van. It’s due a service in a month and there’s a list of stuff I’ve been meaning to do so this was a great time to order what I’ll need ready for our return home.
In no particular order, I have a new Solar panel arriving. It’s 135w and will replace the factory installed Swift 40w panel. I have outstanding queries with both Swift (via dealer) and Sargent about the current carrying capacity of the pre-existing solar wiring. It looks ok but if not I’ll need to cable the solar panel directly to the battery.
If I need to add new wires through the roof of the van for solar, I will add a USB cable also for the WiFi extender setup – I may also convert this to 12v so it works off-grid and maybe just tidy up it’s location to be a bit more permanent.
I’ve put off adding a fan kit to the Dometic fridge. I think I have all the bits and pieces apart from an electronic thermostat, which I did have but then assigned it to another project!
I’ve got an Alde fluid change to carry out; sort out a replacement pump for the Thetford C260 – ours is increasingly dodgy at starting after a period of inactivity; new awning rail corners and finally find a solution so that the TV operates on 12V and can remain setup whilst we travel.
I’d also like to polish the front GRP Panel which has become increasingly dull due I guess to UV damage.
I’ll add blog posts for each of the tasks as I get round to them.
Saturday was a special event day at the Isle of Wight Steam Railway – Steam trains and a Cider / Cheese festival. We decided to stick with the theme of public transport and arrived after a couple of hours at the main steam railway station of Haverstreet.
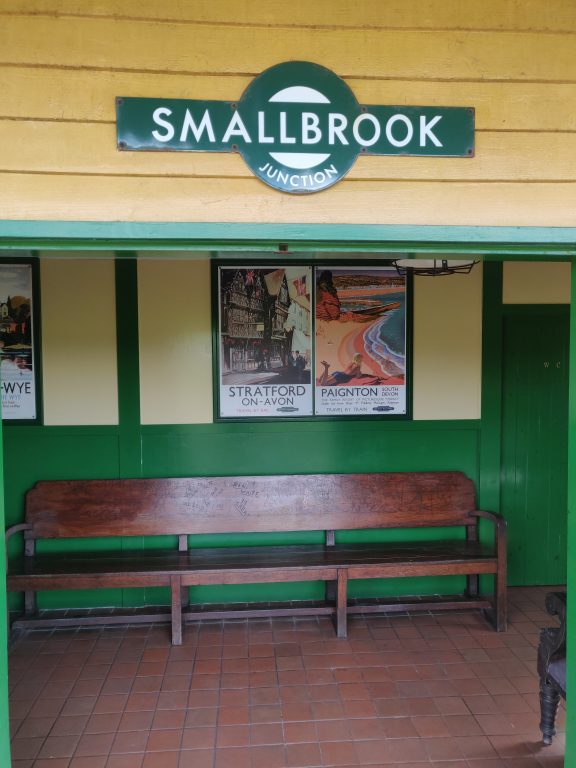
The Isle of Wight seems to have a reasonable bus service and we caught the number 8 bus after a 10 minute walk from the campsite. At Sandown we switched to the regular railway and travelled the short distance to Smallbrook junction. This is at one end of the steam railway line and just a short walk from the mainline station to the steam railway.
Smallbrook Junction, IOW, 2022
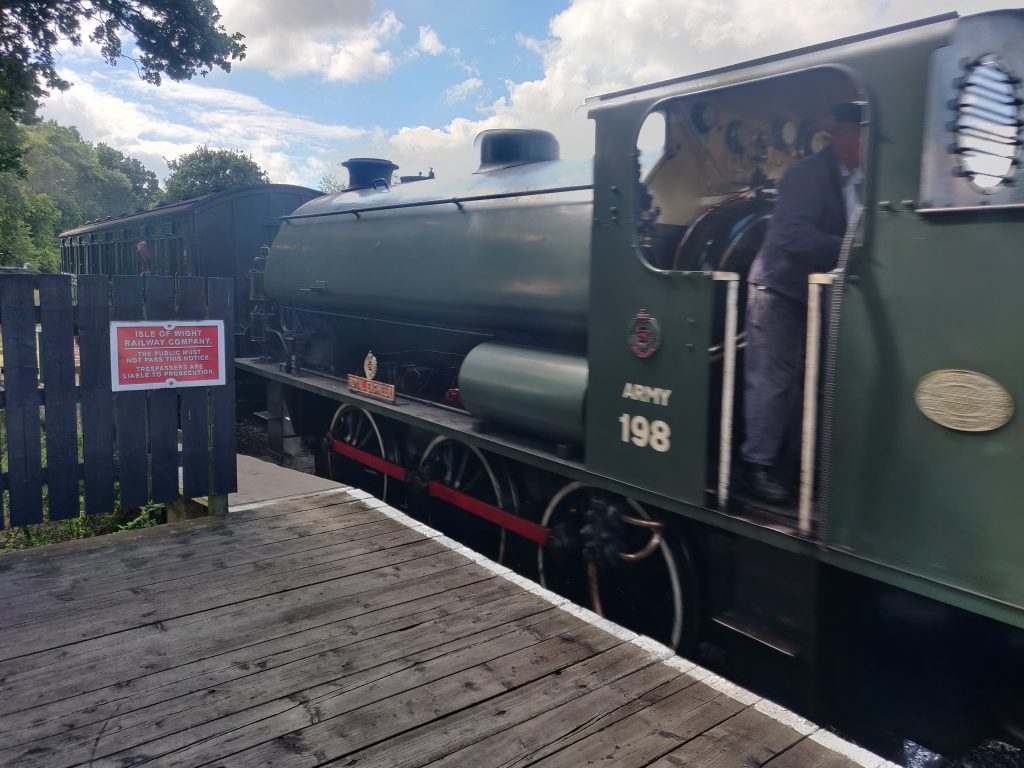
Our first steam train of the day arrived a little later and took us (via a trip to the other end of the line, Wootton) to the main station at Havenstreet.
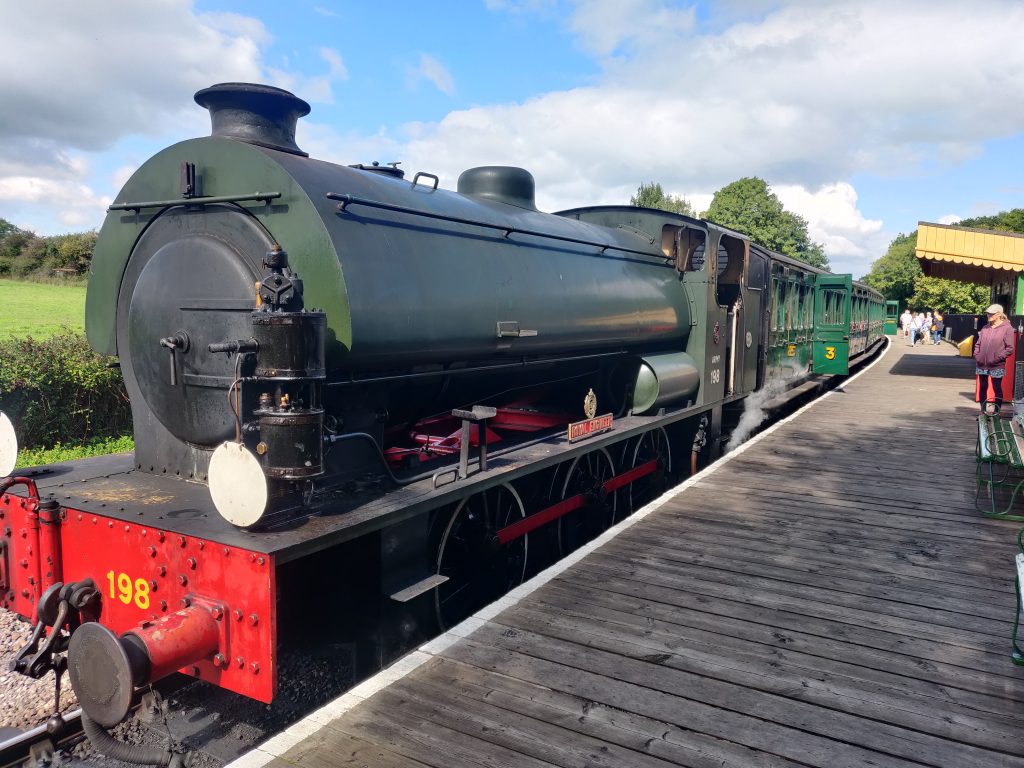
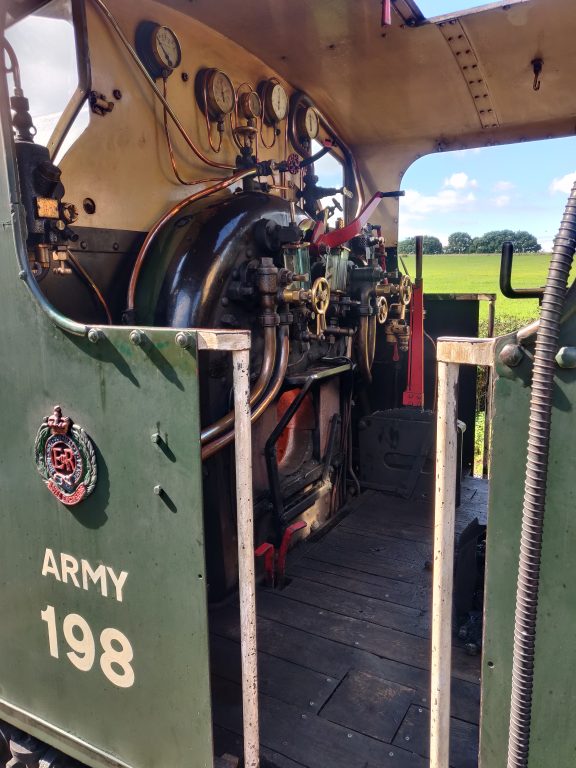
Our first train, “Royal Engineer”
IOW Steam Railway, 2022
IOW Steam Railway, 2022
Entry to the Cider and Cheese festival was complimentary with a train ticket. A very nice choice of cheeses was available for the cheese platters.
There was a similar choice of Ciders although I made some pretty interesting choices. Maybe I’ll stick to Sandford Orchards “Devon Red” if there’s a next time! Service was disappointingly slow, given we only had a couple of hours at the festival.
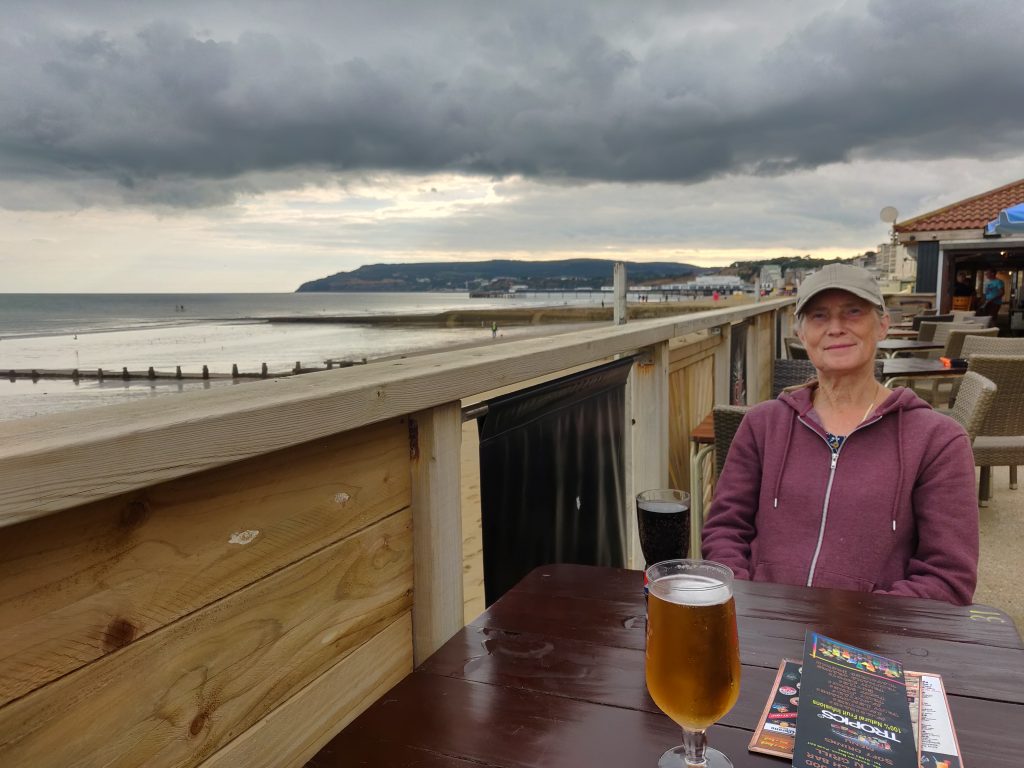
On the journey back, we stopped at the Driftwood bar on the beach at Sandown and then ate Fish’n’Chips nearby in Lake.
Driftwood Beach Bar, Sandown, IOW, 2022
*****
Sunday was a quiet day, with roast dinner at our local inn, The Pointer Inn. Highly recommended.
*****
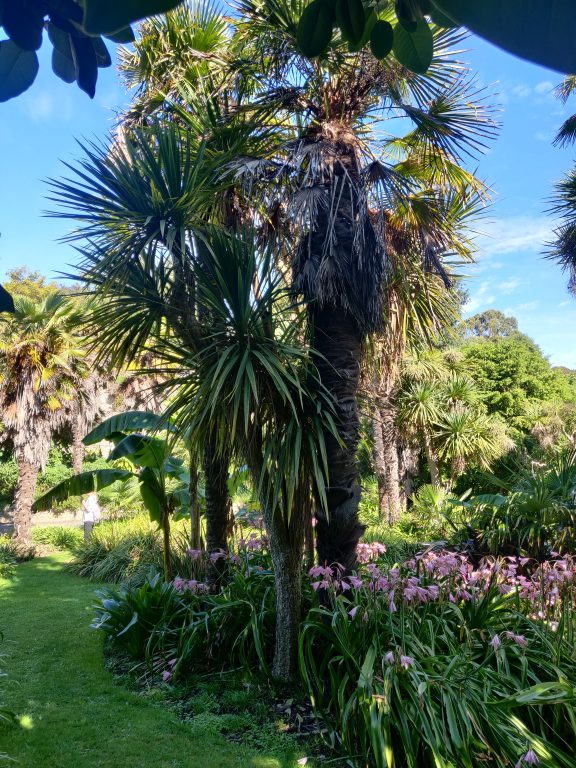
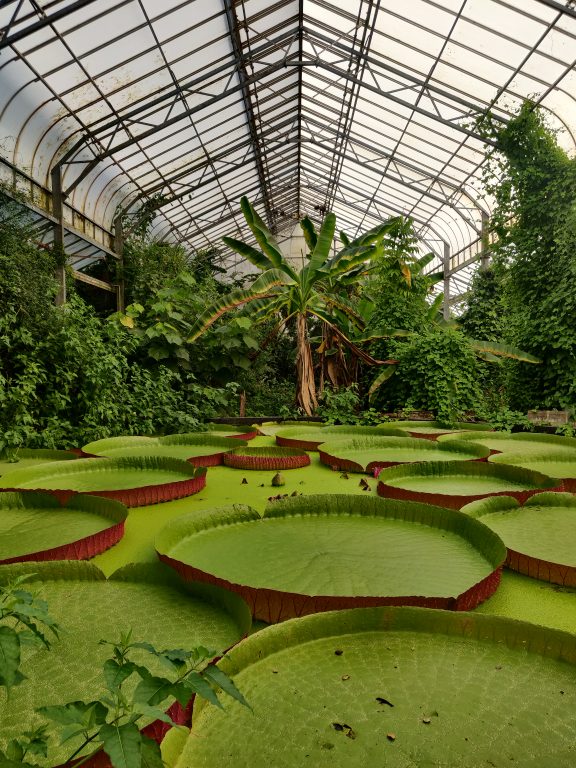
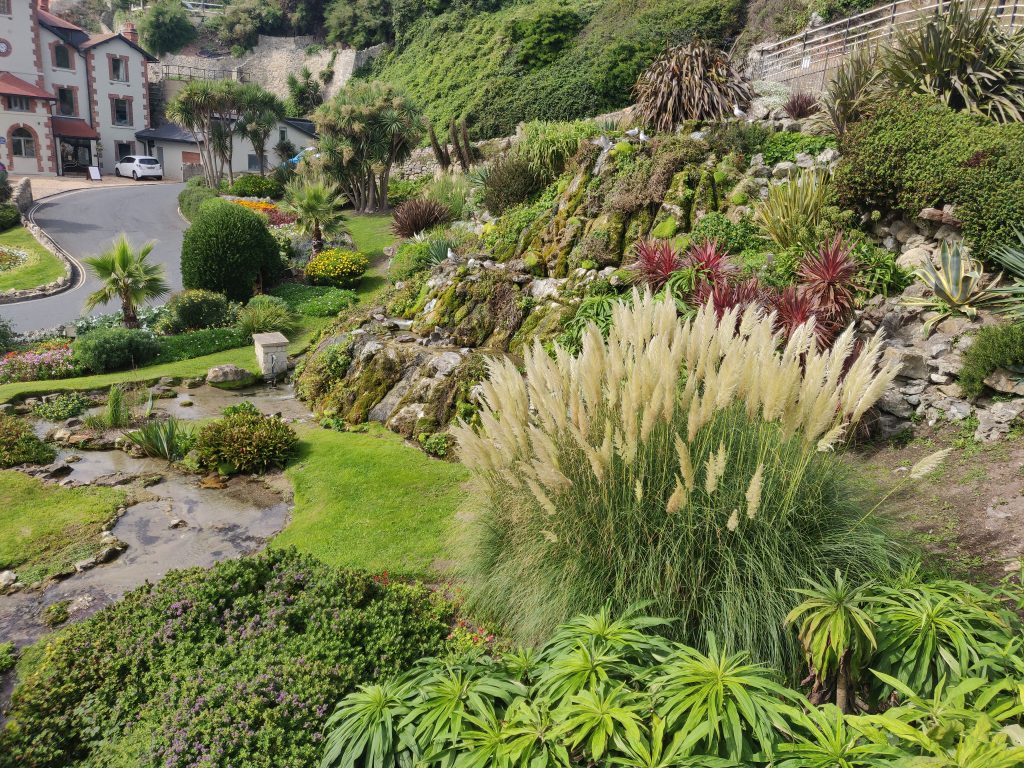
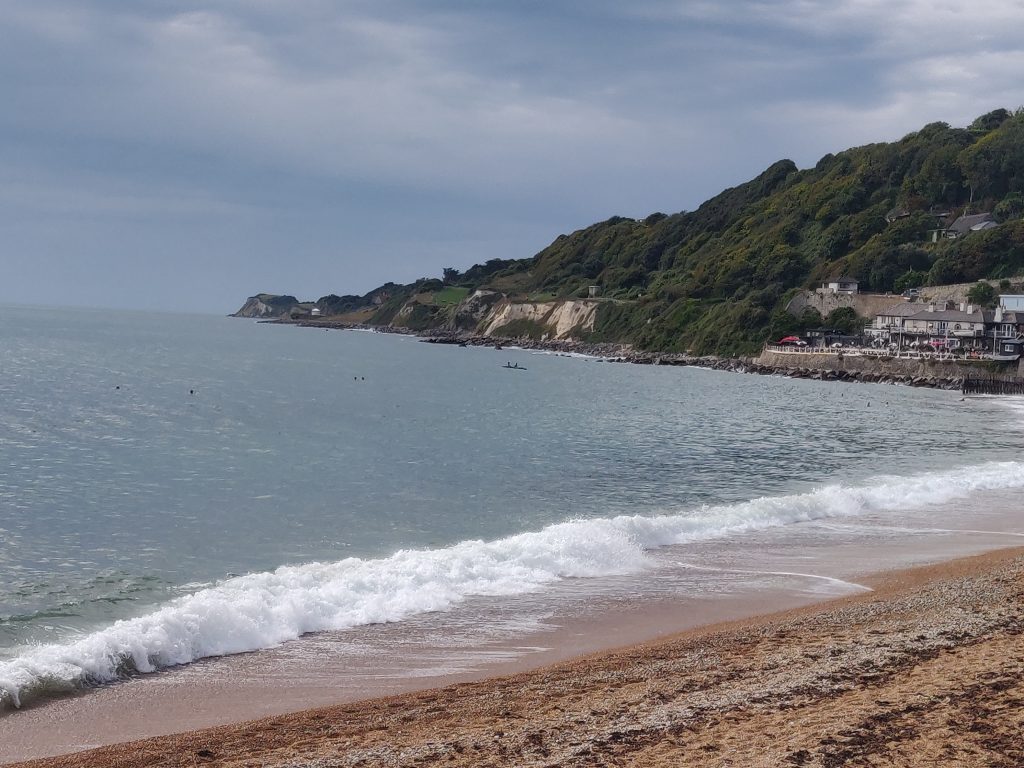
Monday we drove to Ventnor and visited the Botanical gardens there. This has it’s own micro-climate which keeps the temperature some 5 degrees higher than should be expected. The gardens are well laid out and it was a lovely day to enjoy a picnic and wander around the botanical gardens. Weather was warm enough for a late afternoon BBQ.
Ventnor Botanical Gardens, IOW, 2022
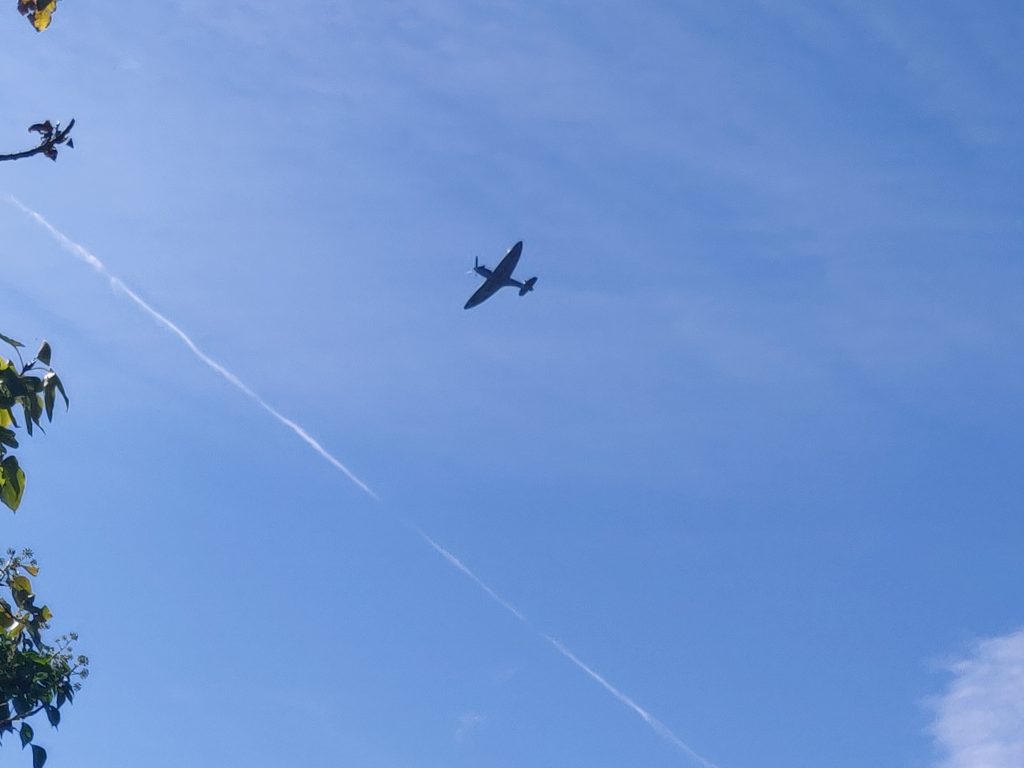
Spitfire flying over Ventnor Botanical Gardens, IOW, 2022
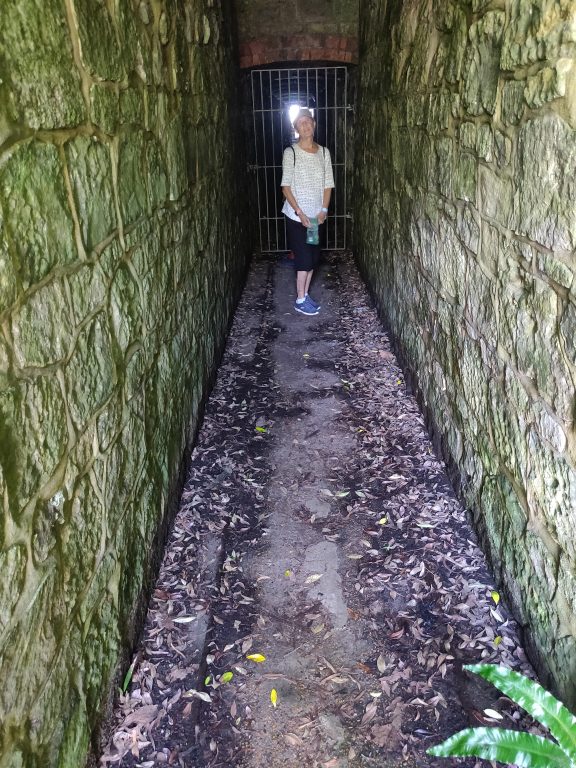
Tunnel through the cliff at Ventnor Botanical Gardens, IOW, 2022