I posted Part 1 on Caravan Talk and received a few very good ideas about how I could drain part of the system and after reflecting on the problem for a couple of days, I decided I’d have another attempt over the weekend, and thus avoid a trip up to Wellingborough. The result was a success but it was a long 6 hours of work. Here’s how the job panned out.
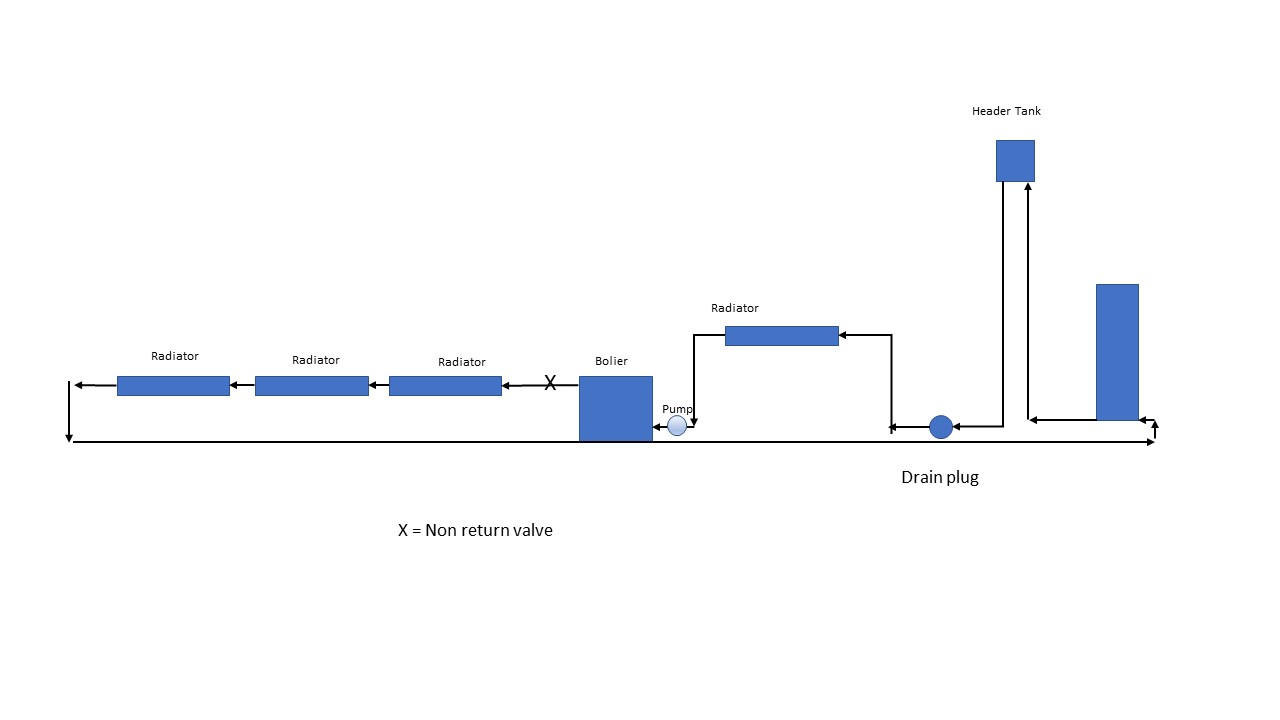
Sterling Eccles Ruby heating schematic…
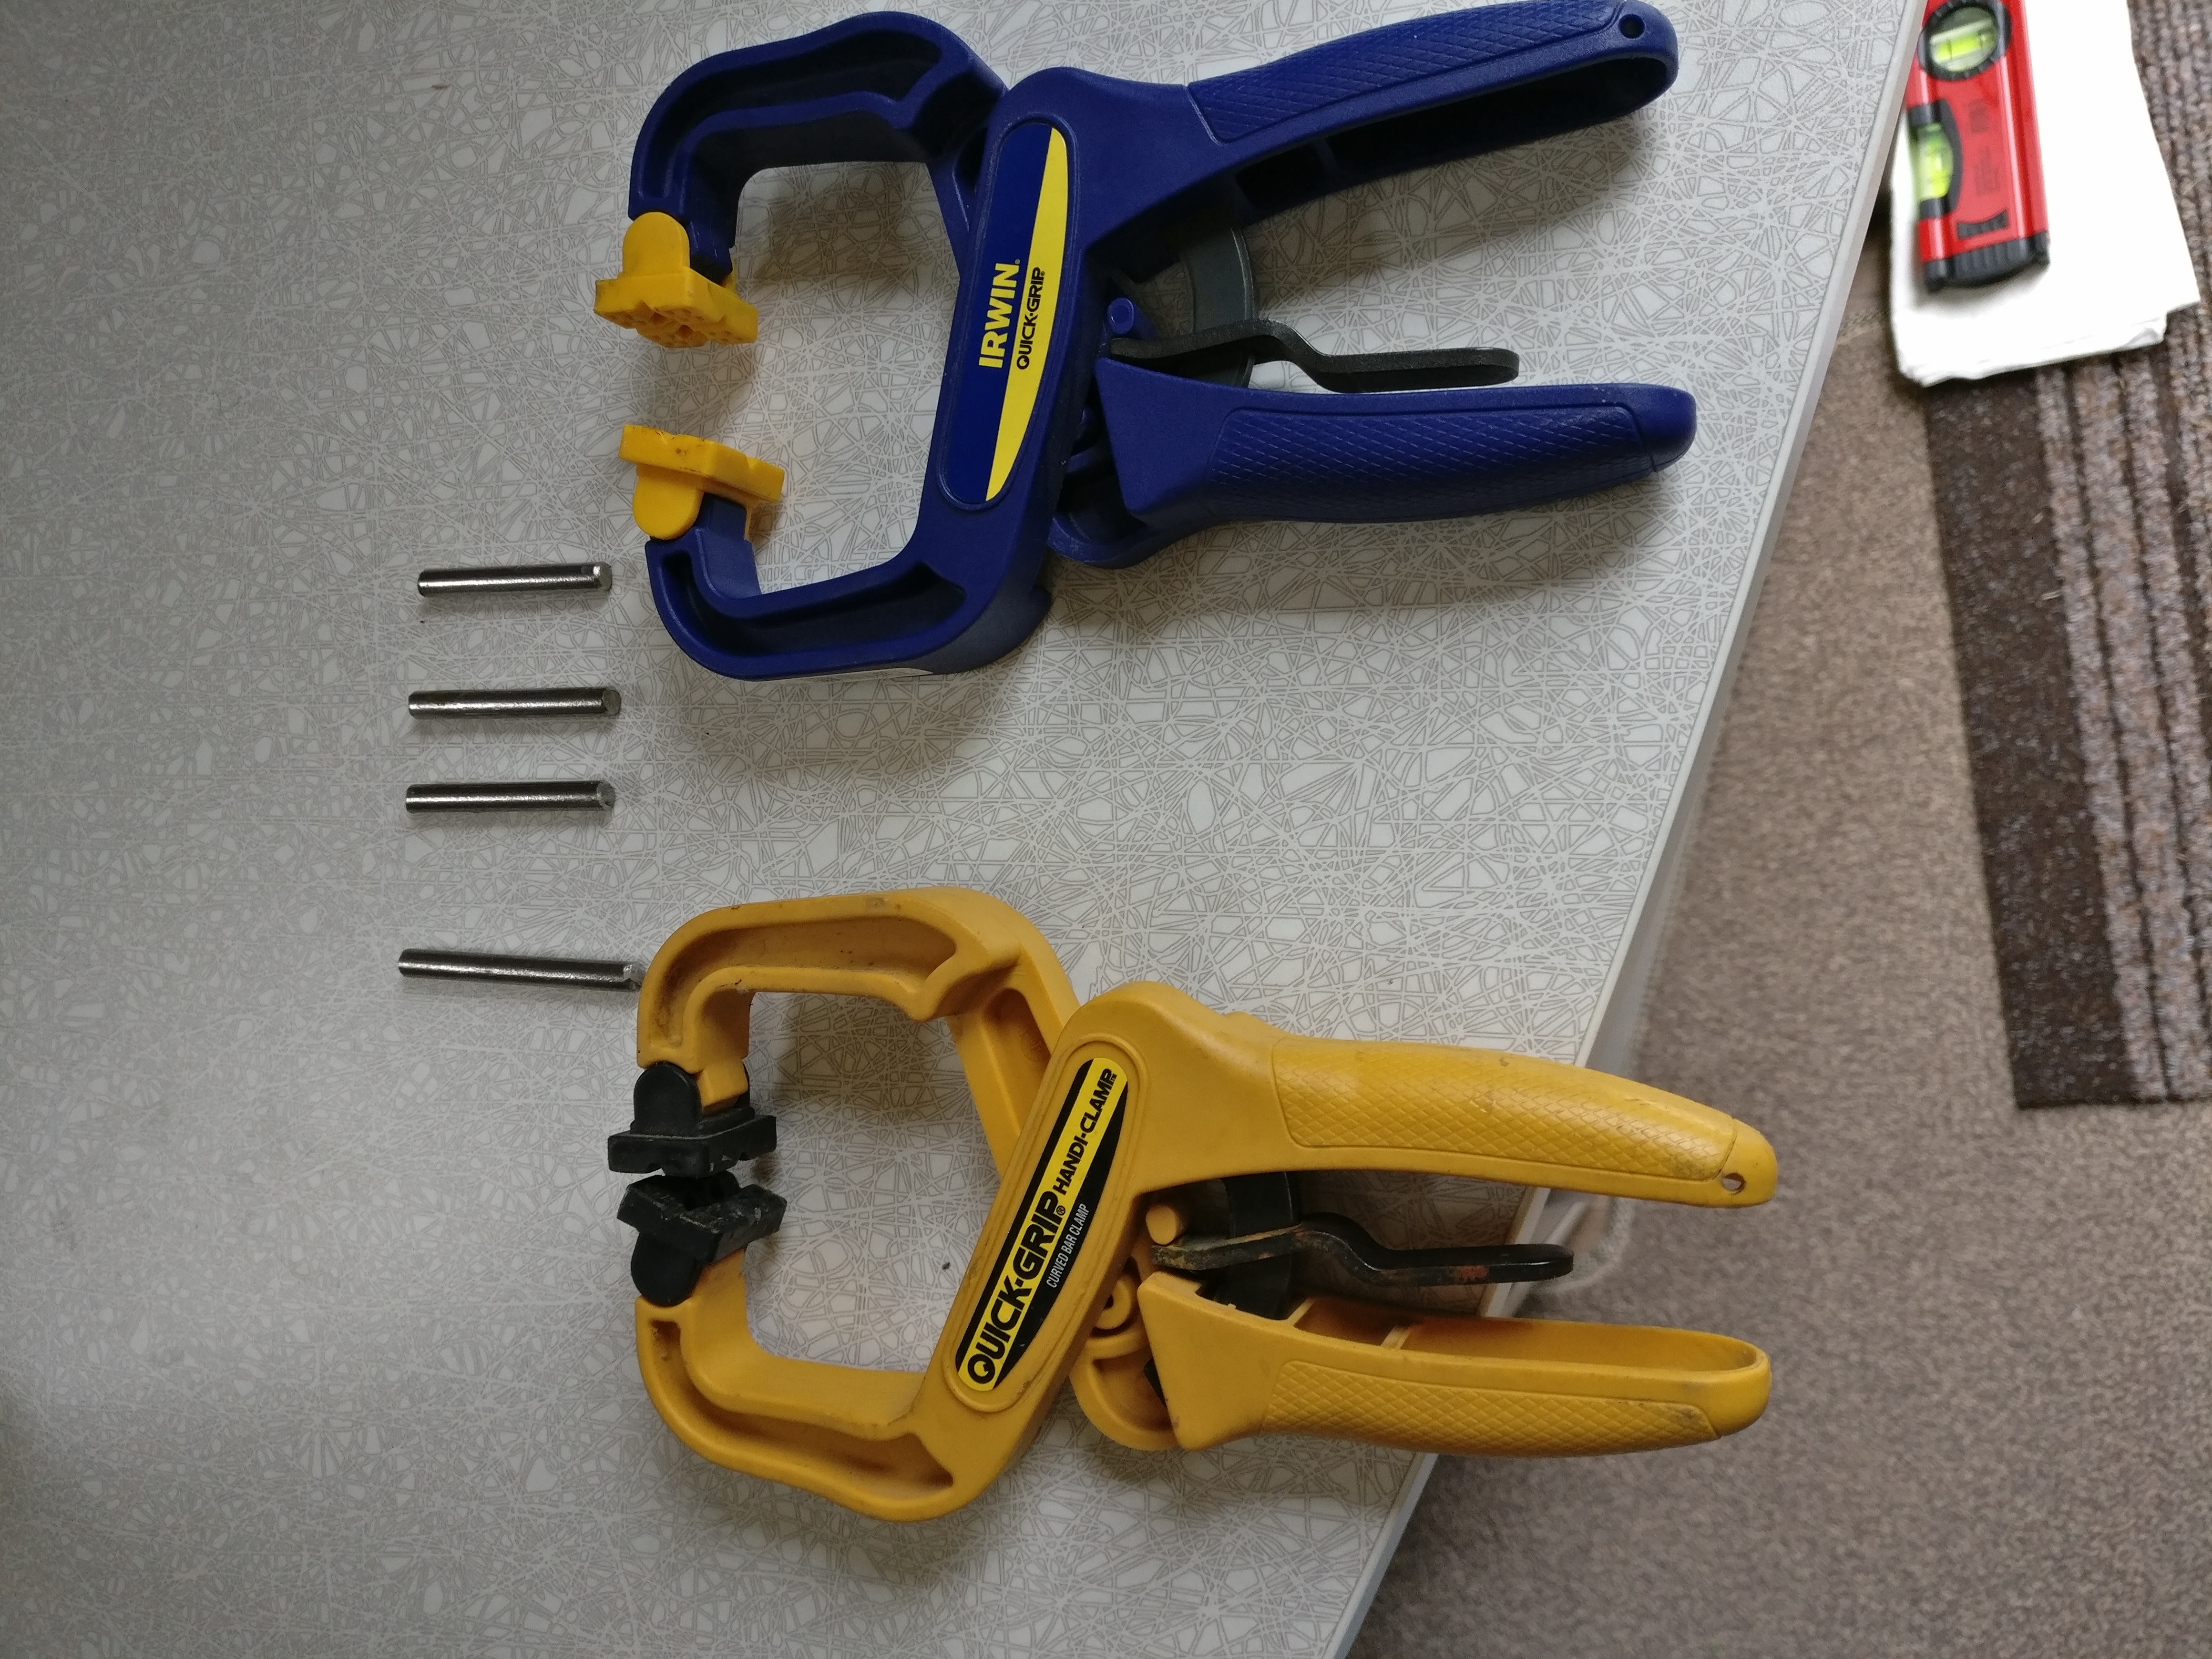
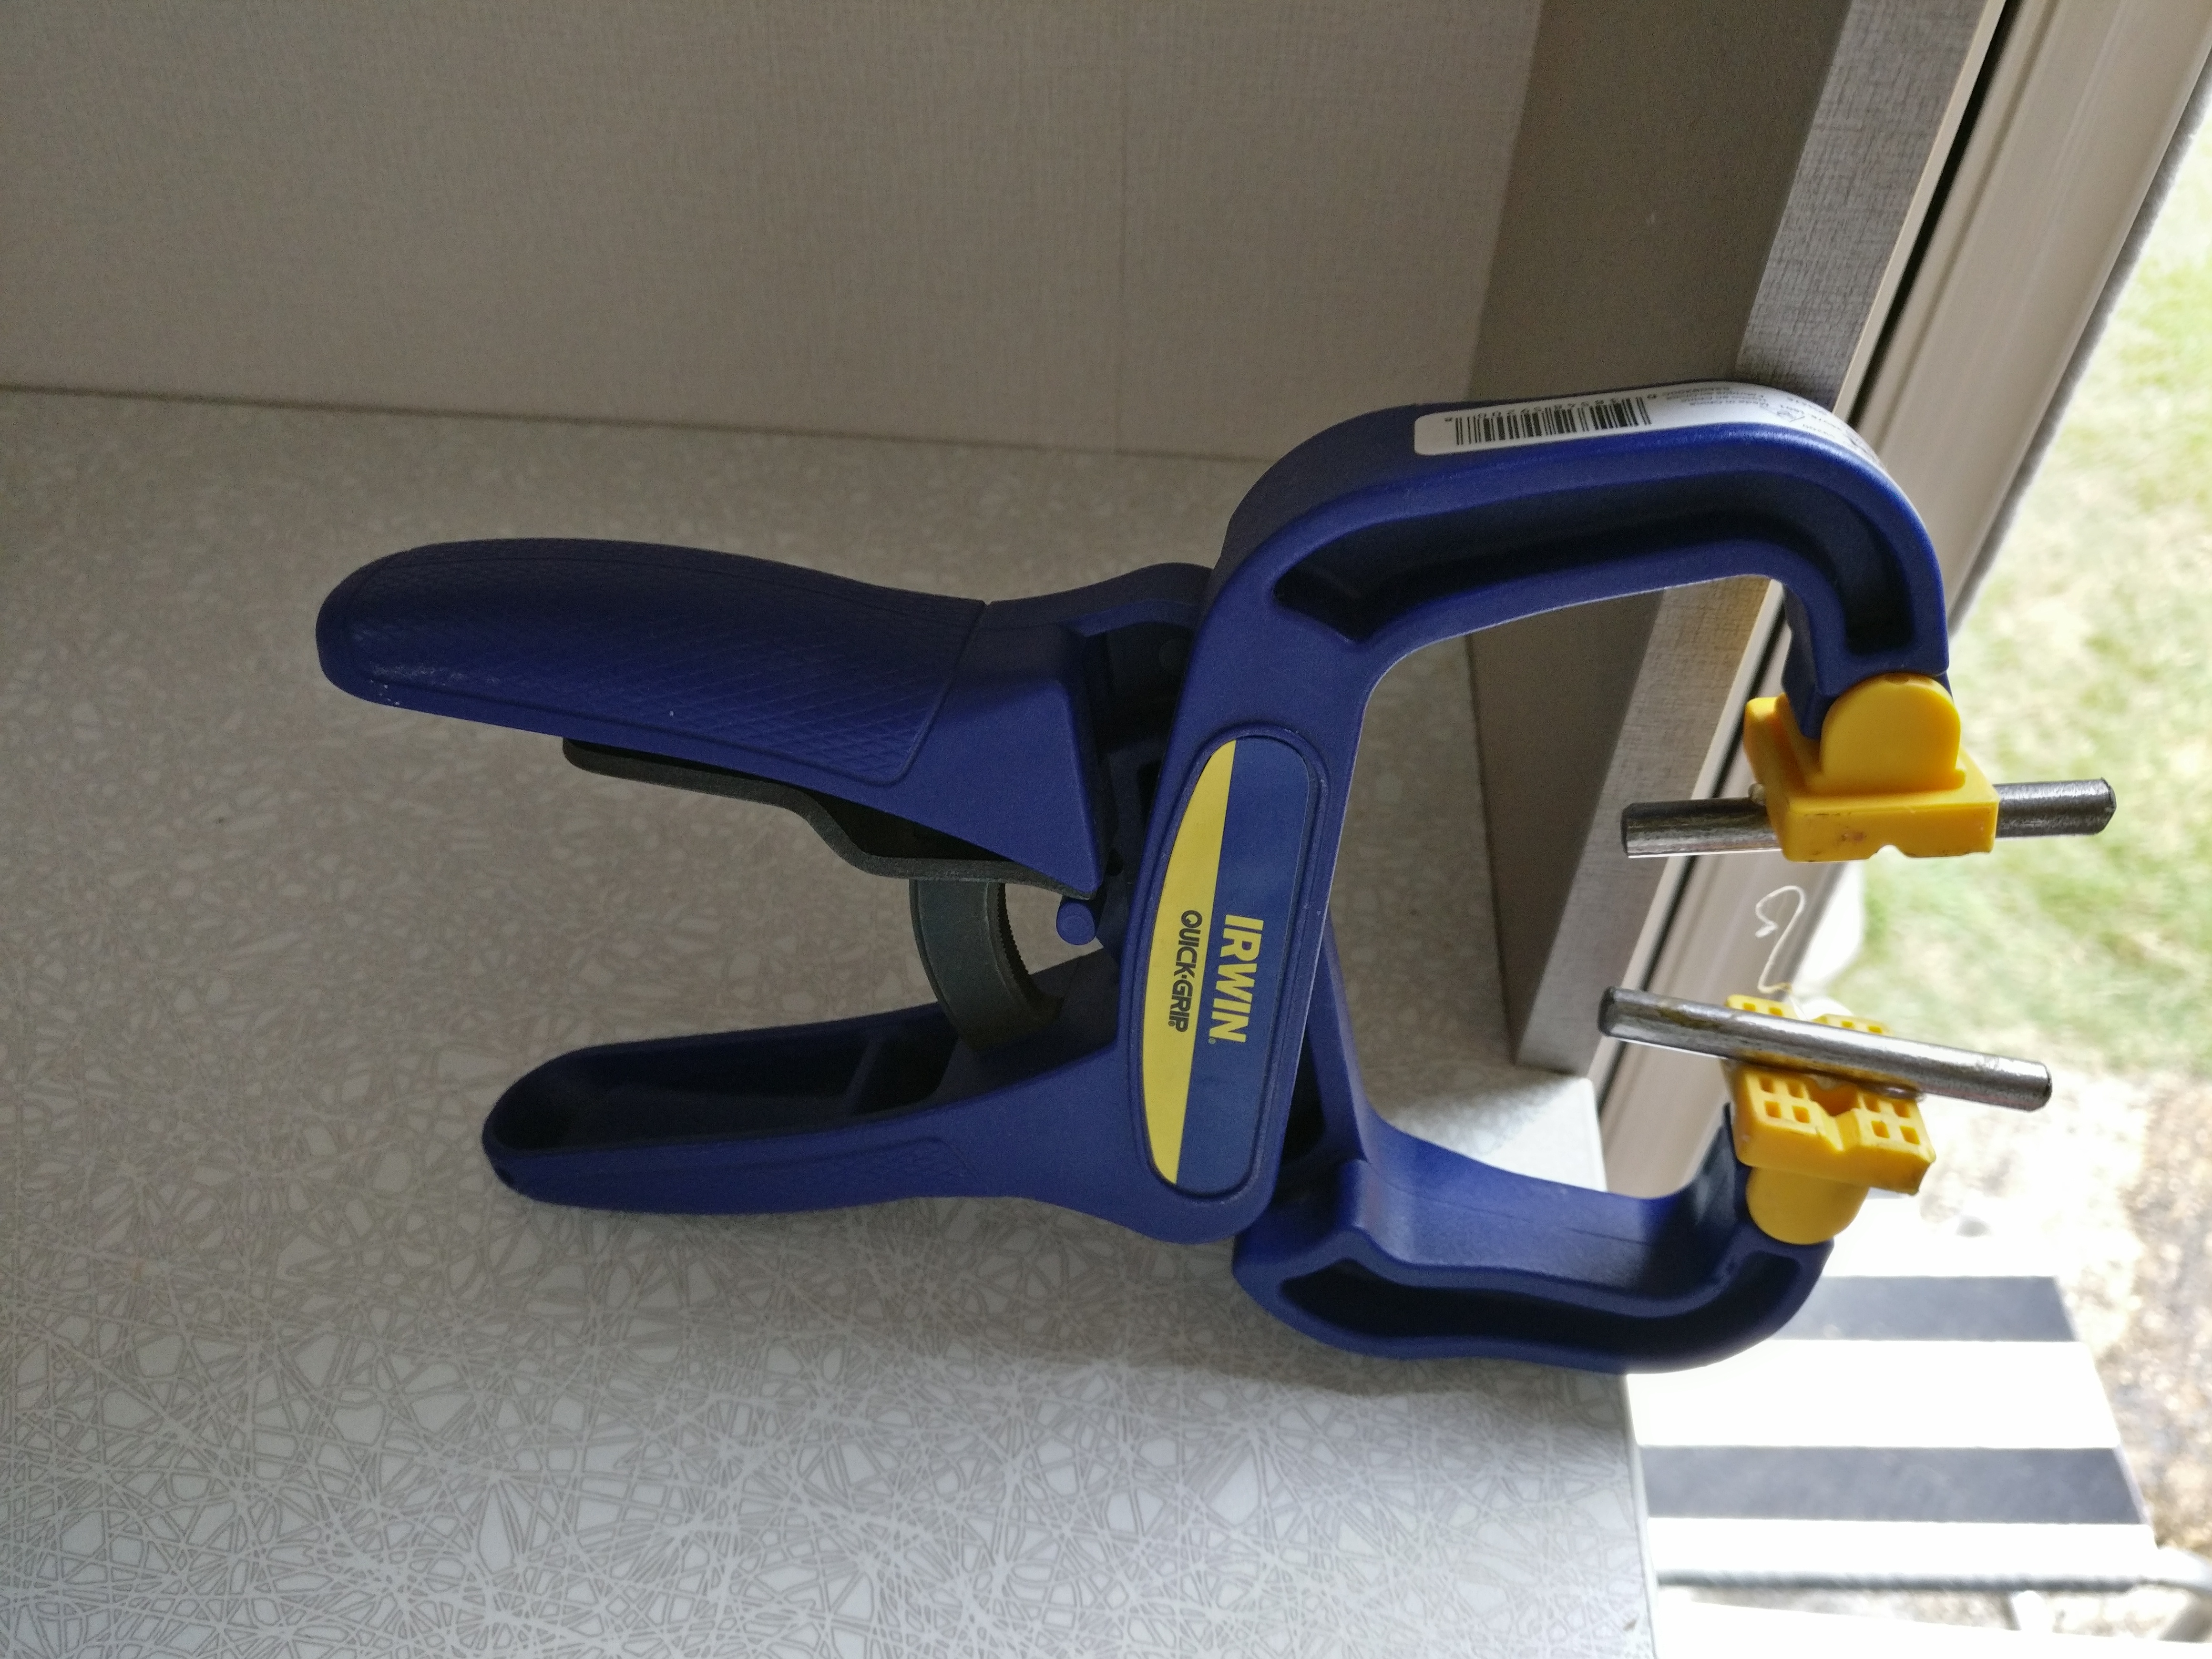
Despite the non return valve to the boiler, I decided to clamp the flexible hose out of the top of the boiler (insurance) and the one from the bottom of the boiler.
Bodgit and scarper hose clamps!!!
I didn’t have any Alde clamps but used 6 inch nails, cut-down and glued to clamps.
Hose clamp…
I’d already tested this on my new pipe and knew it would work so I clamped off the boiler. Top and bottom flexi hoses.
Next I broke the seal between the lower bolier flexible hose and the highest radiator. Since the drain plug actually empties this section I didn’t expect a lot of liquid and this was borne out.
I now attached a homemade drainpipe to the clamped flexible hose and fed this through a hole in the caravan floor.
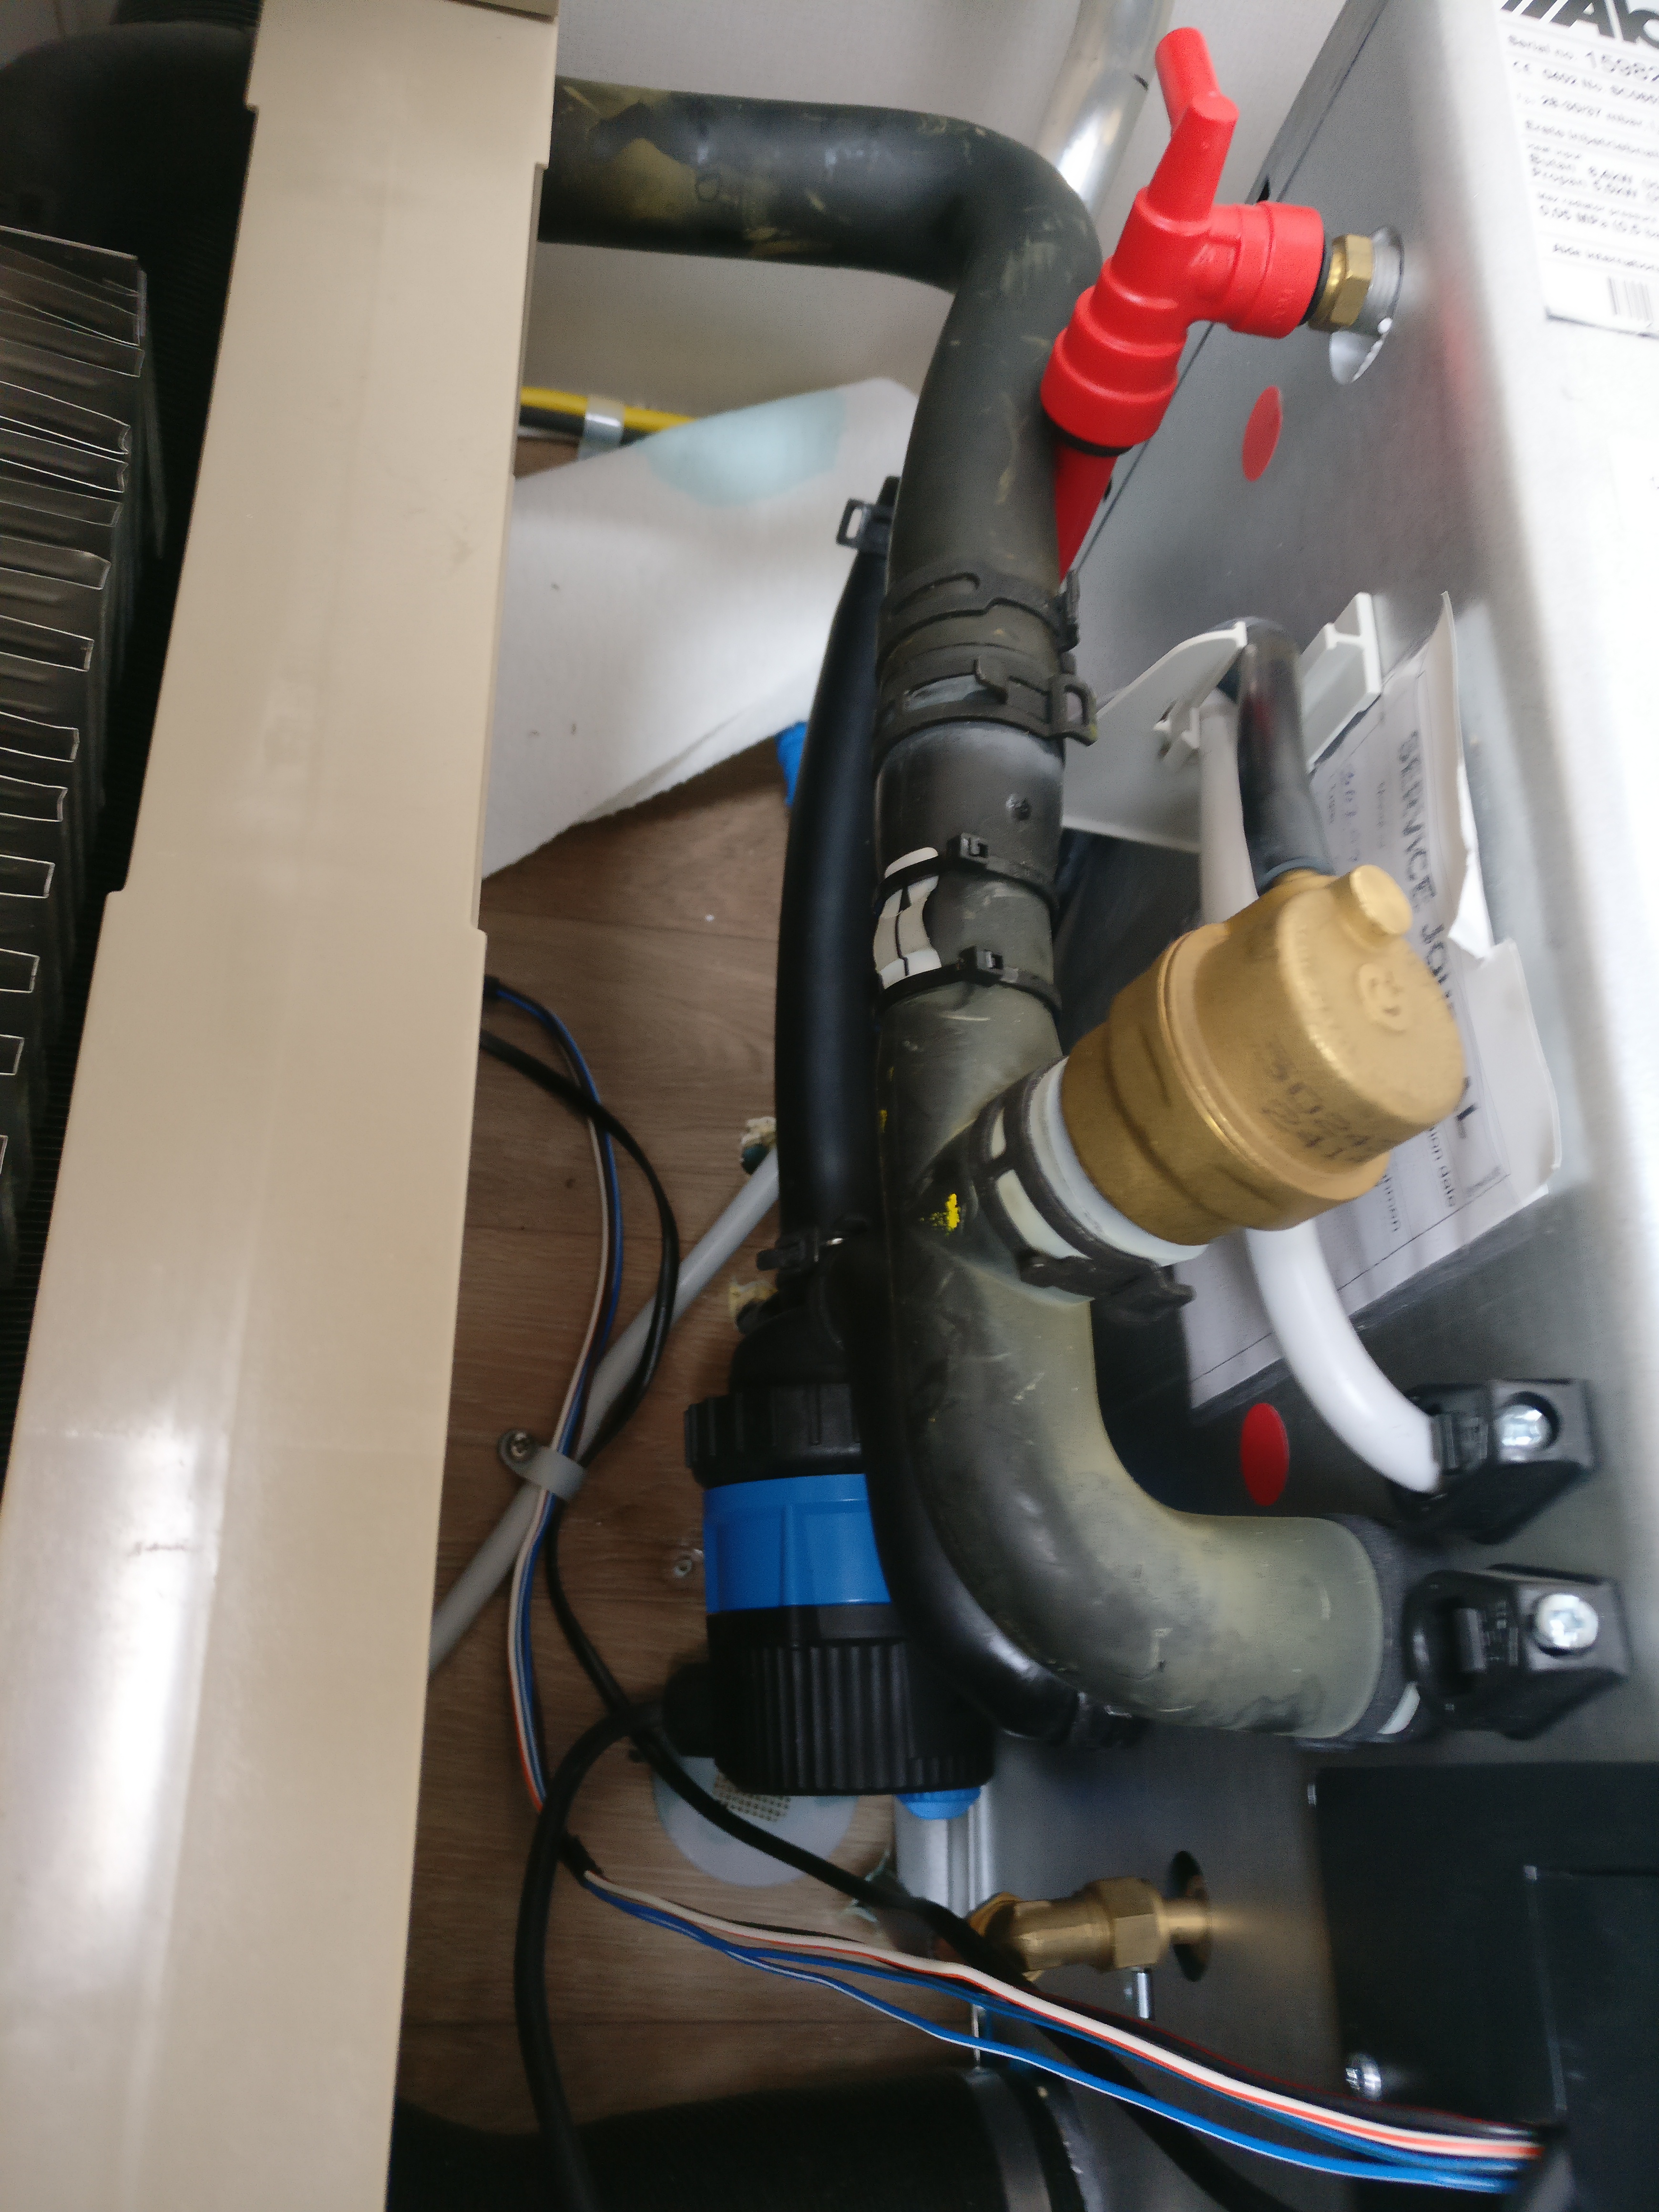
Hot water overflow…
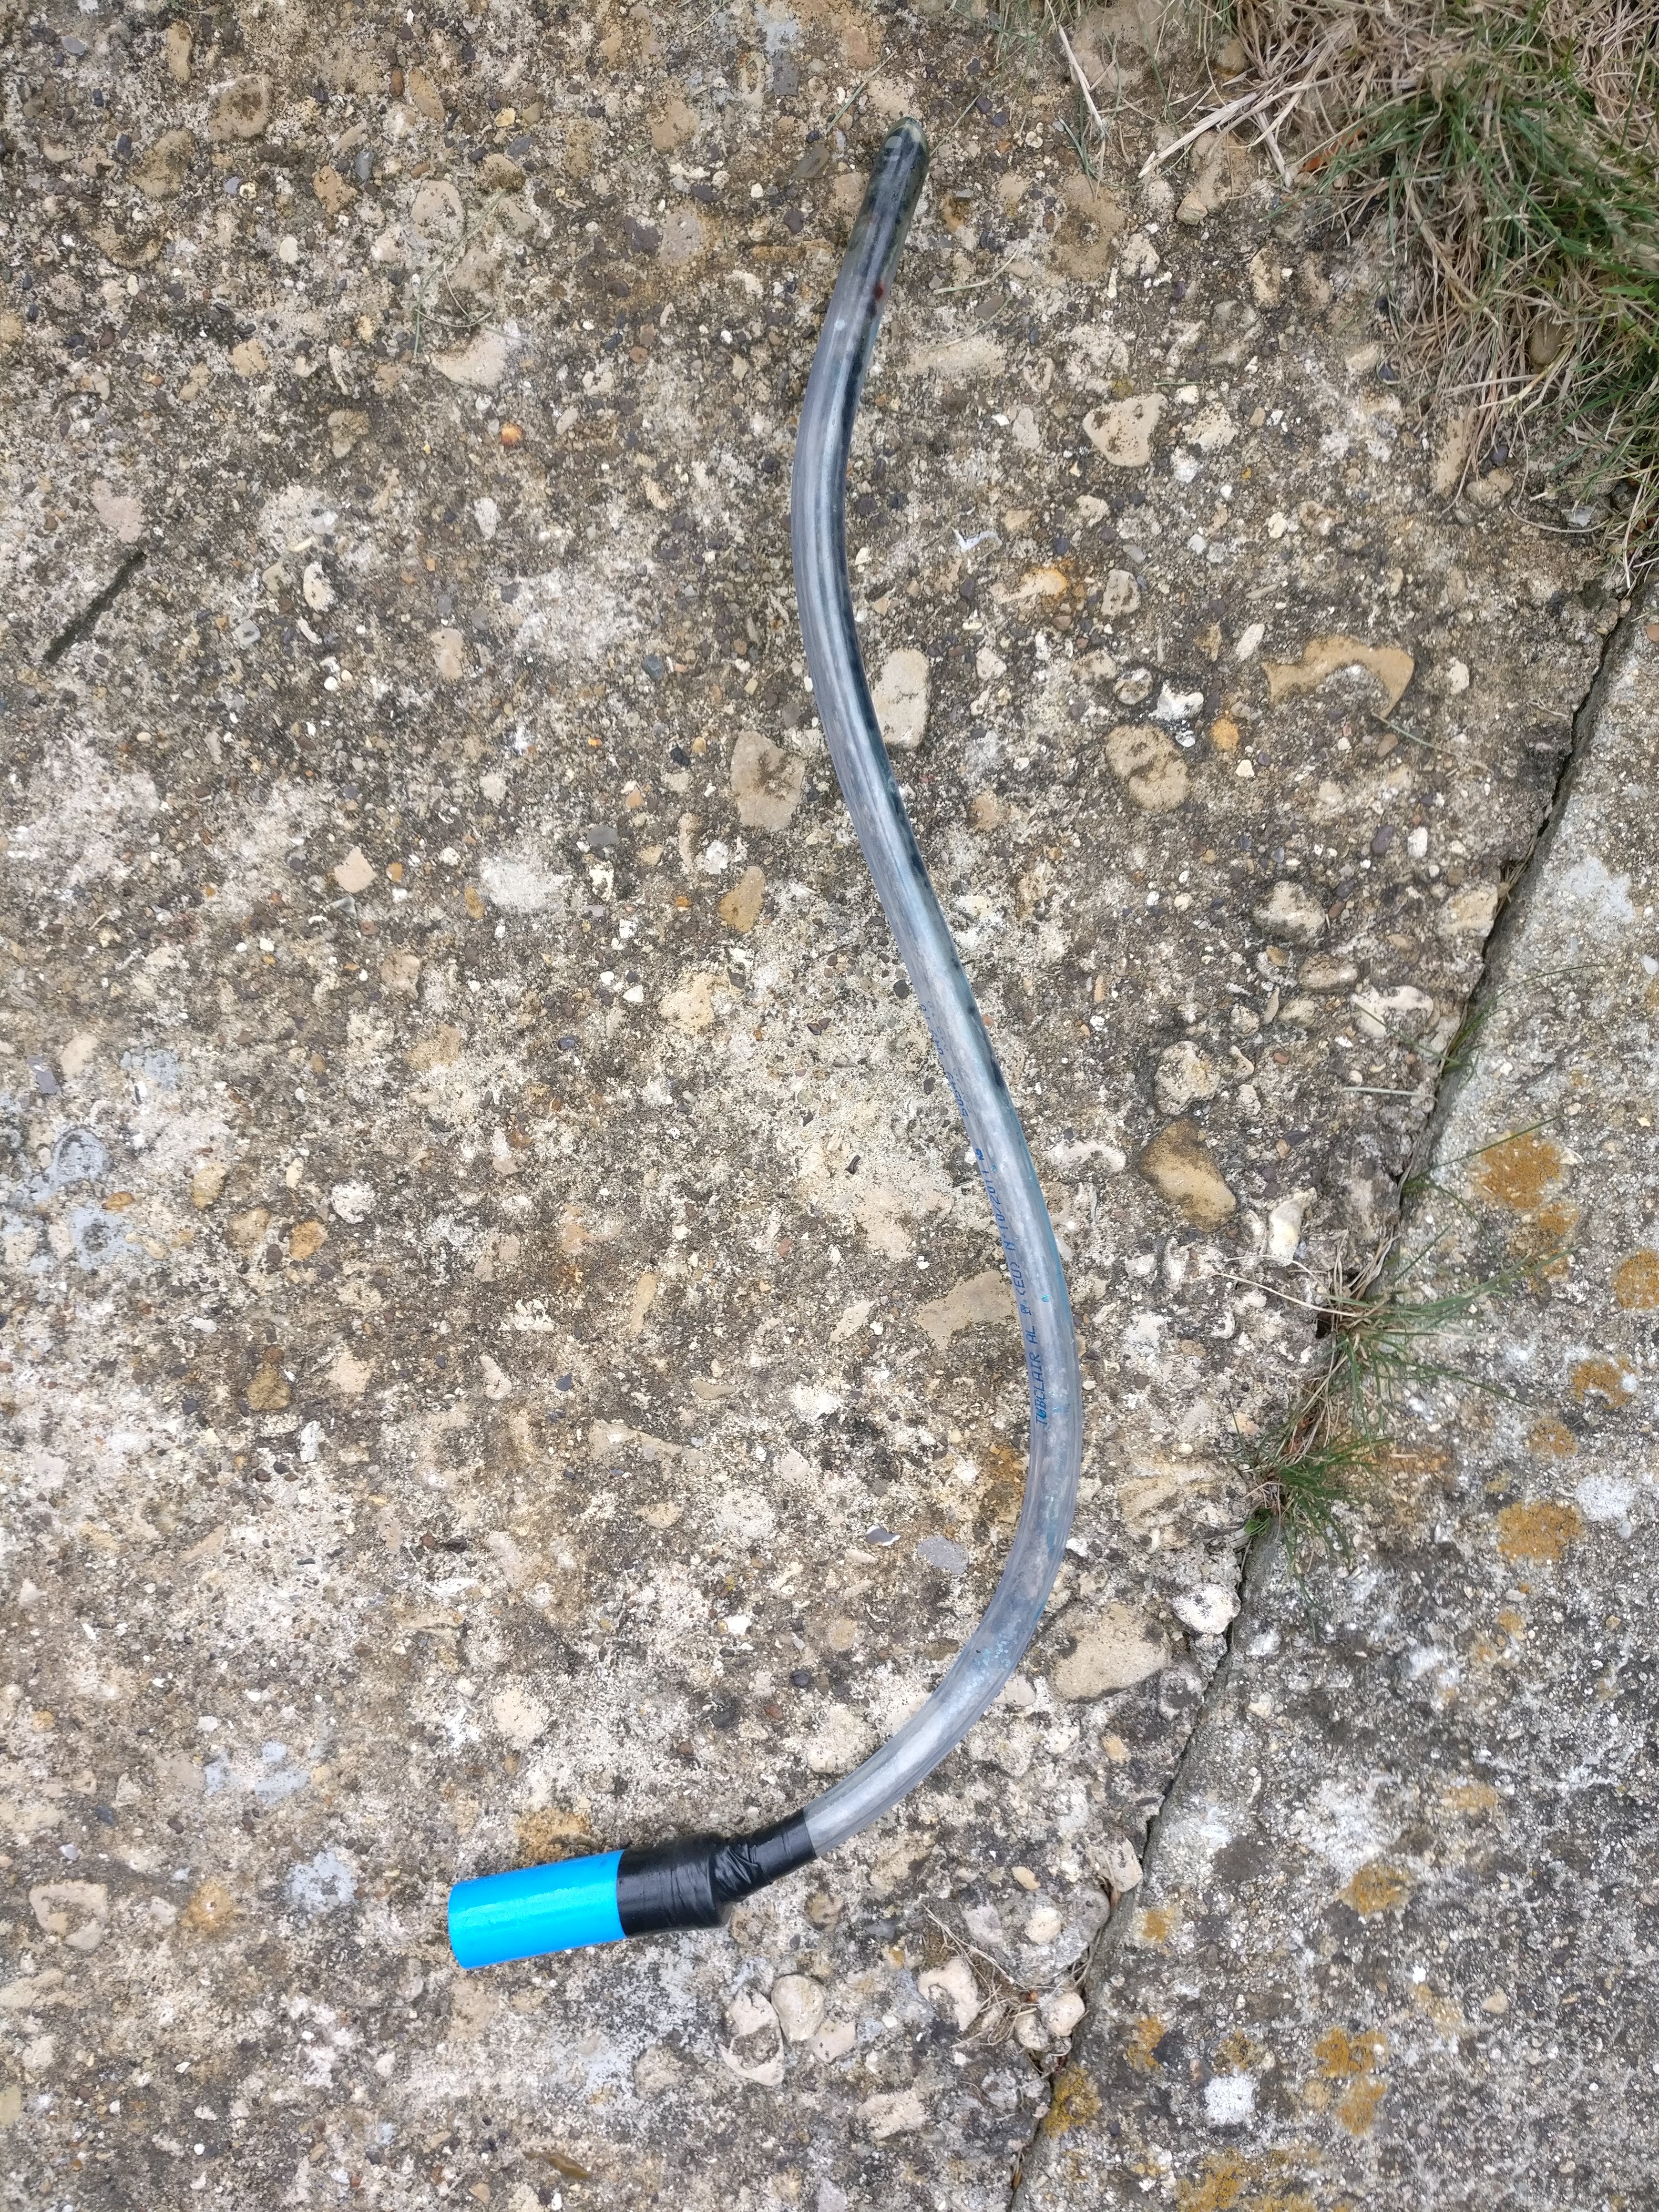
There is a 12mm clear plastic expansion tube on the red water pipe from the top of the boiler and this “vents” through the caravan floor (see picture).
I just pulled this off the red pipe and used it as my custom drain pipe.
Drain tube…
The clear plastic pipe is held into a small section of 15mm blue water pip via electrical tape on the outside and plumbers tape on the inside. The blue plastic then inserts into the Alde flexi hose and is secured with a strong cable tie or the Alde spring clip.
I then released the clamp on the lower boiler feed (return) and the contents emptied into the bucket under the van.
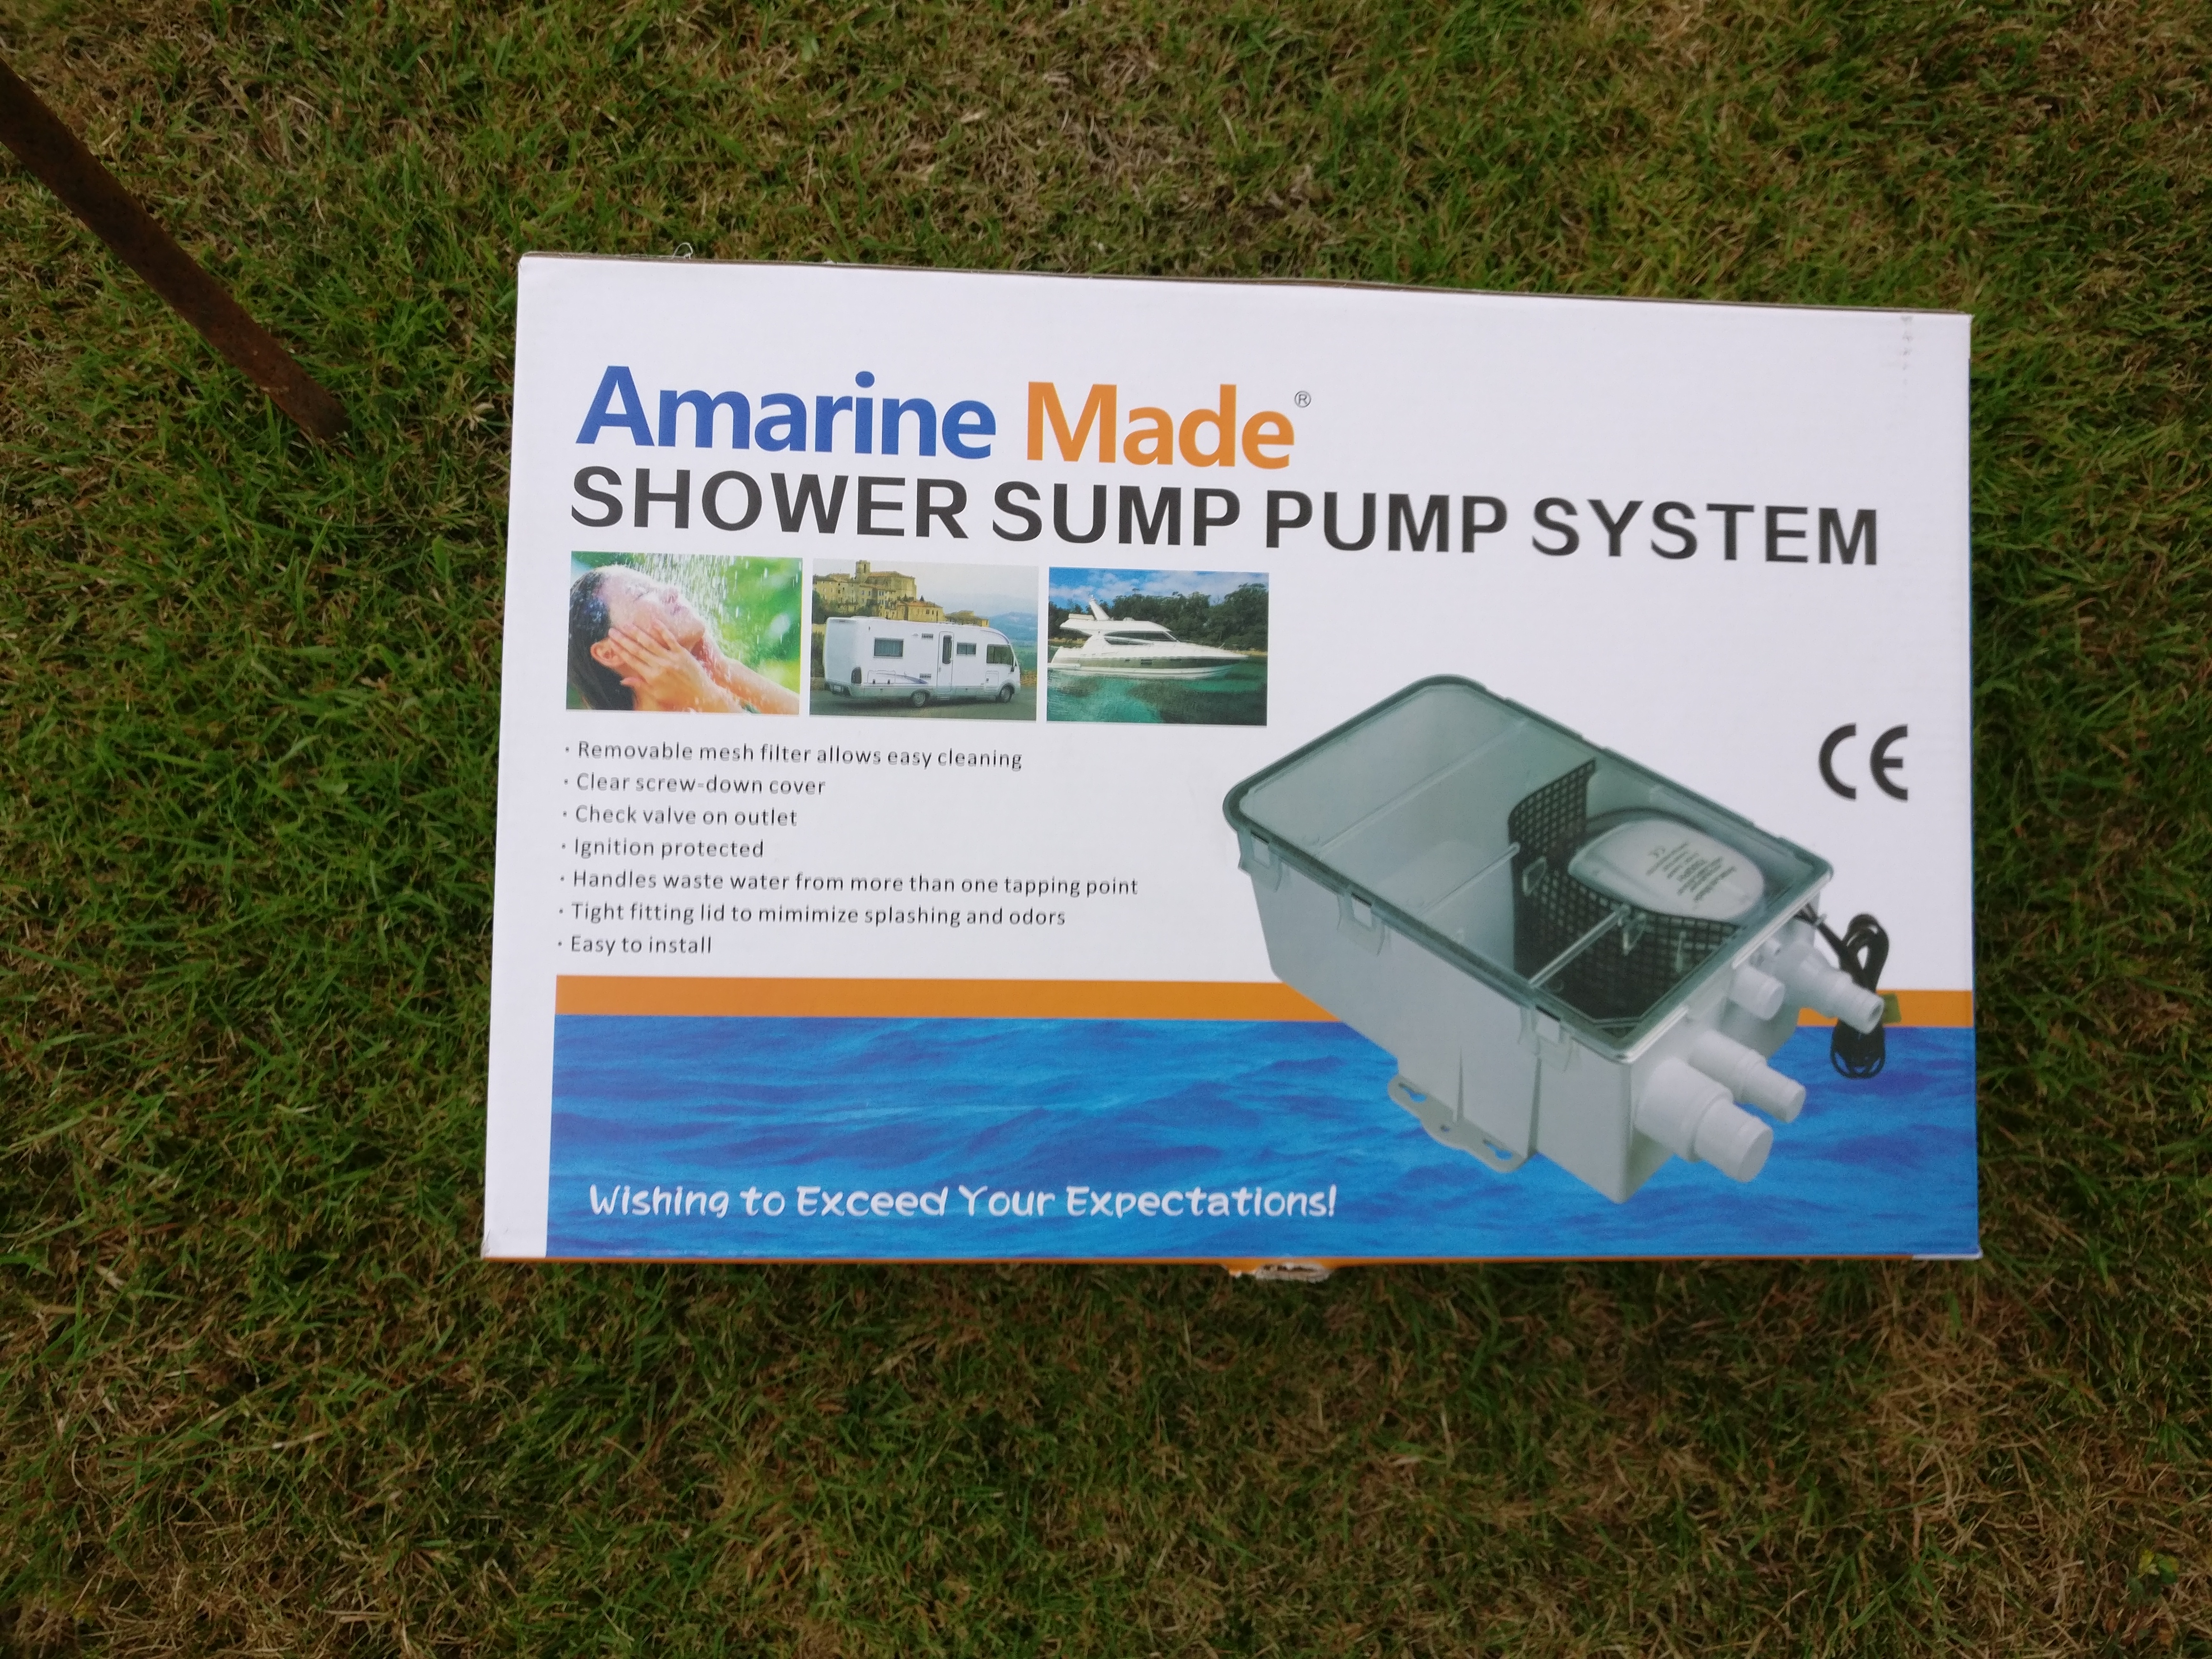
I was now able to plumb in the pump and adjust the pipework by reducing the length of an aluminium coupling.
So far so good. Next was to flush and add new liquid and here I hit a problem. I was hoping to top up the header tank such that de-ionised water would flow around the system and clean out all the old stuff. However, the boiler non-return valve stopped that idea in its tracks.
Sterling Eccles Ruby heating schematic…
Pump kit…
Looking again at the diagram and it’s going to be impossible to expel the main of the liquid without using a pump and connecting hose pipes to the header tank. I decide to go for it and this time, I will use my sump pump, which was recently purchased for another van project (more on that later).
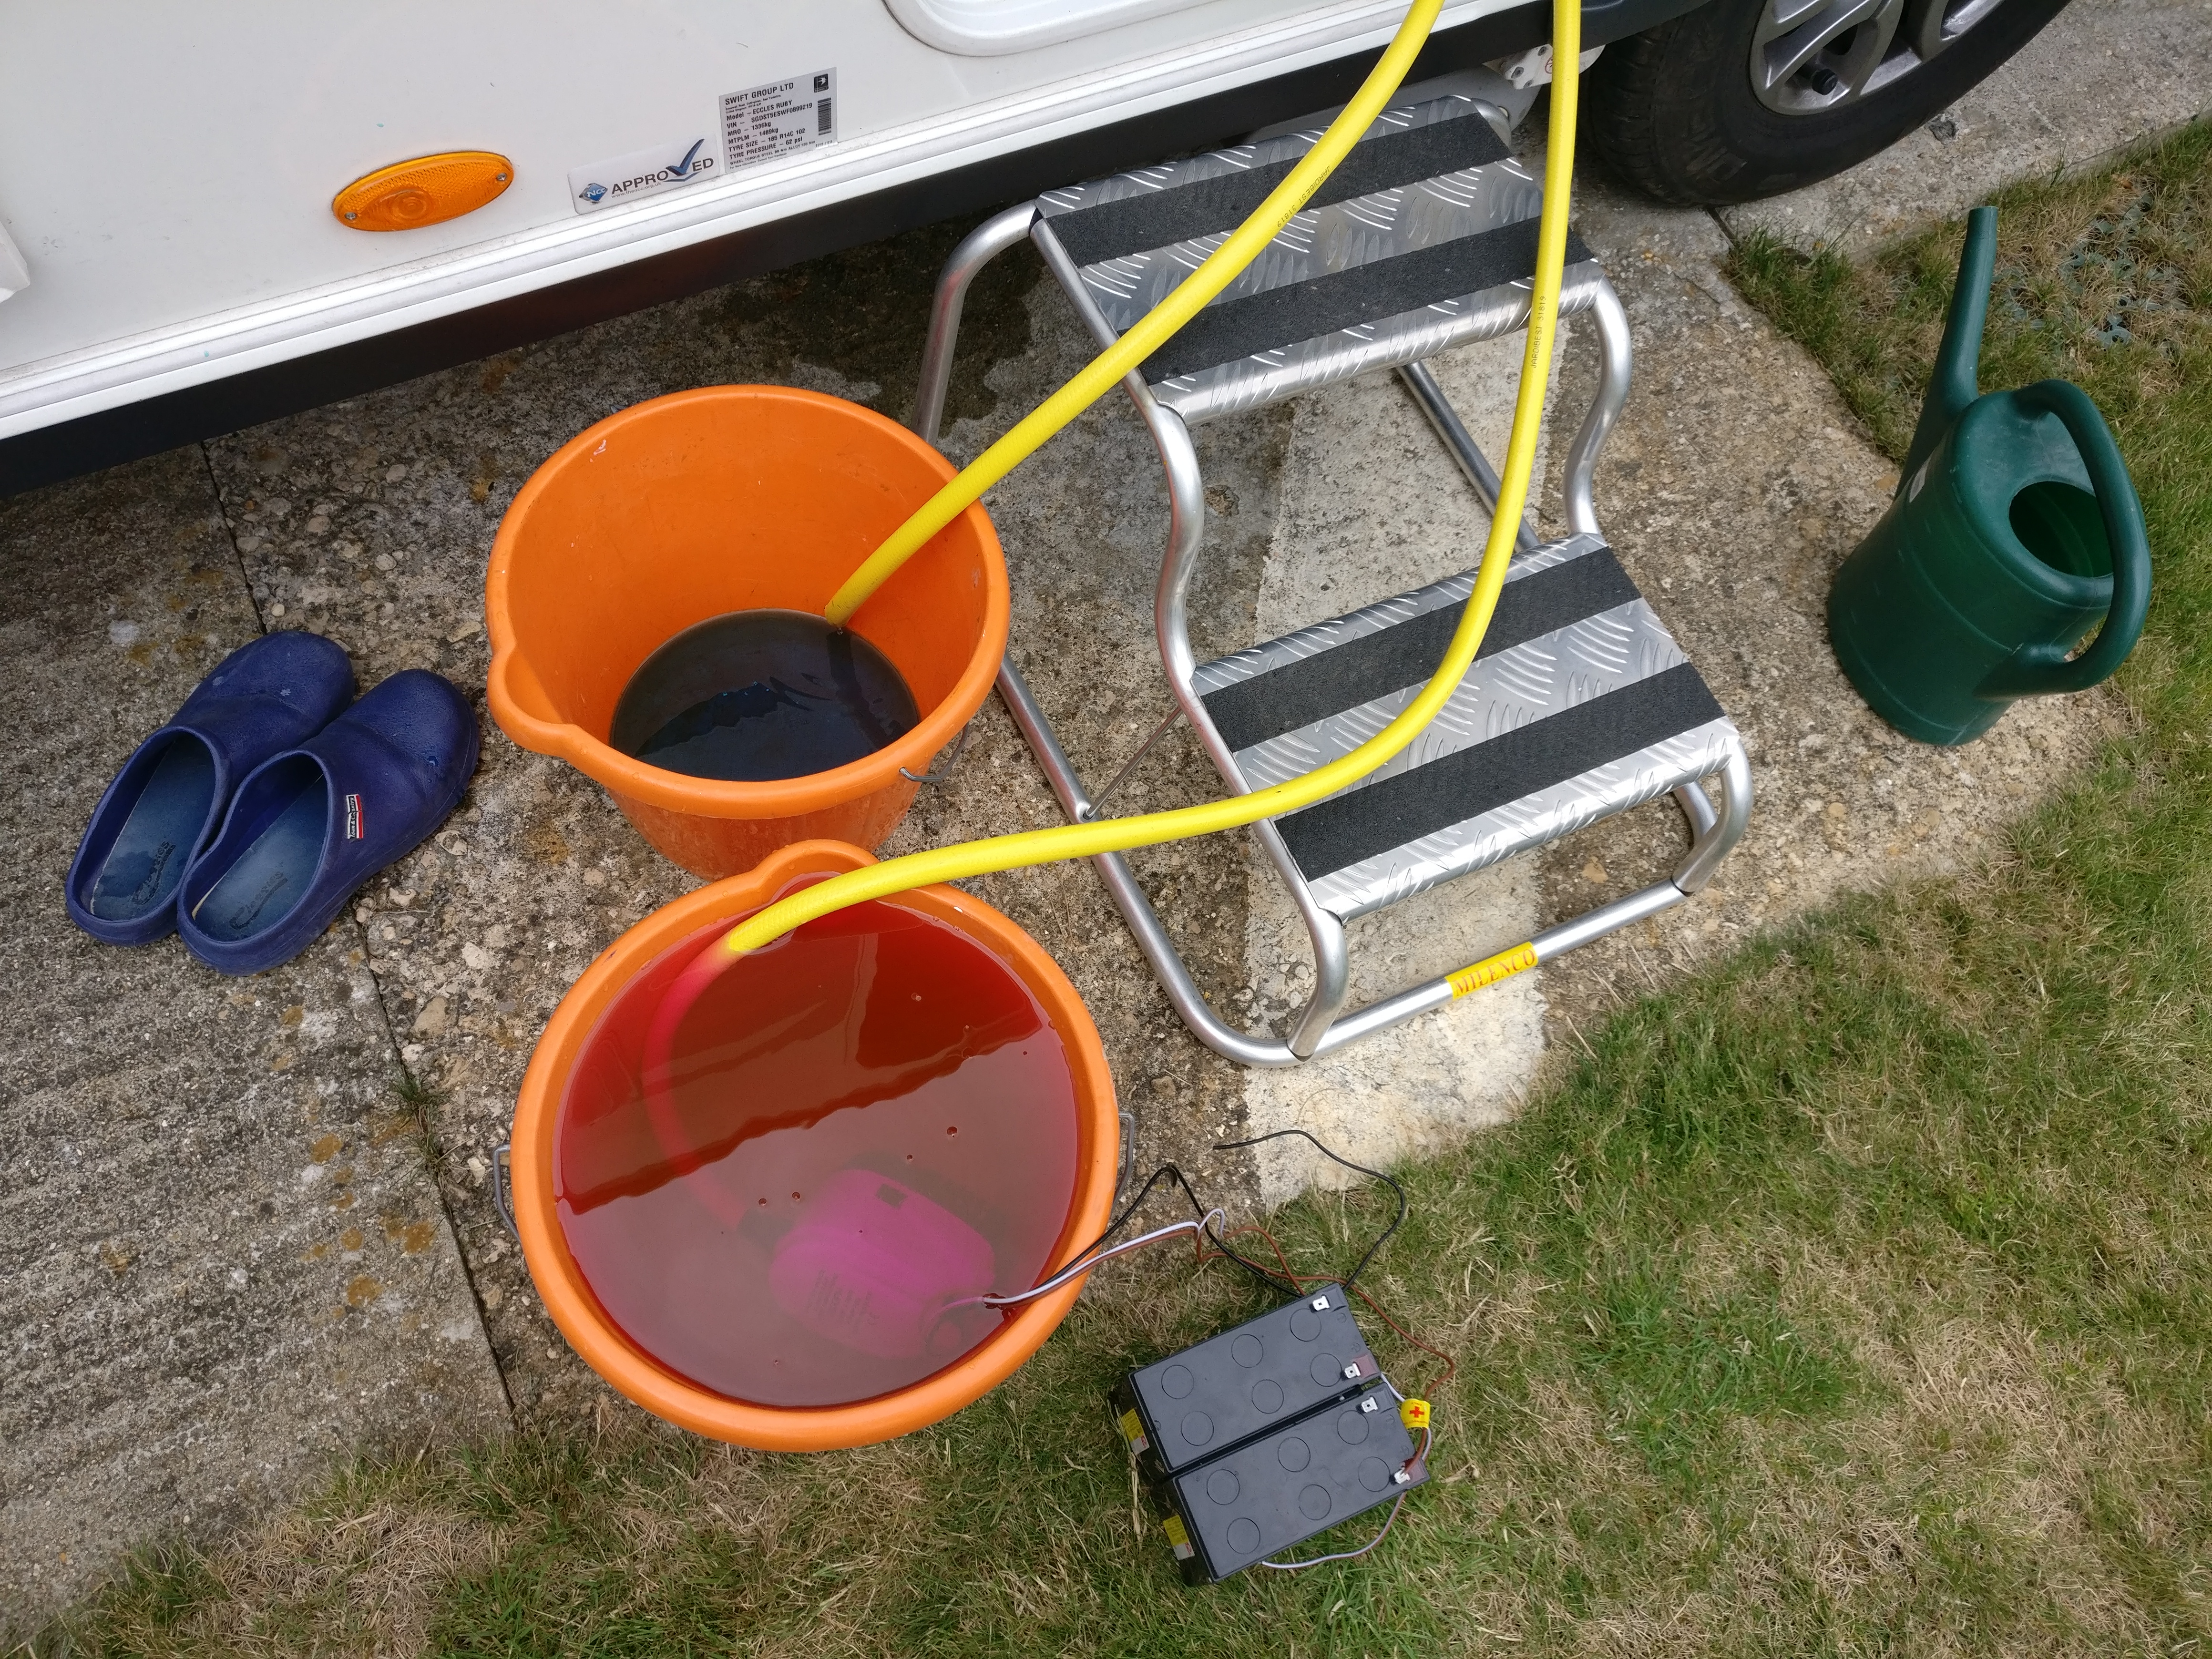
In with the new…
The pump was placed in a bucket of de-ionised water and connected via a hose pipe to the return pipe at the header tank.
The other hosepipe was connected to the second header tank pipe and fed into a bucket to catch the contents. A 12v battery pinched from an unused UPS would supply the power. To disconnect the header tank I used a plastic pipe and suction to just draw off enough liquid to avoid a blue mess.
I powered on the pump and it went like a dream. After a couple of buckets of water the colour was now only a very light blue. I mixed my 7 litres of Comma Xstream G40 with more water in the bucket and pumped it around. When the effluent water was turning pink, I stopped and salvaged a couple of litres of mixed antifreeze for topping off the header tank. All is looking very good.
Pump in place…
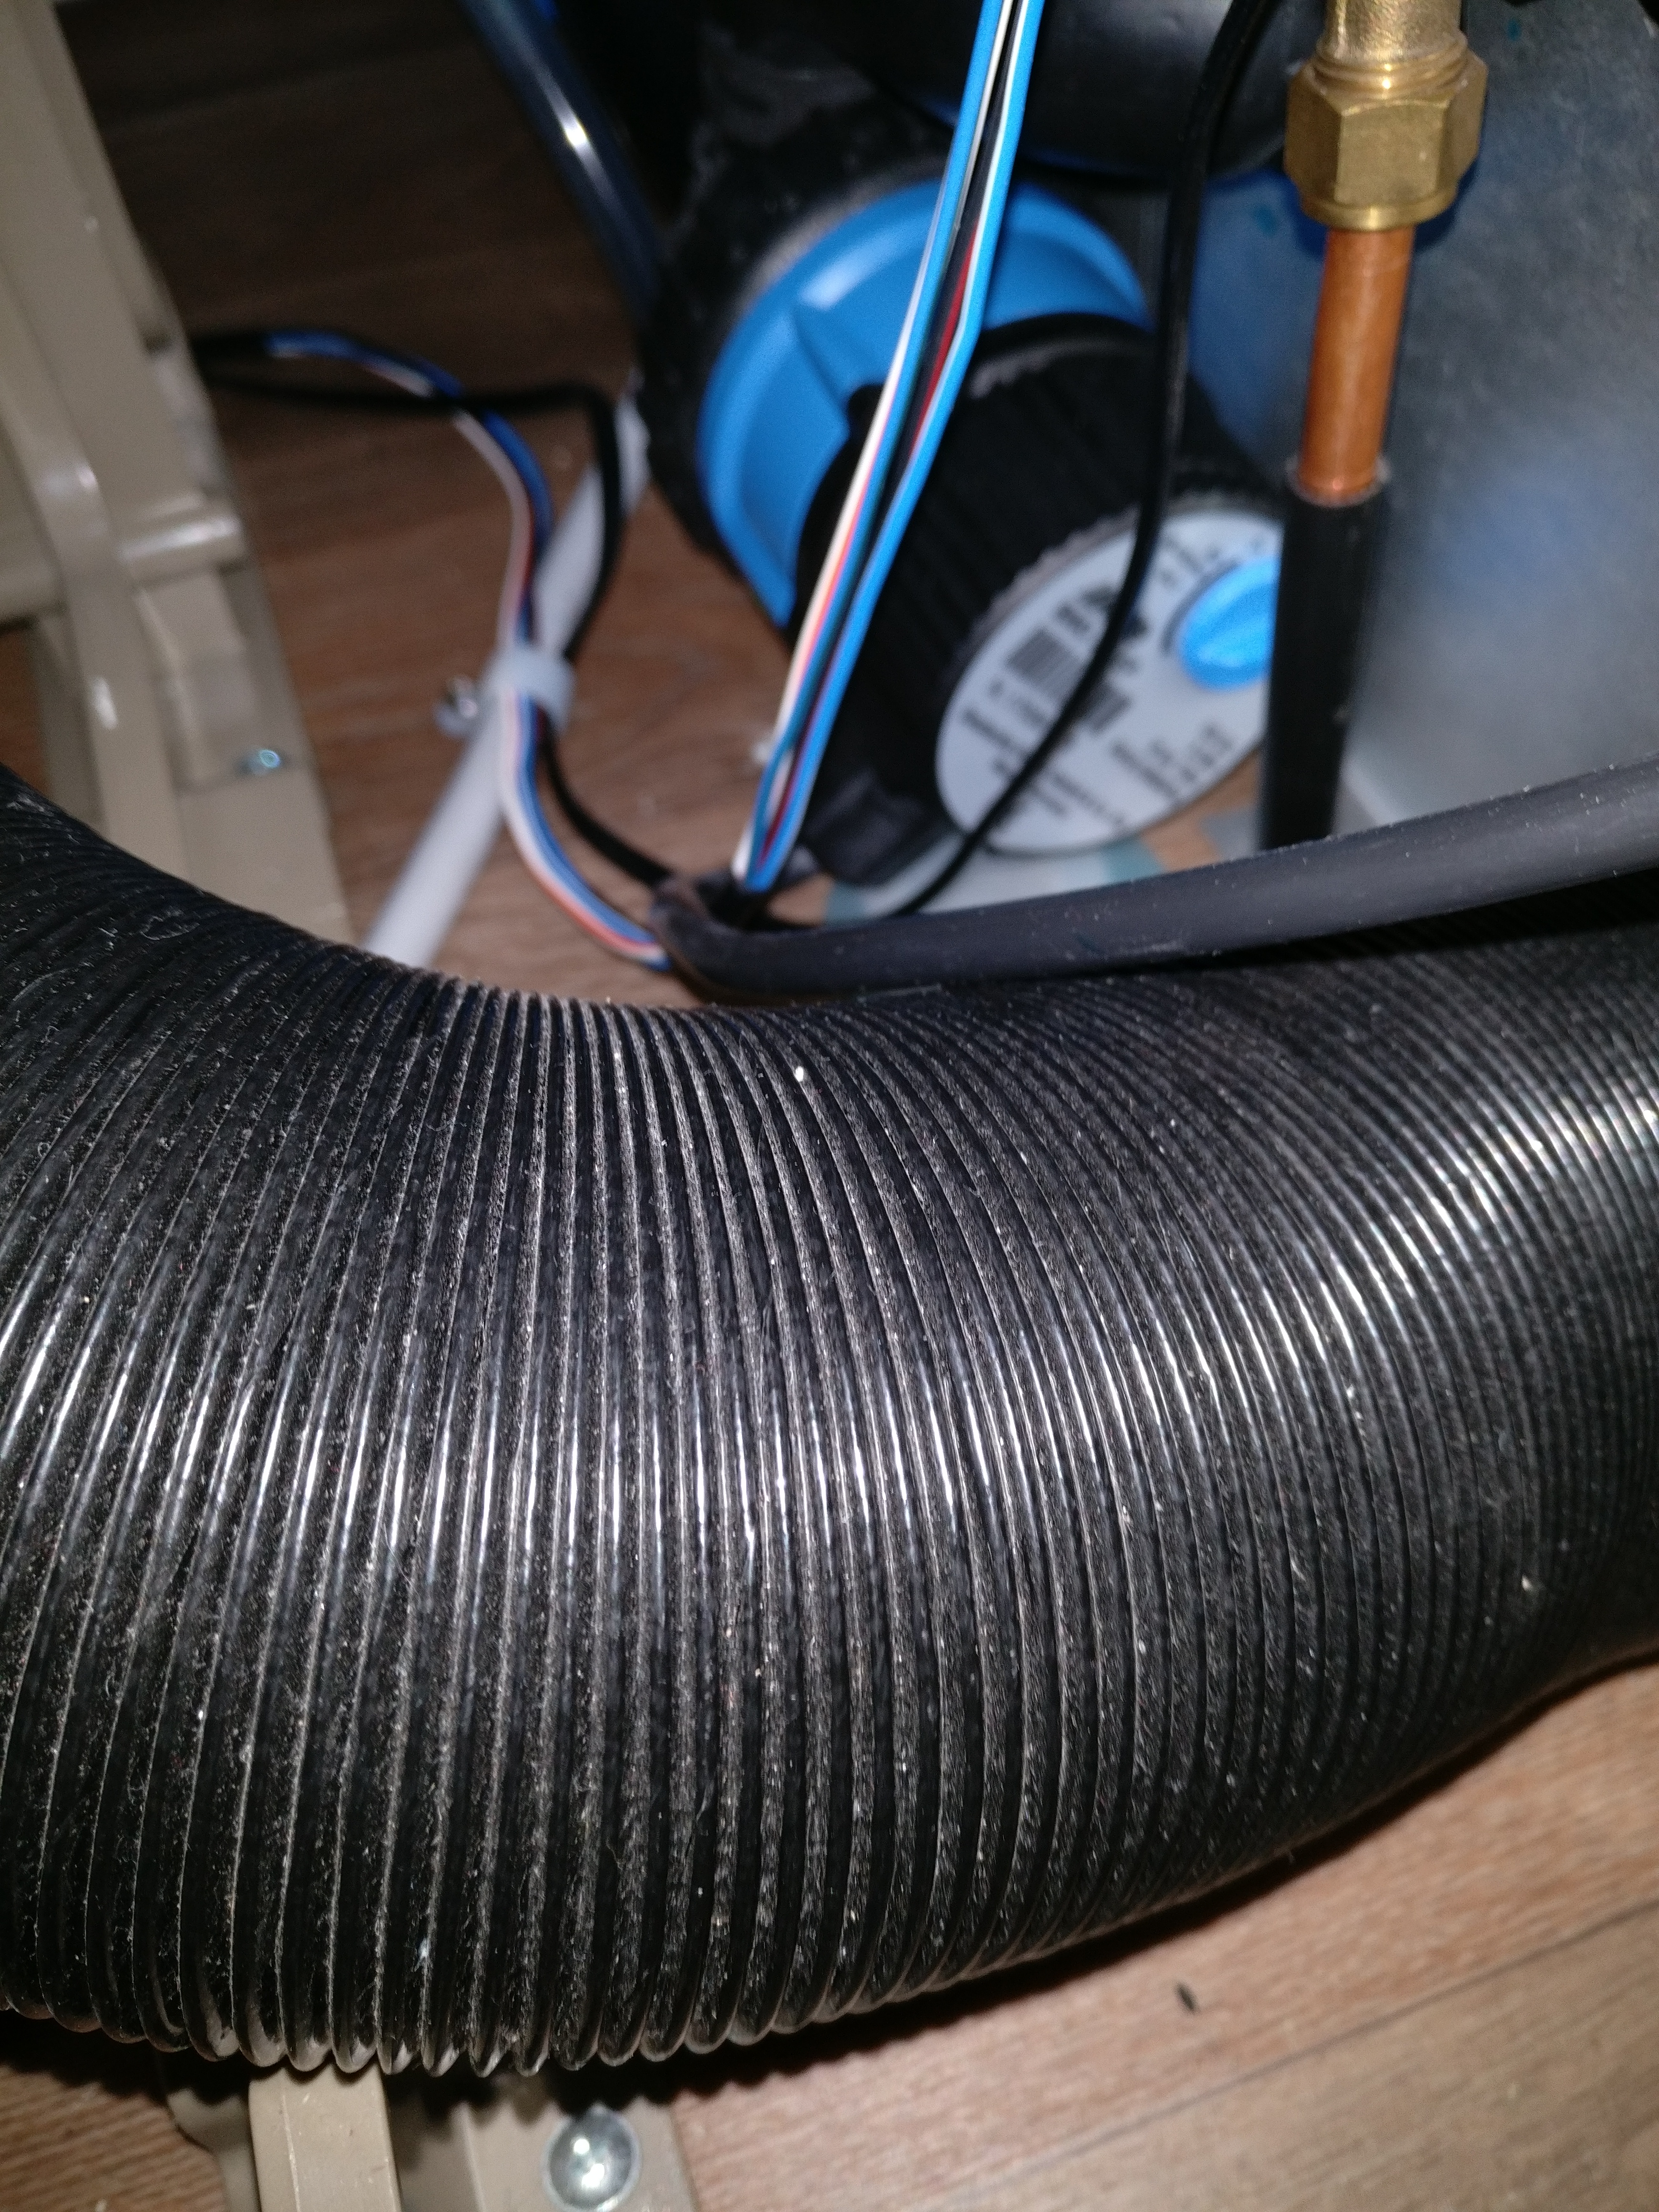
The inline pump was then connected to the boiler control board. I had thought that there were two connections – one for the header pump and a second for the inline pump but the compact 3020 appears to just have the one set of pump connectors. I unplugged the header tank pump and inserted the inline pump connector.
Fired up the heating and all is working perfectly.
A pig of a job, some useful help from Alde and Caravantalk, and hopefully, not required again for 5 years!